How to Map Assets
- 04 Mar 2022
- 3 Minutes to read
- Contributors

- Print
- DarkLight
How to Map Assets
- Updated on 04 Mar 2022
- 3 Minutes to read
- Contributors
- Print
- DarkLight
Article summary
Did you find this summary helpful?
Thank you for your feedback!
Mapping the Assets
Once you have imported a floor plan, you can begin mapping the assets for the assembly.
Note: You must add all of the needed assets to FormLink before they can be mapped.
In the following example, three types of devices (SD, PS and CoD) will be added to the floor plan to demonstrate the features available when mapping devices to a Zone Map.
Map Devices for Smoke Detector (SD)
1. Access the Assembly to be mapped.
2. Select the Zone to be mapped from the Zone field.
 Select a Zone
3. The assets for the selected zone are displayed.
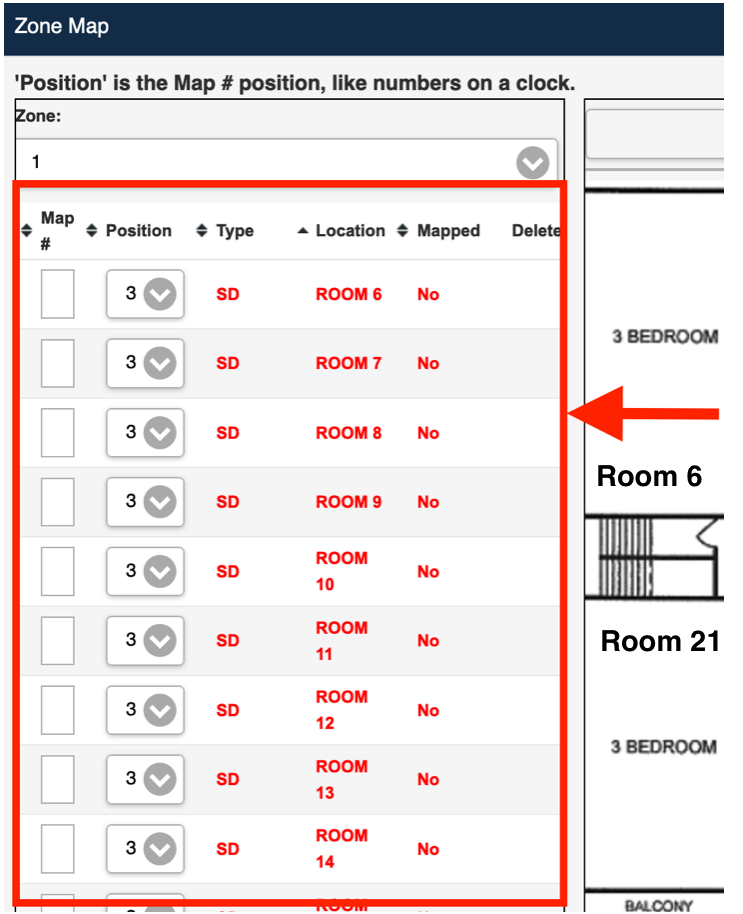 Available Assets for Mapping
4. The following fields are available on the Define Zone Map page.
| Field | Description |
|---|---|
| Select an Assembly to Map | Select the zone you want to map using a drop-down selection list. All available assets in that assembly will be available for selection when adding assets to the map. |
| Zone | Use the Zone field to select the zone to be mapped. |
| Map # | Enter a map number for the specific asset. The Map # can be sorted, and it is the number assigned to an asset in order to locate it on the zone map. |
| Position | Select a number between 1 and 12. The Position field determines the position of the (Map) number for the symbol on the map. The location of the position number equates to the numbers on a clock, so position 6 would be located at the bottom of the asset symbol on the map. |
| Type | Use the Type field to sort the Asset Types in the assembly. |
| Location | Use the Location field to sort the assets by Location on the Zone Map. For example, you could use the Location field to sort by the Room numbers assigned to the assets. |
| Mapped | The Mapped field displays whether the asset has been mapped to the floor plan. This field can be sorted. |
| Select Floor Plan Image | Select this field to import a floor plan file into the Zone Map. The files to be imported must be in JPEG or PNG format. |
Delete | Use the Delete function to remove an asset from the Zone Map. Note: The Delete function removes the asset from the map but does not delete it from the asset list |
Note: All of the fields in the assets list can be sorted using the ascending and descending arrows.
5. Sort the assets in the assets list to find the desired Asset Type and Location for this zone map.
In this example, the assets were sorted by Type(SD) to locate all SD Asset Types, and by Location to more easily find all "Rooms" Locations in this zone.
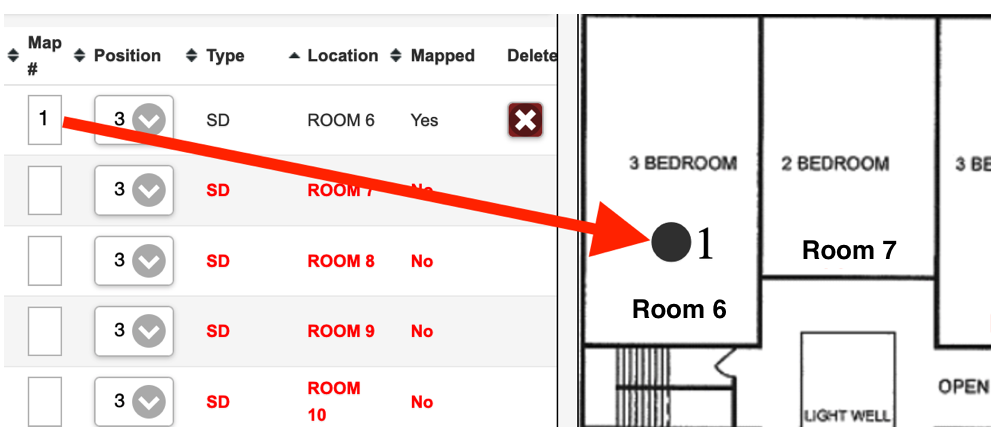
6. Select an asset (row) to add the asset to the map.
Note: You can "click" anywhere in a row to select that row.
When a row is selected, the symbol for the asset is highlighted on the map as shown below.
The Mapped field for the selected asset also changes to Yes when you add an asset to the map.
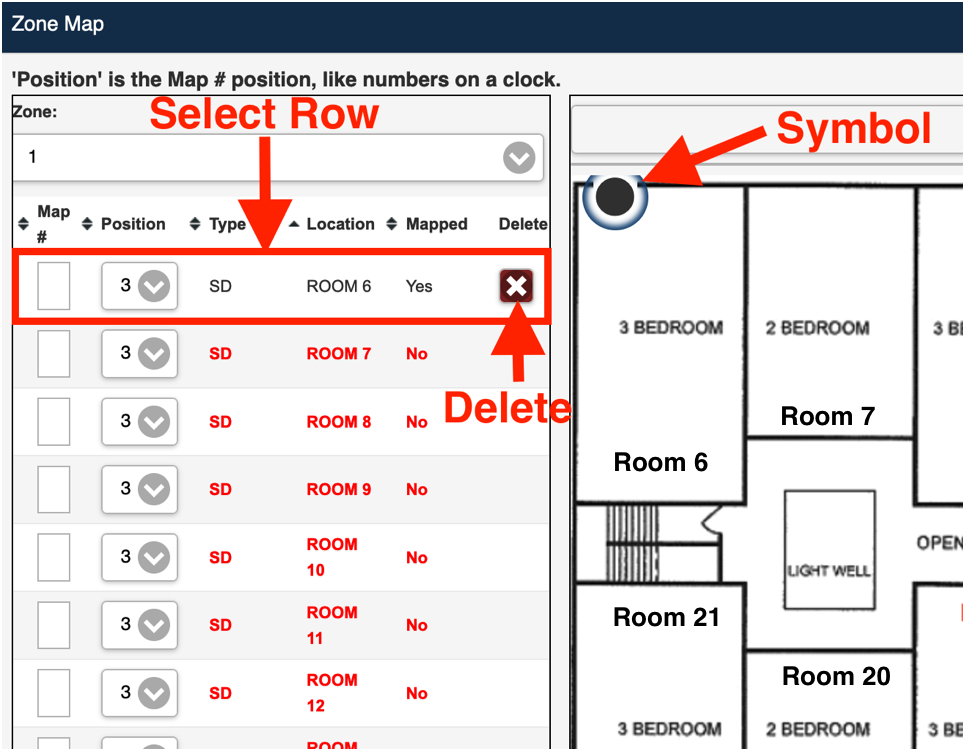 Select Asset to be Mapped
7. The selected asset and associated symbol are added to the floor plan image.
8. You can now select and drag the asset symbol to the proper location on the floor plan. In this example, the asset was placed in Room 6 per the Location indicated on the asset in the list.
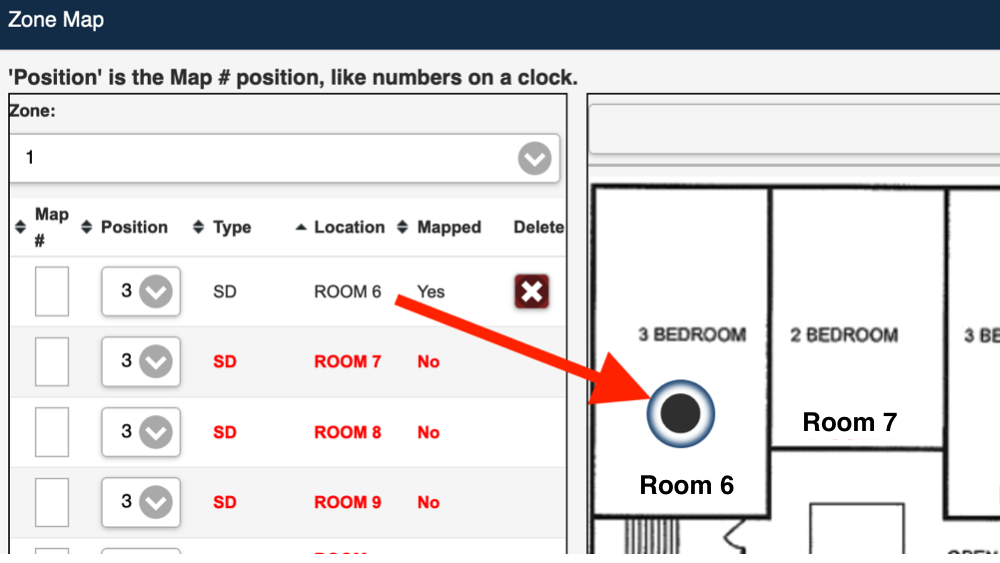 Asset Symbol on Floor Plan
9. Enter a number for the asset in the Map # field.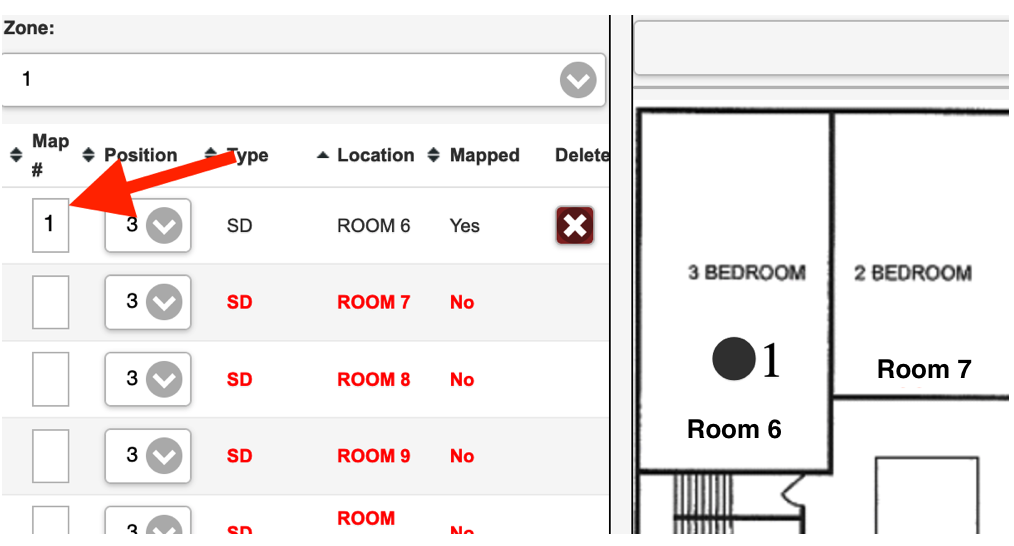 Map Number on Asset
10. The Map # is added to the symbol on the floor plan.
 Map Number on Floor Plan
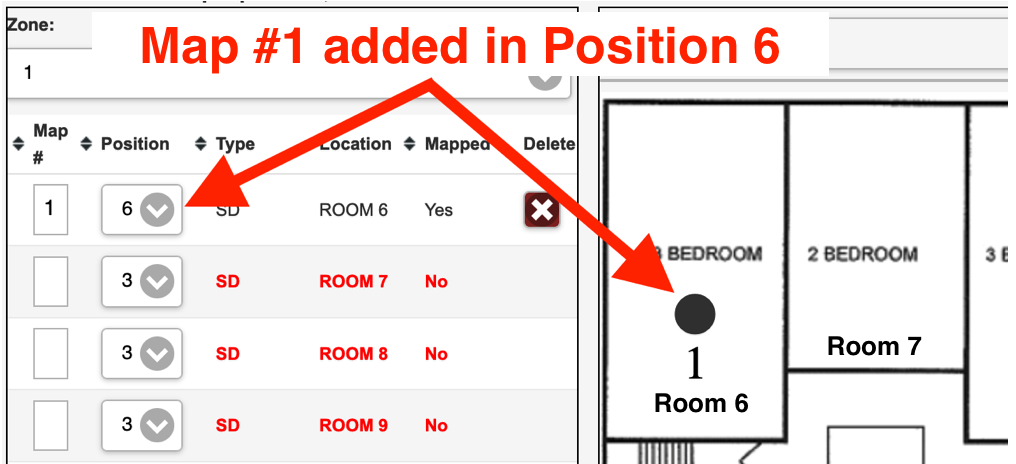
11. Using the Position field, select a position for the number to be displayed on the asset symbol.
Note: The Number position functions the same as the hands on a clock. Position 6 is the 6 o'clock position relative to the symbol.
Note: By default, the number Position field is set to 3 as shown below.
In this example, position 6 was selected for the asset Position.
 Map Number Position 6
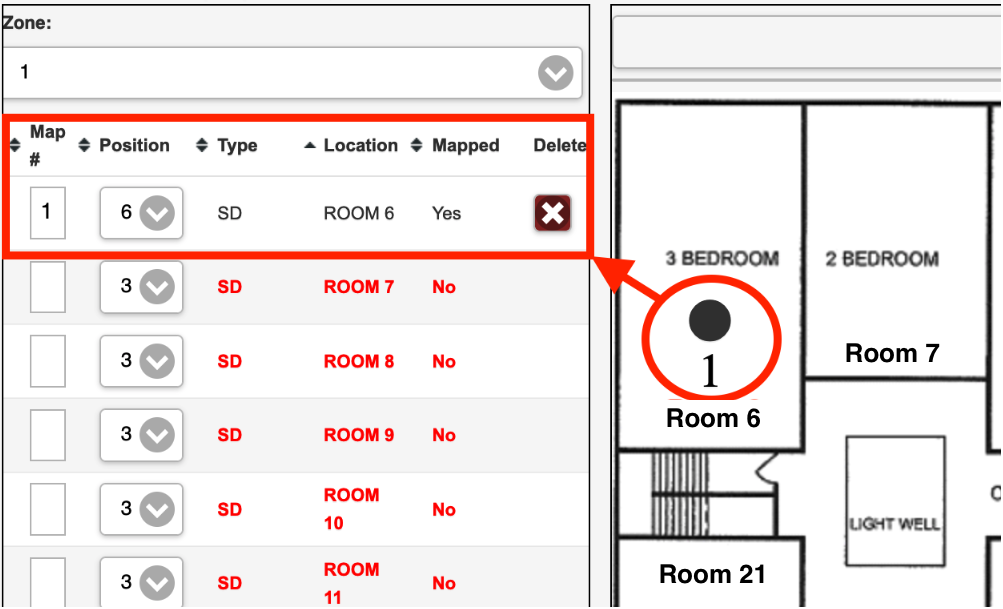
12. After being mapped, the asset row that was added is no longer displayed in Red and shows the mapped asset information as shown below.
 Mapped Asset
Note: You can add as many devices/asset types as needed to complete your zone map. In this example, a Smoke Detector (SD) was added to each room per the asset Location listed.
 Mapped Smoke Detectors
Note: The procedure/steps for mapping additional assets is the same as described for mapping the SD Assets in this article.
13. For the purposes of this example, several PS and CoD devices have been added to this Zone Map to illustrate the ability to quickly identify the different asset types and their general location on the map.
 Basic Zone Map
14. The completed Zone Map and Asset Details are displayed below.
.png) Completed Zone Map for CoD, SD and PS Assets
Completed Zone Map for CoD, SD and PS Assets
15. Save the Zone Map.
.png) Save Zone Map
Save Zone Map
16. The "Save successful" message is displayed.
 Save Successful Message
17. Select OK to close the message.
Was this article helpful?