How to Generate a Custom Report
- 10 Nov 2021
- 1 Minute to read
- Contributors

- Print
- DarkLight
How to Generate a Custom Report
- Updated on 10 Nov 2021
- 1 Minute to read
- Contributors
- Print
- DarkLight
Article summary
Did you find this summary helpful?
Thank you for your feedback!
How to Generate a Custom Report
1. Select Locations from your home page (Figure 1).
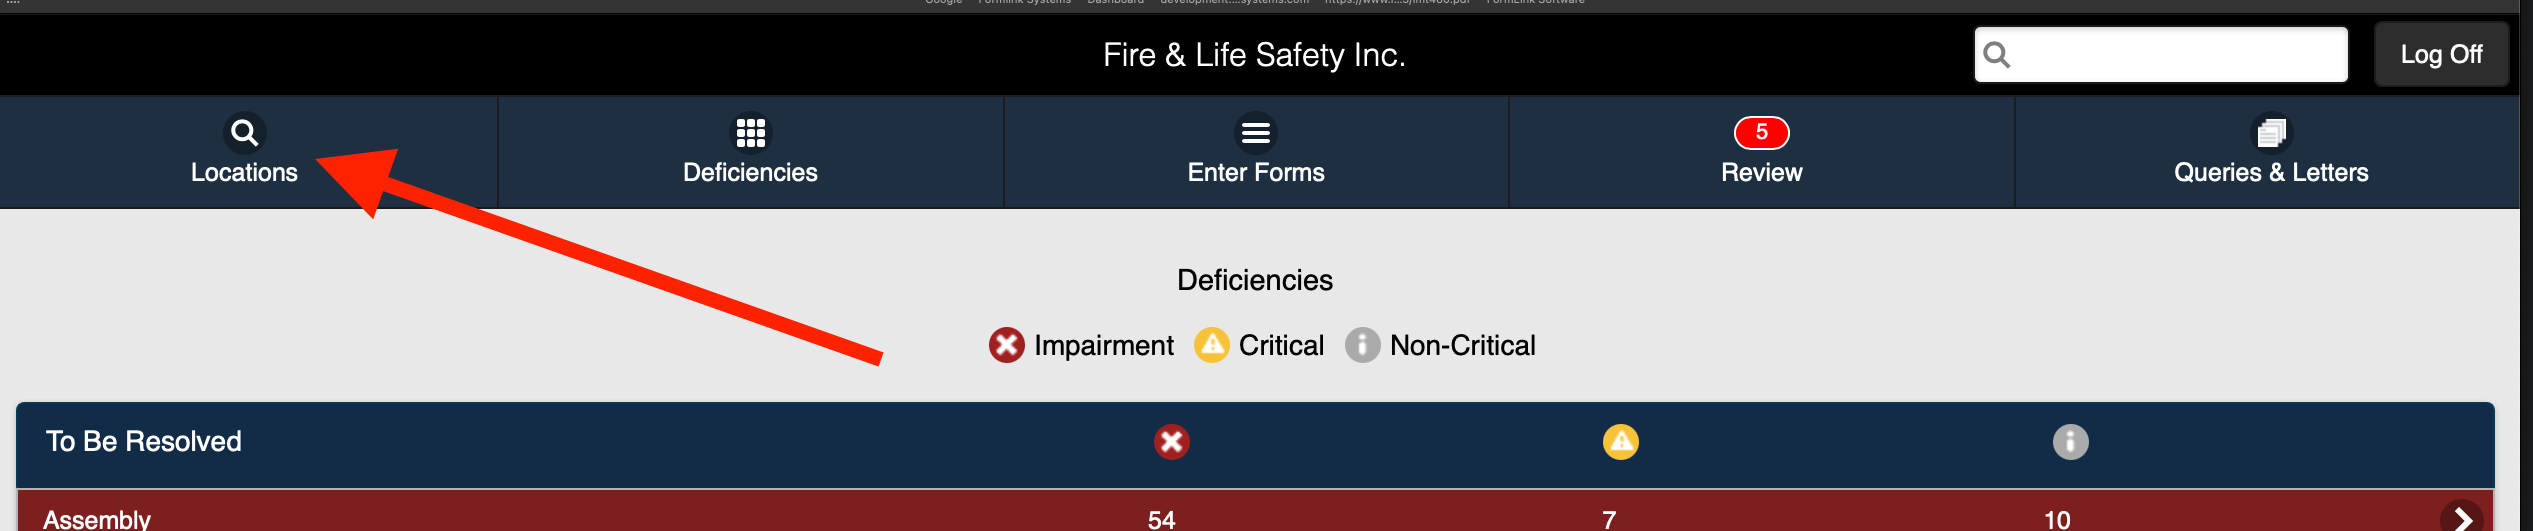 Figure 1
2. Access the desired location from the Locations page (Figure 2).
.png) Figure 2
Figure 2
3. Select Generate Custom Report (Figure 3).
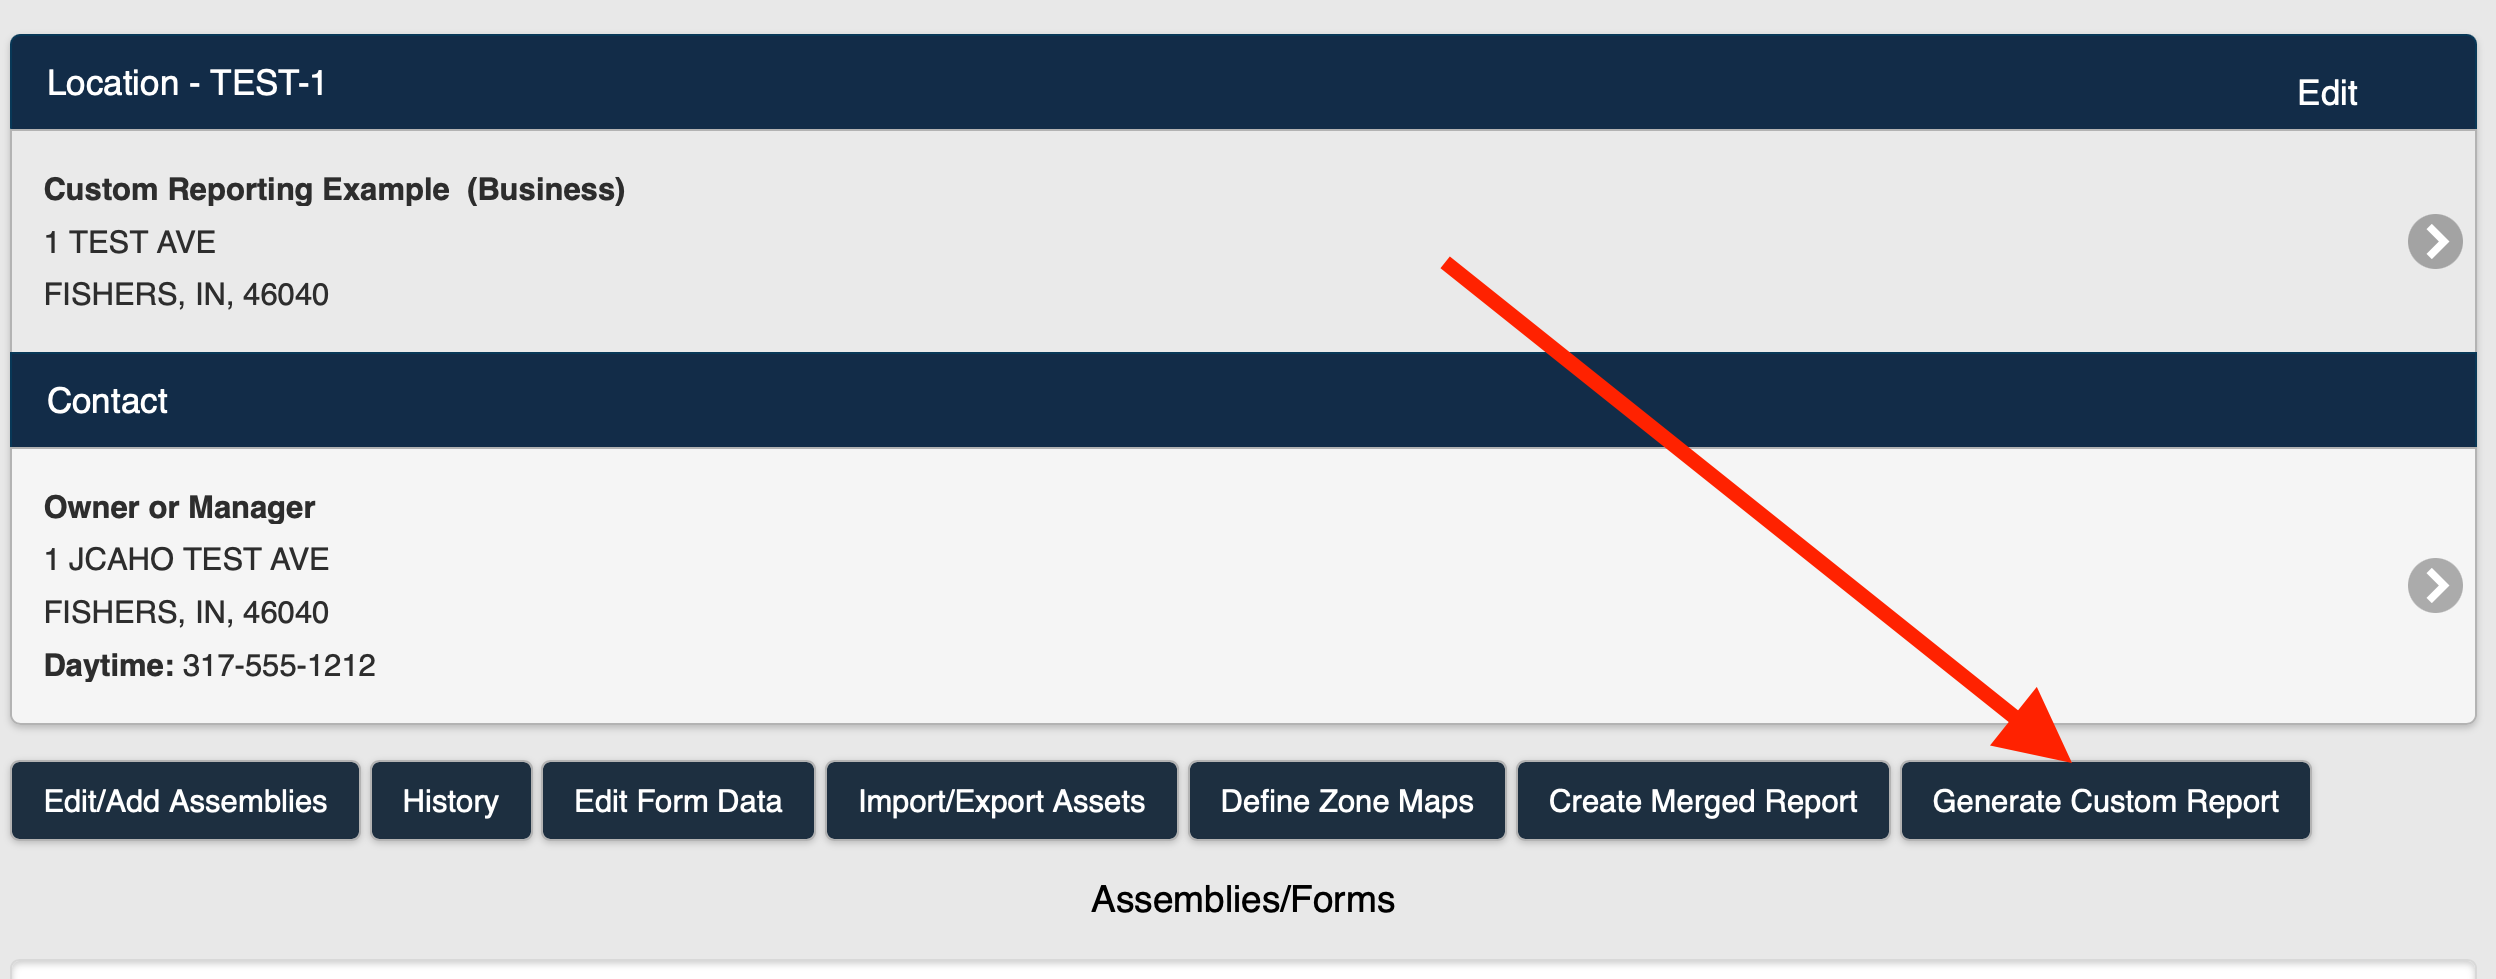 Figure 3
4. The Generate Custom Report page is displayed (Figure 4).
.png) Figure 4
Figure 4 5. Enter a Description for the report (Figure 5).
6. Enter a Start Date for the report (Figure 5).
7. Select/click in any of the remaining Start Date fields (Q2 Start Date, Q3 Start date, Q4 Start Date) (Figure 5).
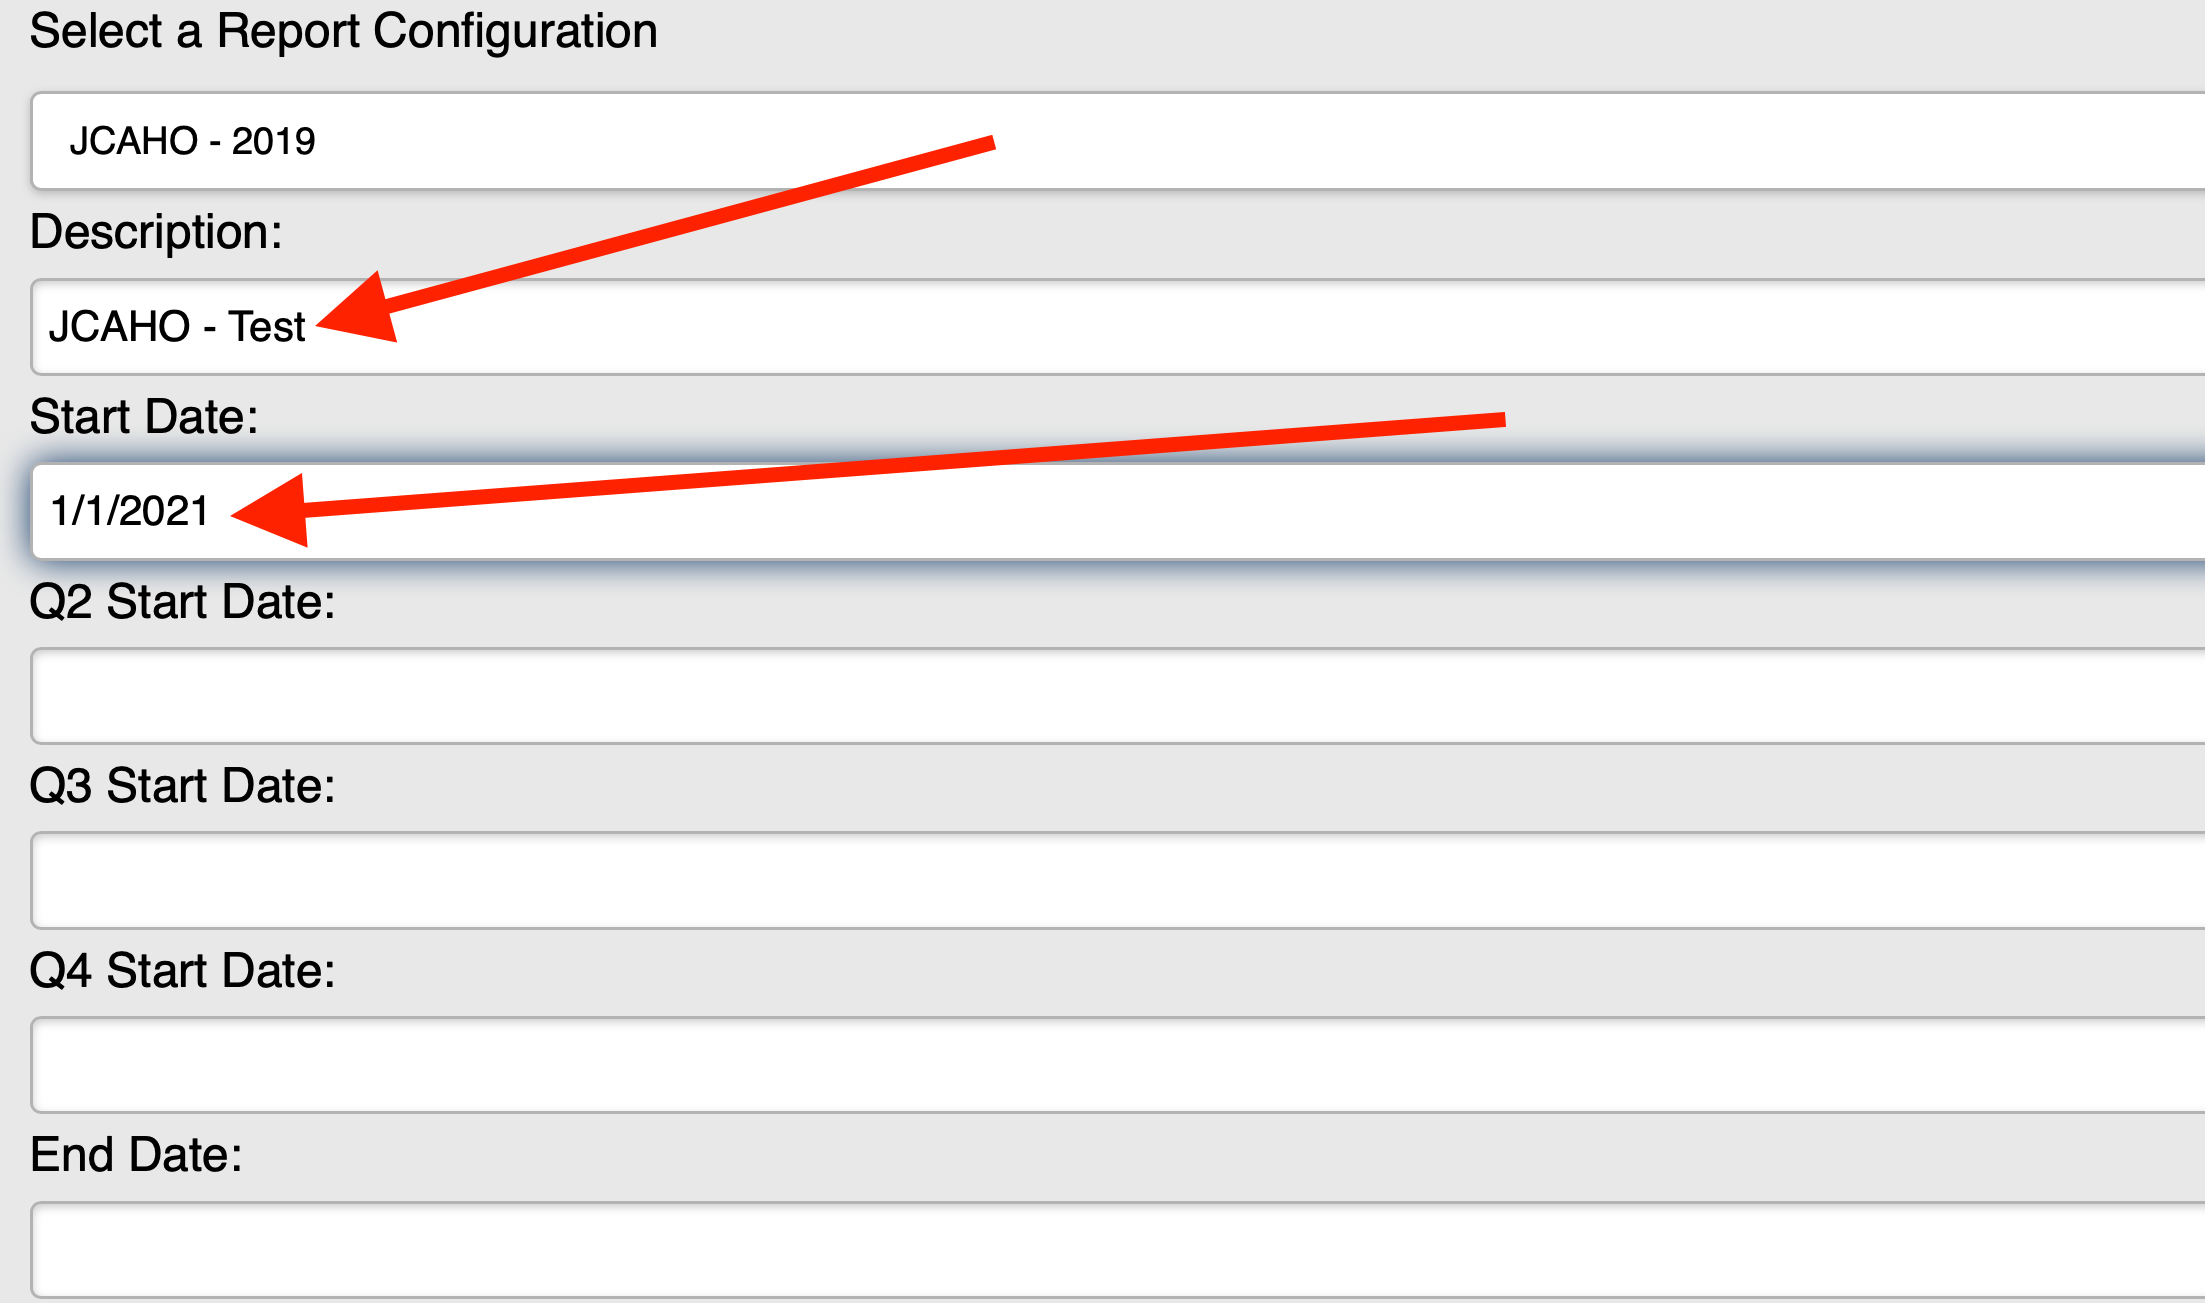 Figure 5 8. The quarterly Start Dates and End Date fields are automatically populated (Figure 6).
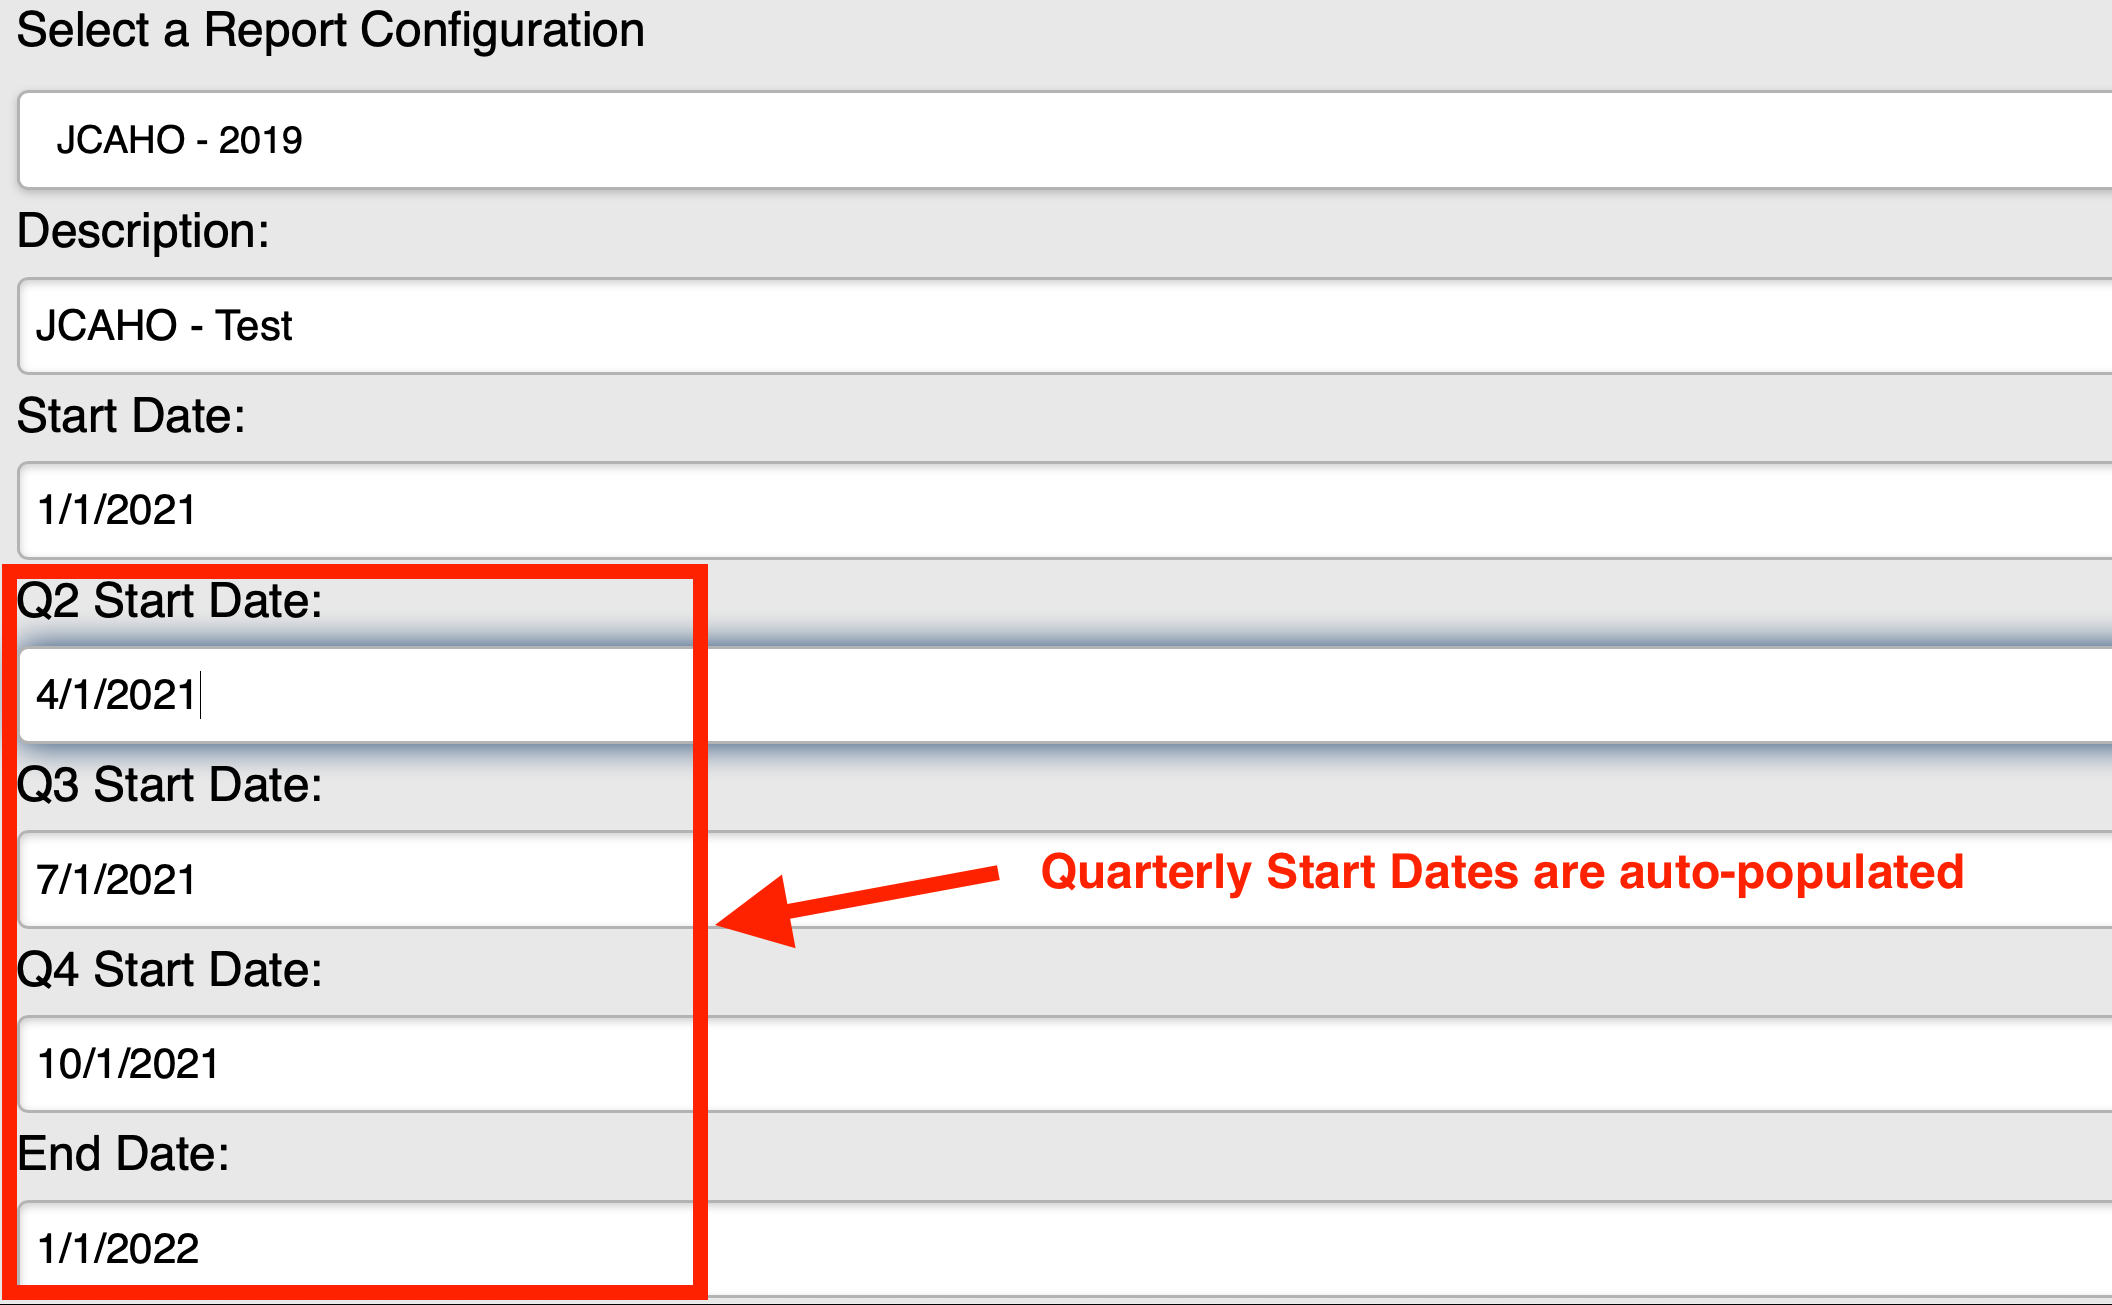 Figure 6
 9. If desired, you can change the default Column Labels (Figure 7).
Note: The dates specified for each quarter will determine which individual inspection reports will be analyzed for each quarter (based on the Date of Work falling into the range for the quarter). For example, if you have a Q2 report that was run on March 28th instead of in April, you could adjust the Q2 date to start on March 28th instead of April 1st so the report would then be included in Q2 instead of Q1.
Additionally, the report does not necessarily have to be broken down into quarters, as any date range can be used when generating the report.
10. Enter any Optional Notes for the Executive Summary in the Notes text box (Figure 8).
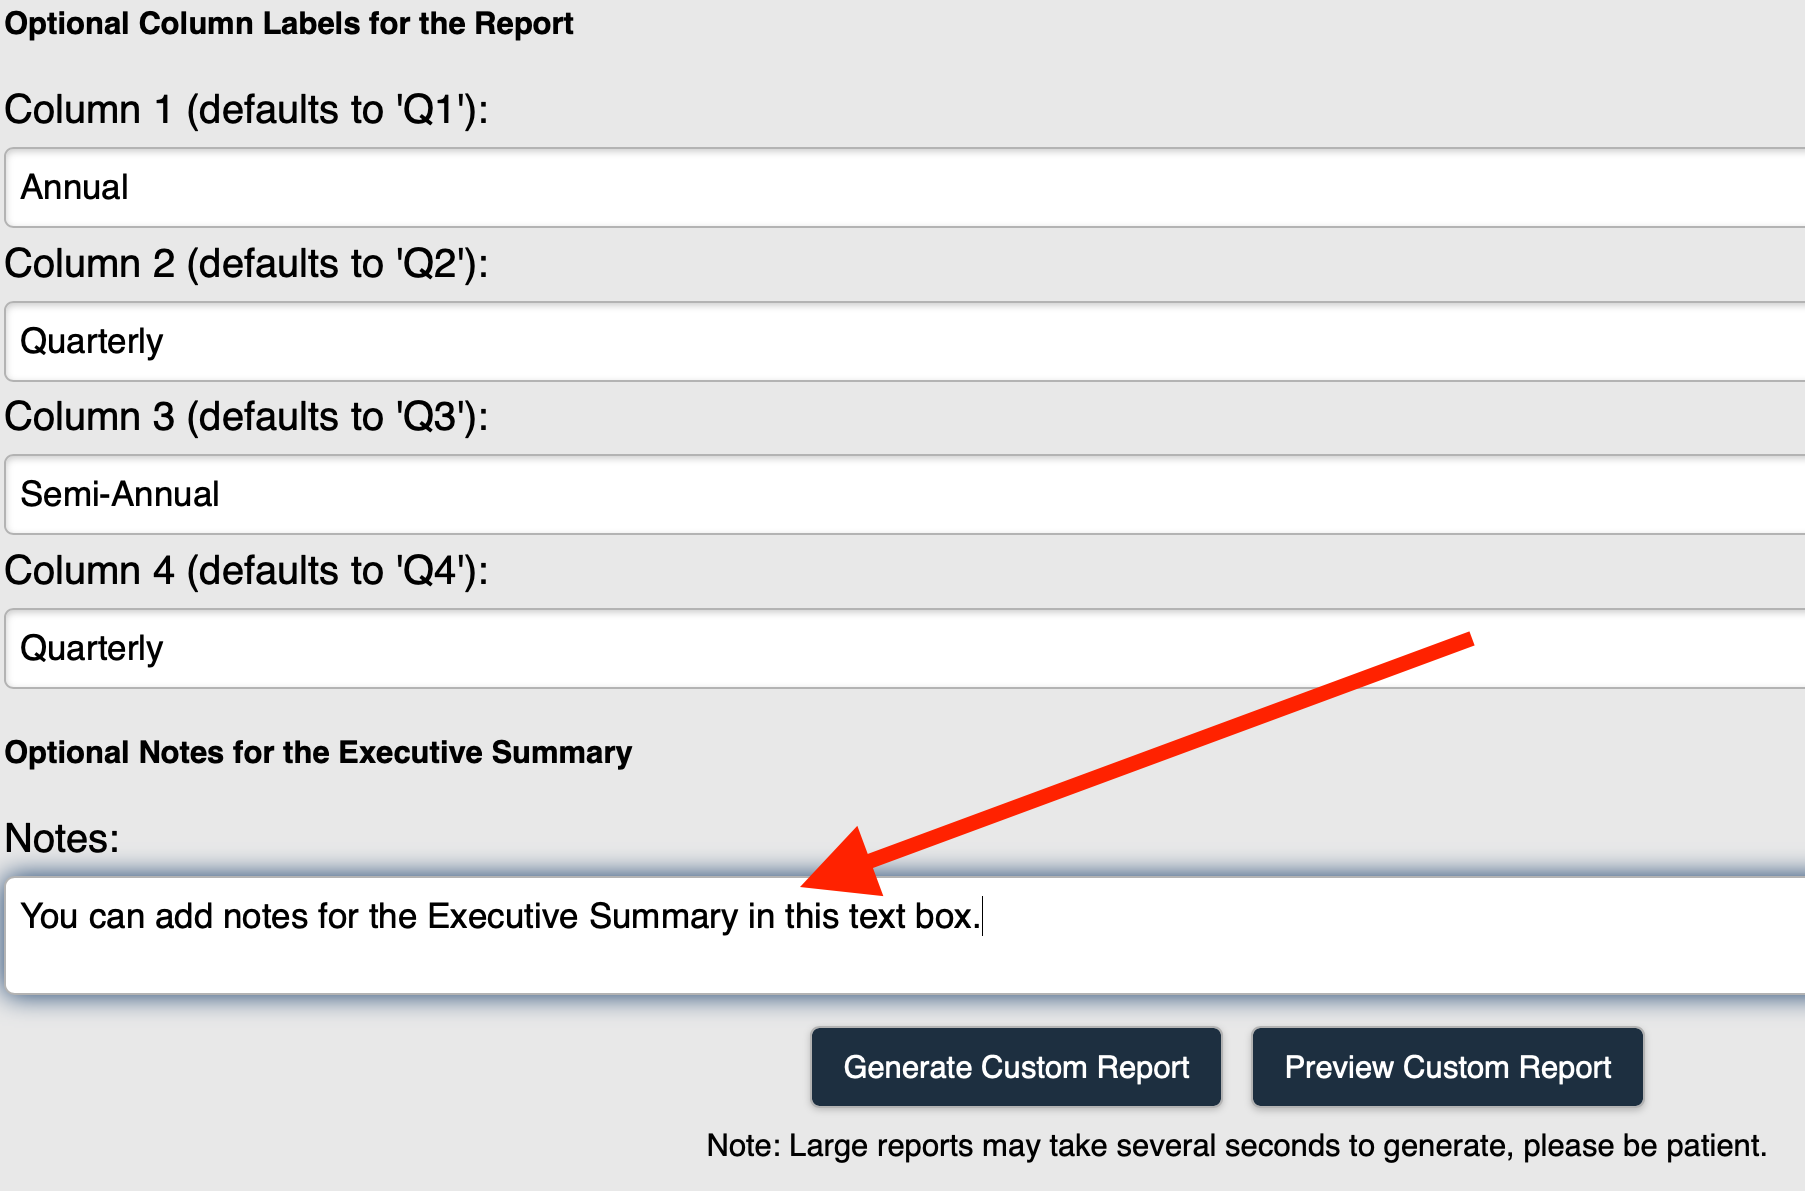 Figure 8
11. Select Generate Custom Report to create the report (Figure 9).
Note: If you want to see what your report will look like before finalizing your settings and generating the report, you can select the Preview button to view the report.
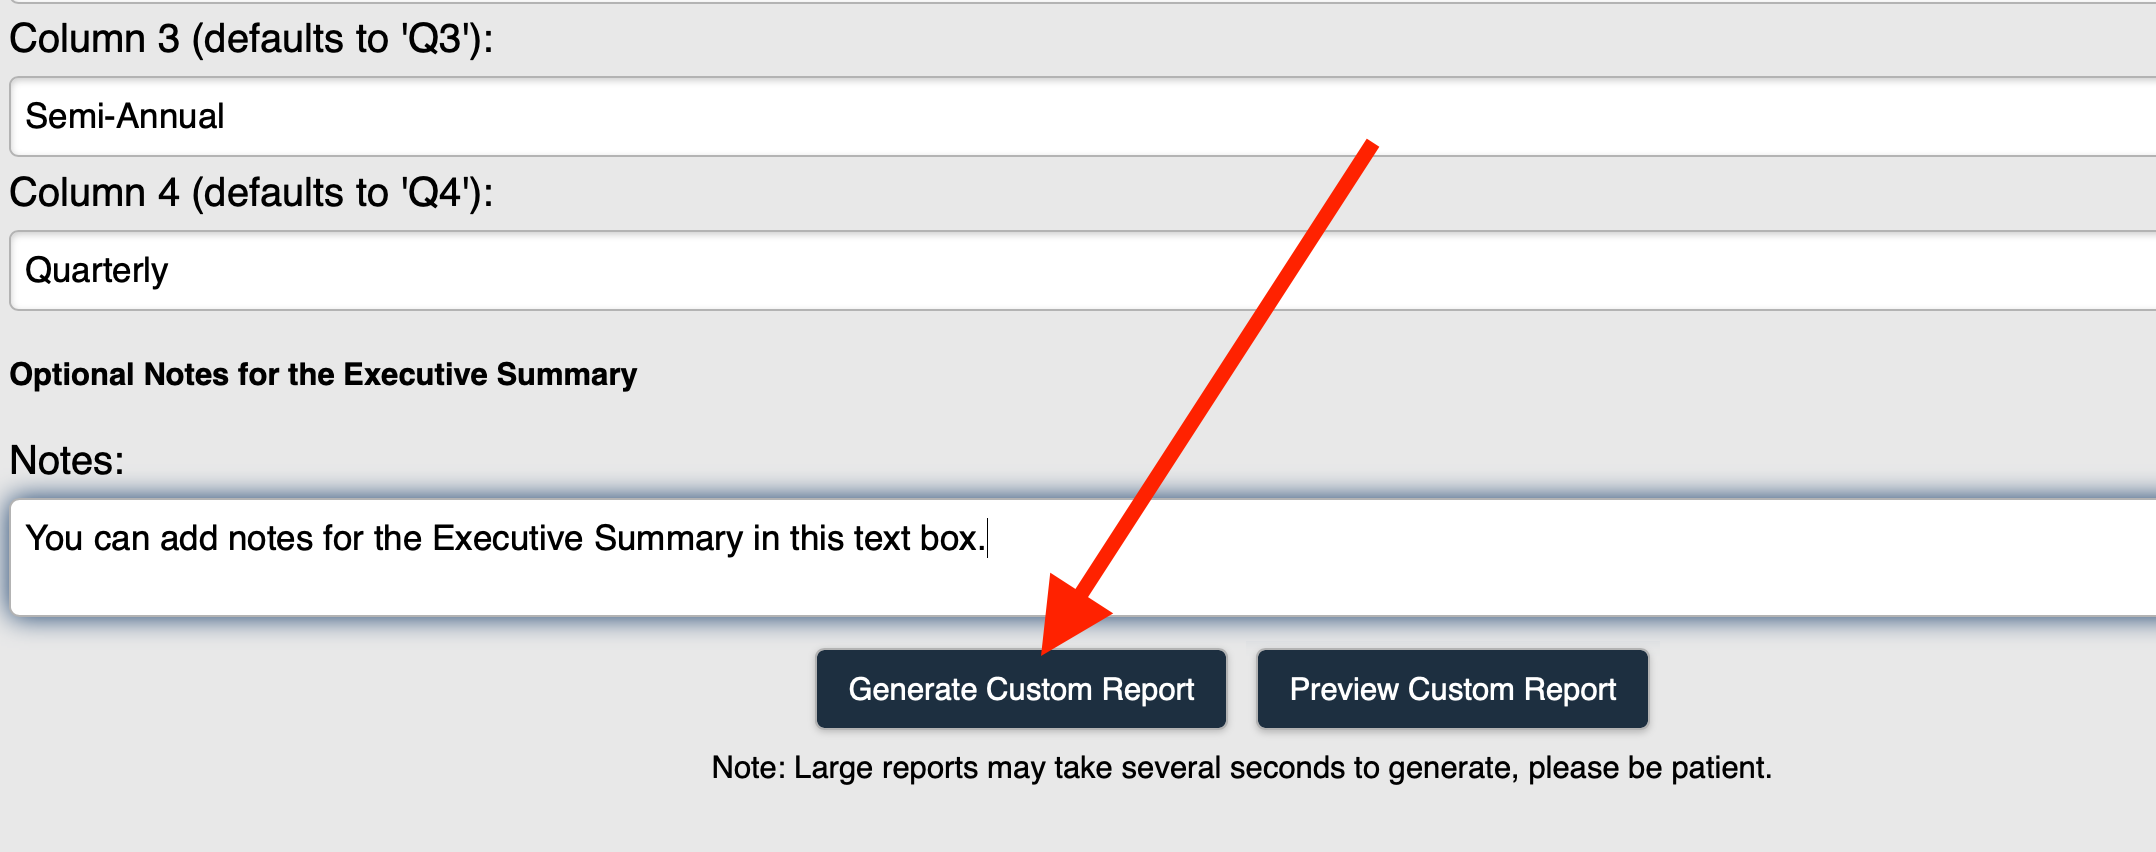 Figure 9
The report is generated and can now be viewed in Custom Reports History.
Was this article helpful?