Inspector - How do I add a new Location?
- 13 Jul 2022
- 3 Minutes to read
- Contributors

- Print
- DarkLight
Inspector - How do I add a new Location?
- Updated on 13 Jul 2022
- 3 Minutes to read
- Contributors
- Print
- DarkLight
Article summary
Did you find this summary helpful?
Thank you for your feedback!
Inspector - How to Add a New Location
Note: Refer to the FormLink Adding a New Location (for inspectors)Training Video for additional details on adding a new Location from the New Location Page.
Complete the following steps to add a new Location from the Inspector Home page.
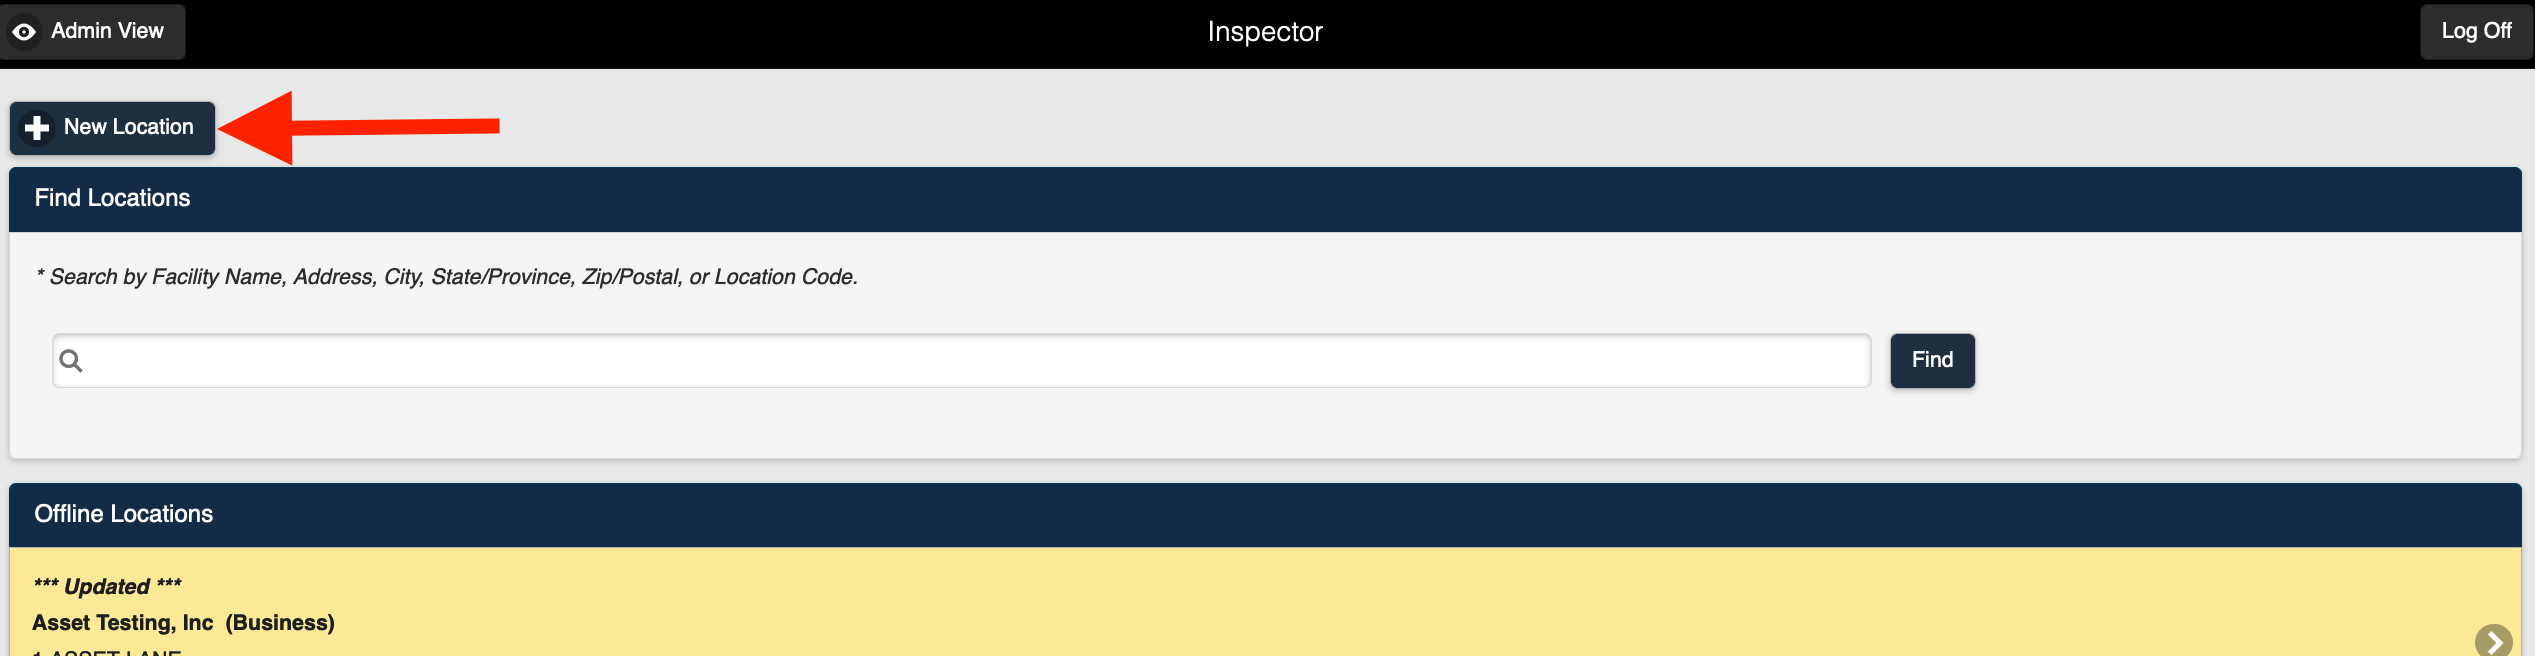
1. From your Inspector Home page, select New Location.
 New Location Button2. Enter the Location information on the New Location page.
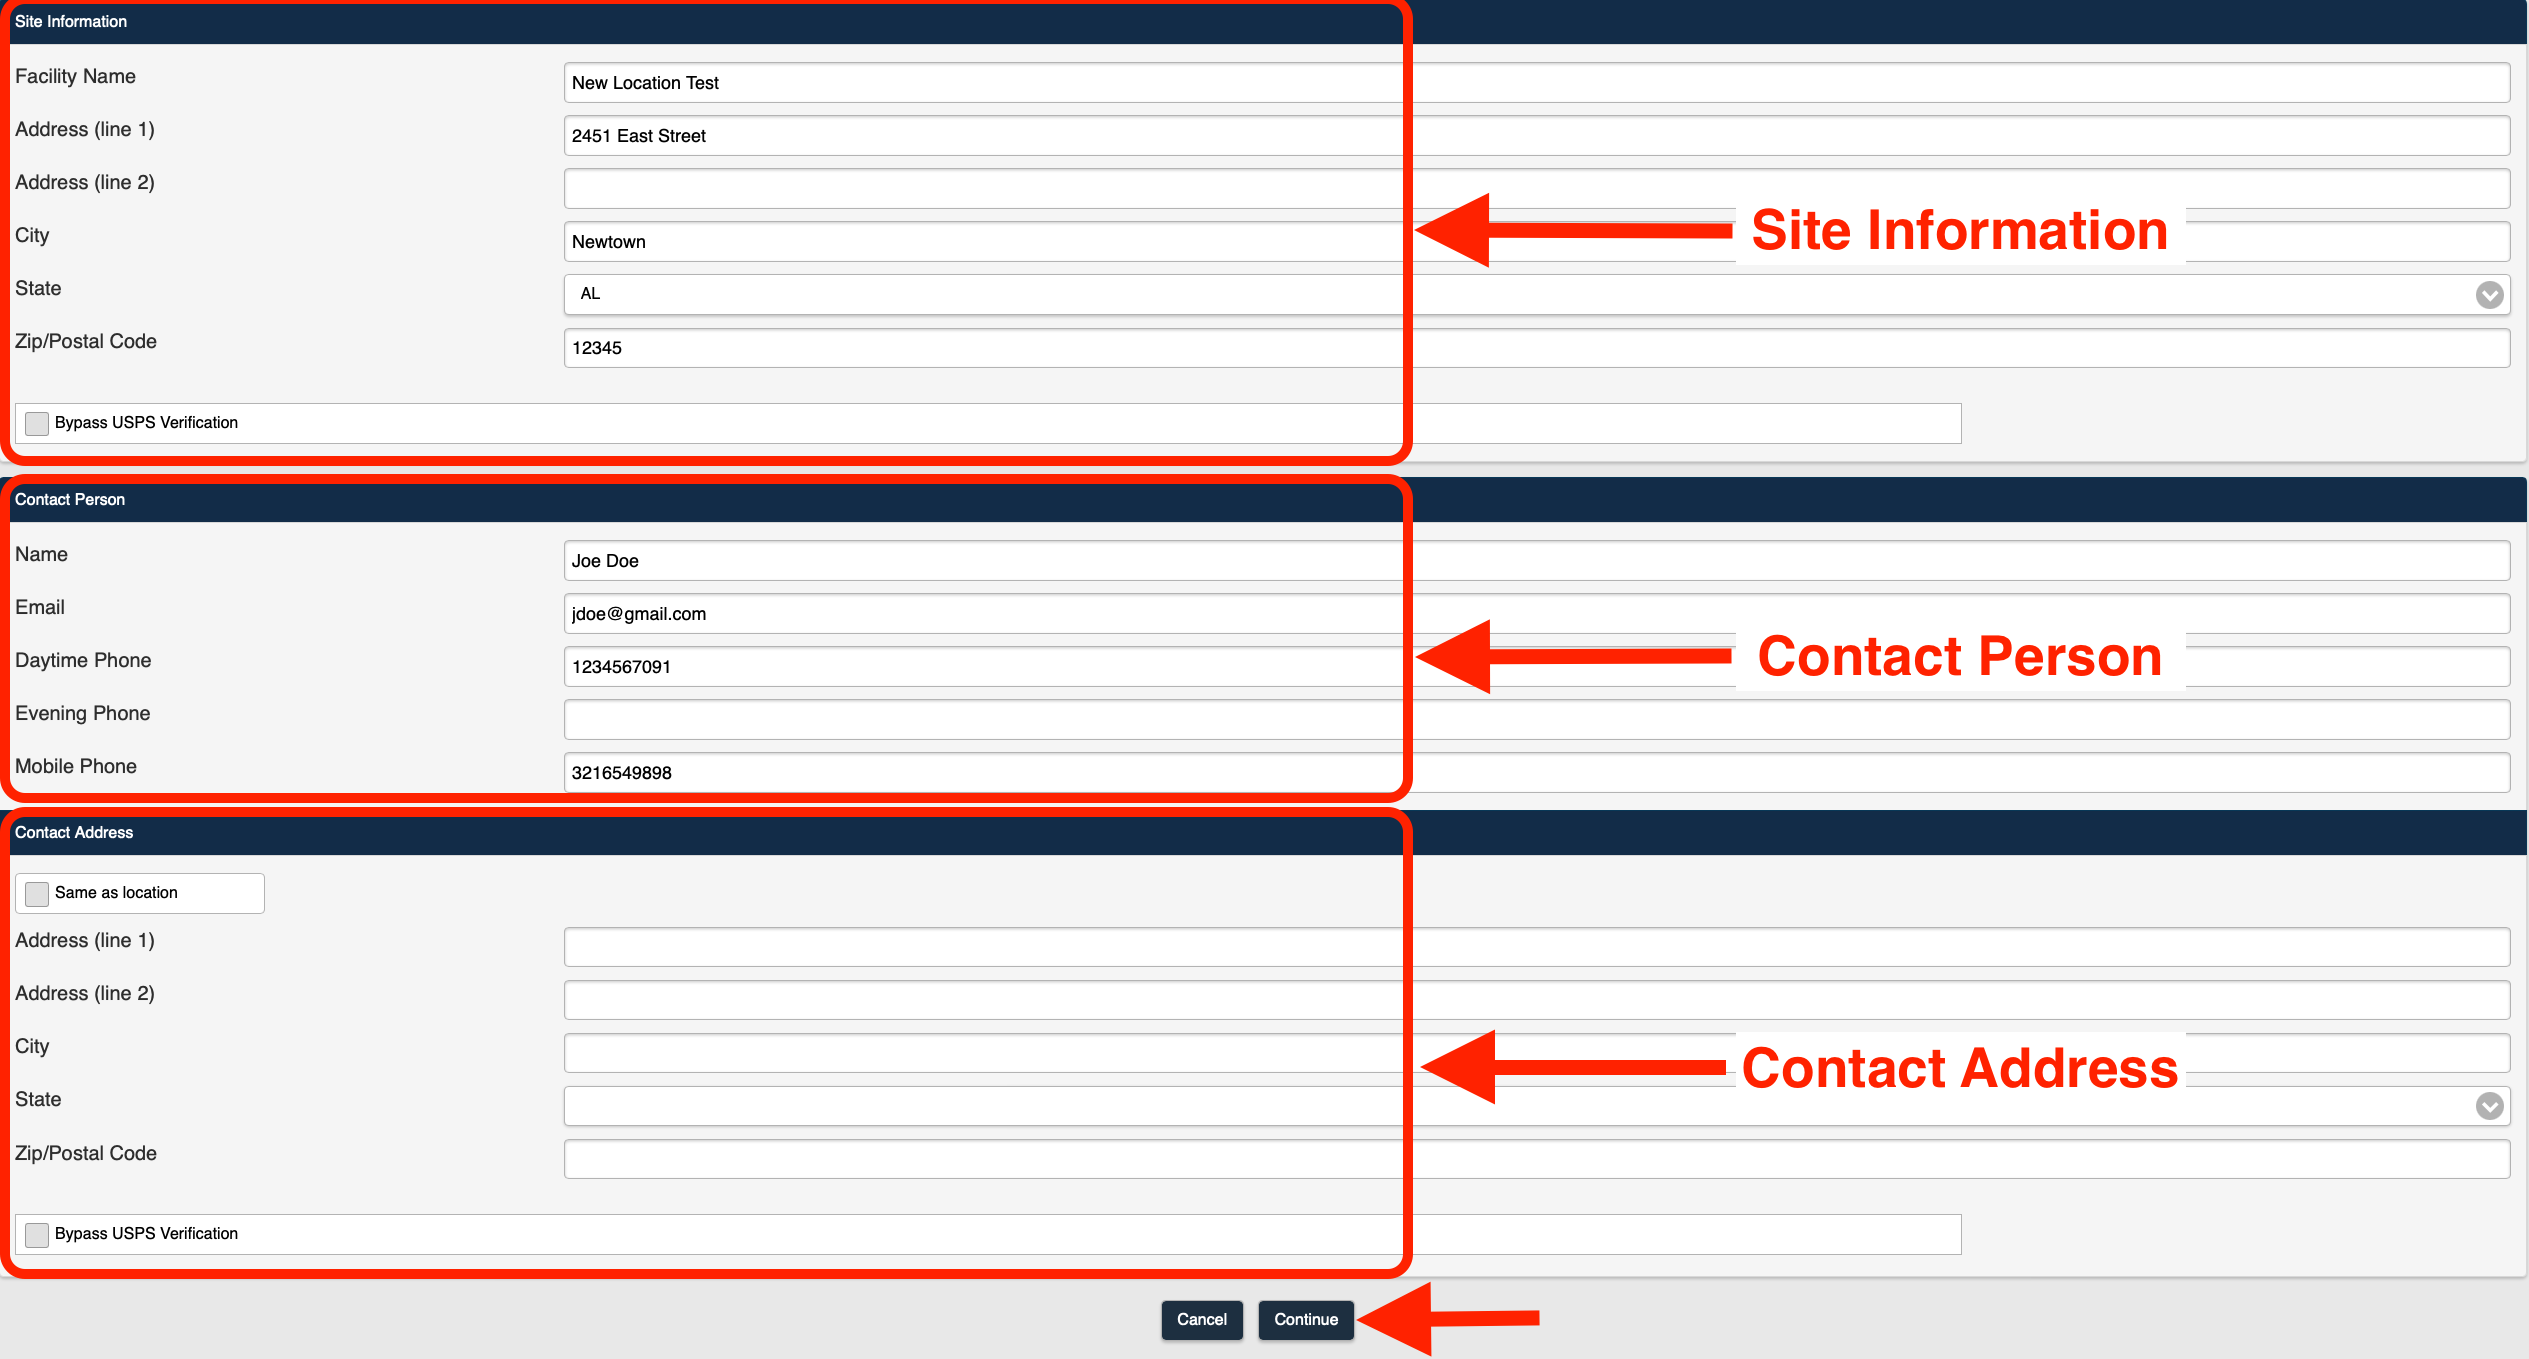 New Location Page Overview
The following fields are available on the New Location page.
| Field | Description |
|---|---|
| Site Information Section | |
| Facility Name | Enter a name for the new Location. The Facility Name is a required field. |
| Address (line 1) | Enter an address for the new Location. The Address (line 1) field is a required field. |
| Address (line 2) | If needed, enter a second line for new Location address. |
| City | Enter a City for the new Location. |
| State | Select a State for the new Location from the drop-down selection list. |
| Zip/Postal Code | Enter the Zip/Postal Code for the new Location. The Zip/Postal Code is a required field. |
| Bypass USPS Verification | Select the Bypass USPS Verification checkbox to disable USPS verification of the address entered. When disabled (unchecked), the system will instead only verify that the address you entered is not a duplicate address within your account. |
| Contact Person Section | |
| Name | Enter the Contact Person's name. The Contact Person's Name is a required field. |
| Enter the Contact's Email address. | |
| Daytime Phone | Enter the Contact's Daytime Phone number. |
| Evening Phone | Enter the Contact's Evening Phone number. |
| Mobile Phone | Enter the Contact's Mobile Phone number. |
| Contact Address Section | |
| Same as location | Select the Same as location checkbox to use the Location Address for the Contact. When disabled (unchecked), the system will require manual entry of the Contact's address information. |
| Address (line 1) | Enter an address for the Contact person. The Address (line 1) field is a required field. |
| Address (line 2) | If needed, enter a second line for new Contact address. |
| City | Enter a City for the new Contact. |
| State | Select a State for the new Contact from the drop-down selection list. |
| Zip/Postal Code | Enter the Zip/Postal Code for the new Contact. The Zip/Postal Code is a required field. |
| Bypass USPS Verification | Select the Bypass USPS Verification checkbox to disable USPS verification of the address entered. When disabled (unchecked), the system will instead only verify that the address you entered is not a duplicate address within your account. |
3. Select Continue.
4. Enter all necessary information on the Confirm Location page.
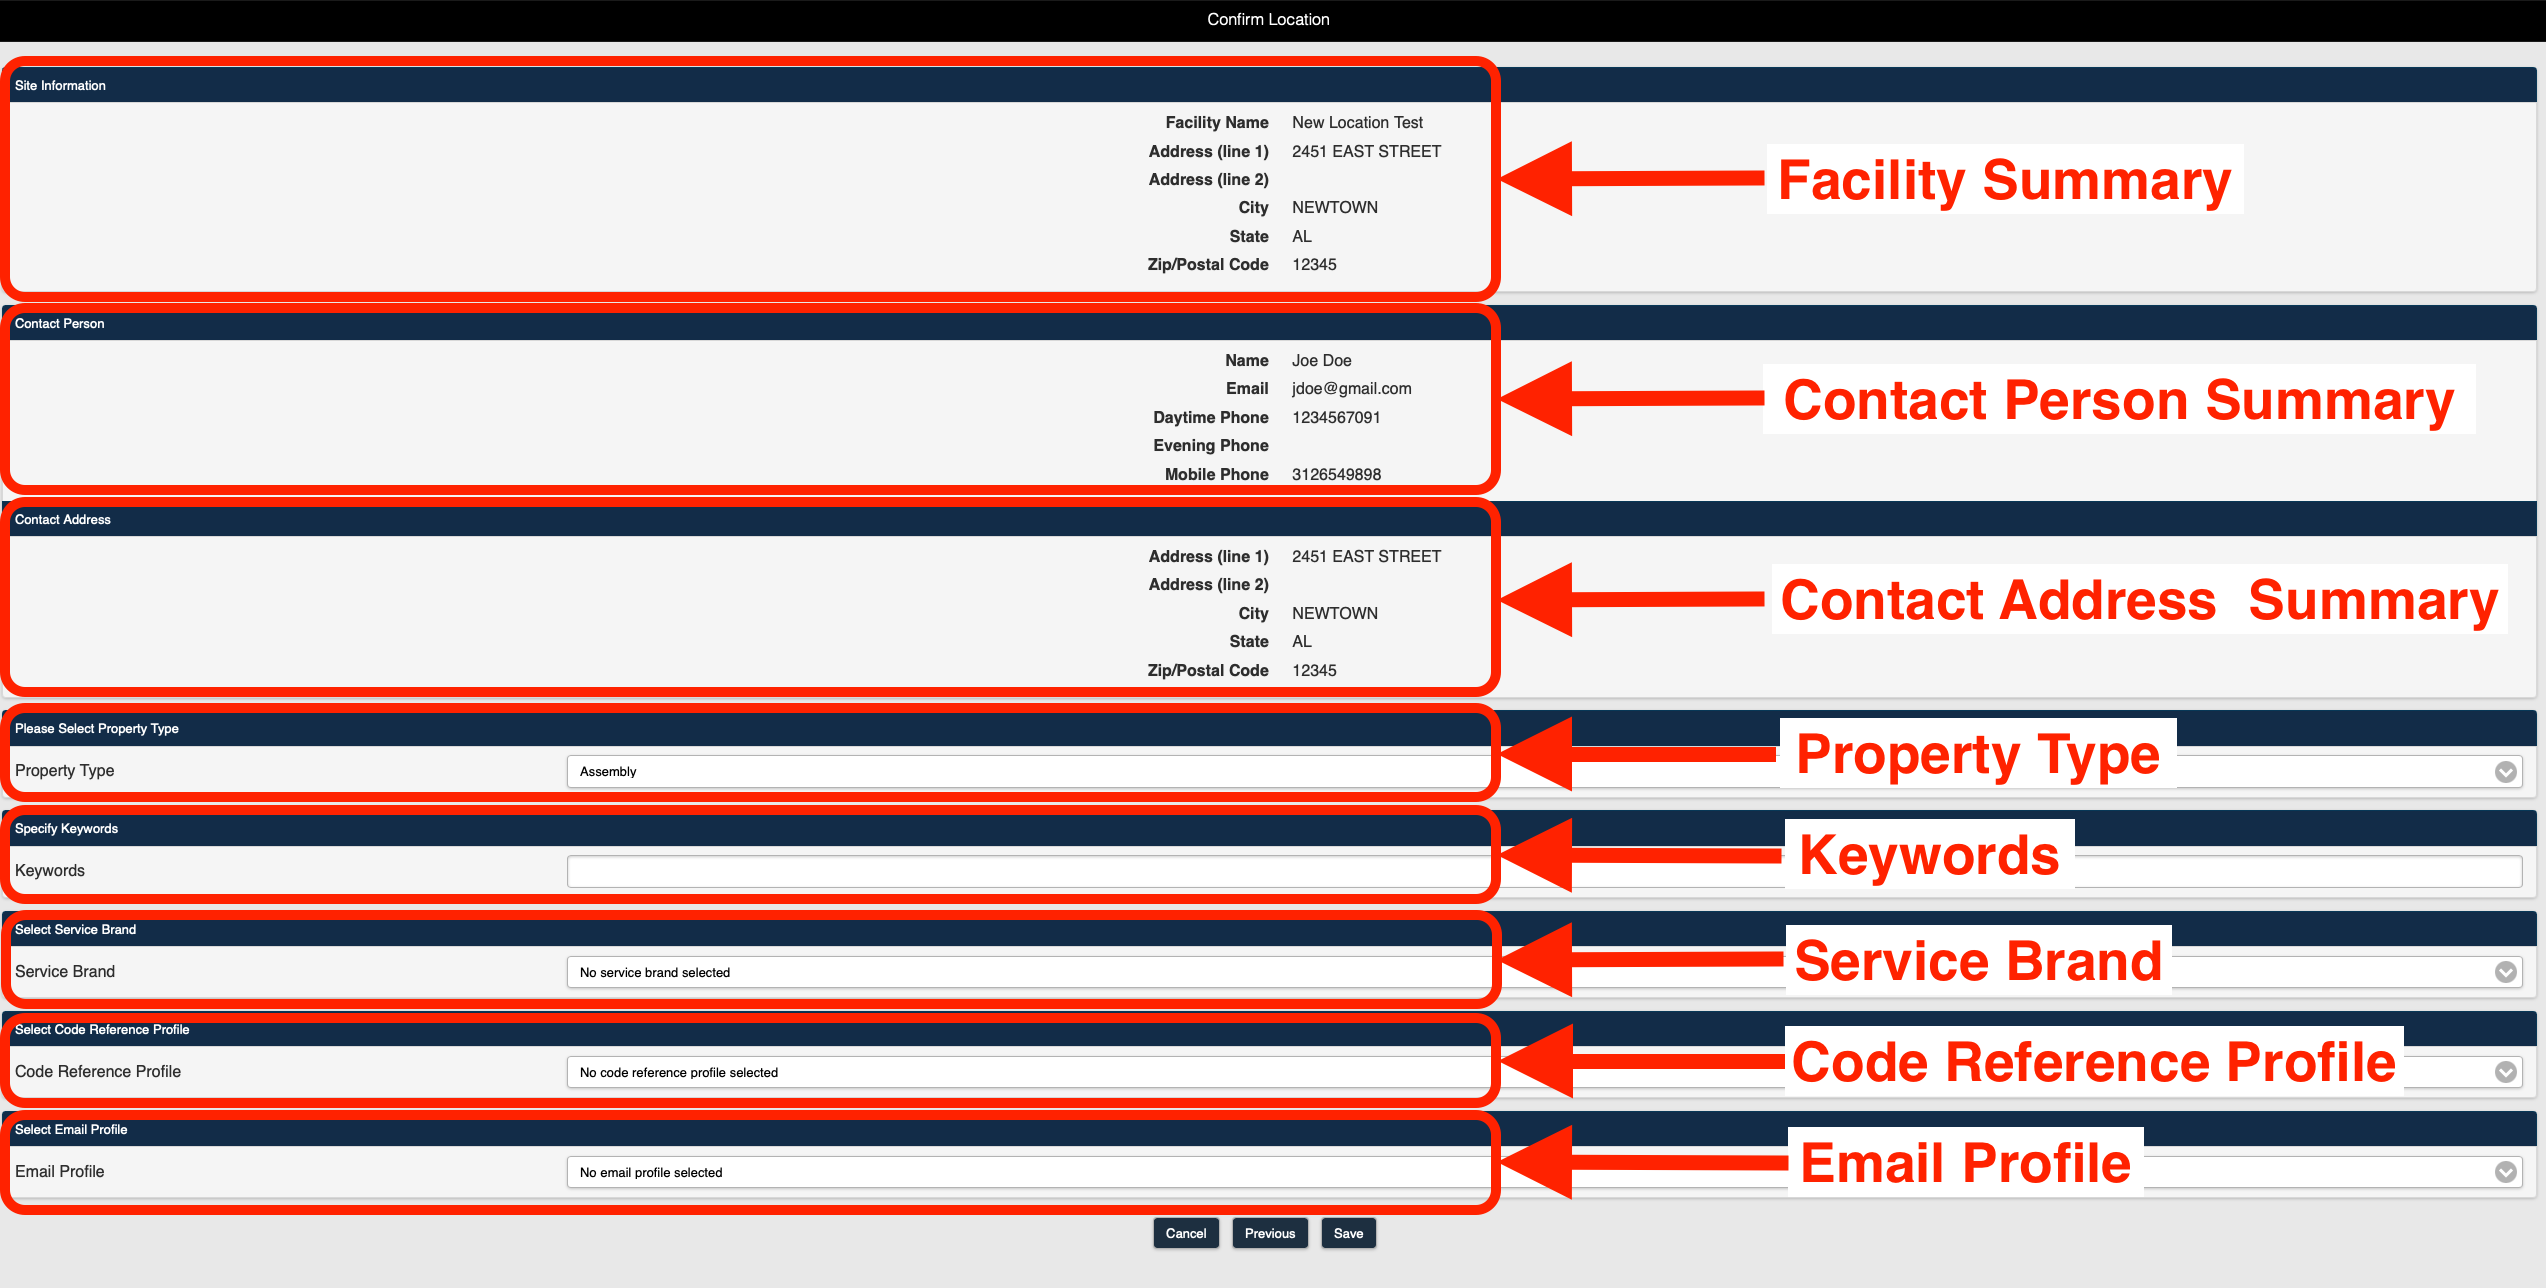 Confirm Location Page Overview
The following fields are available on the Confirm Location page.
| Field | Description |
|---|---|
| Property Type | Select a Property Type for the Site/Location from the drop-down selection list. The available selections are:
|
| Keywords | Enter any Keywords that may be used to find the Site/Location on the Inspector Home page. |
| Service Brand | Select a Service Brand for the Site/Location from the drop-down selection list. |
| Code Reference Profile | Select a Code Reference Profile for the Site/Location from the drop-down selection list. Note: The Code Reference Profile is only visible to customers who have had their system configured for code references. |
| Email Profile | Select an Email Profile for the Site/Location from the drop-down selection list. |
Note: You can select the Previous button to return to the New Location page.
5. Save the new Location.
FormLink User Tips
The following browsing guidelines should be followed for optimum performance when using FormLink on your personal device.
- FormLink should be accessed using recent versions of modern mainstream browsers. This includes Mozilla FireFox, Google Chrome, Microsoft Edge (Chromium) and Safari on iOS.
- Always access the FormLink login page using the URL that is available on FormLink's website, or a bookmark created from that URL. The bookmark may be needed to access FormLink in remote areas without internet access.
- Always Disable Private or Incognito mode on your device.
- Do not clear browser history or cache.
- Devices should have automatic updates disabled. Updates can be applied after ensuring all locations and forms have been uploaded to the server. In some cases, updates can clear the browser storage and cause a loss of data.
Was this article helpful?