- 26 Jan 2022
- 1 Minute to read
- Contributors

- Print
- DarkLight
Transfer a Custom Form
- Updated on 26 Jan 2022
- 1 Minute to read
- Contributors

- Print
- DarkLight
How to Transfer a Custom Form
This section is intended to show you how to transfer an existing form from your system to Custom Forms to make changes.
1. From the Configuration page, select Custom Forms (Figure 1).
 Figure 1
2. The Define Templates page is displayed (Figure 2).
.png) Figure 2
Figure 2
3. Select Transfer to transfer an existing form to Custom Forms (Figure 3).
 Figure 3
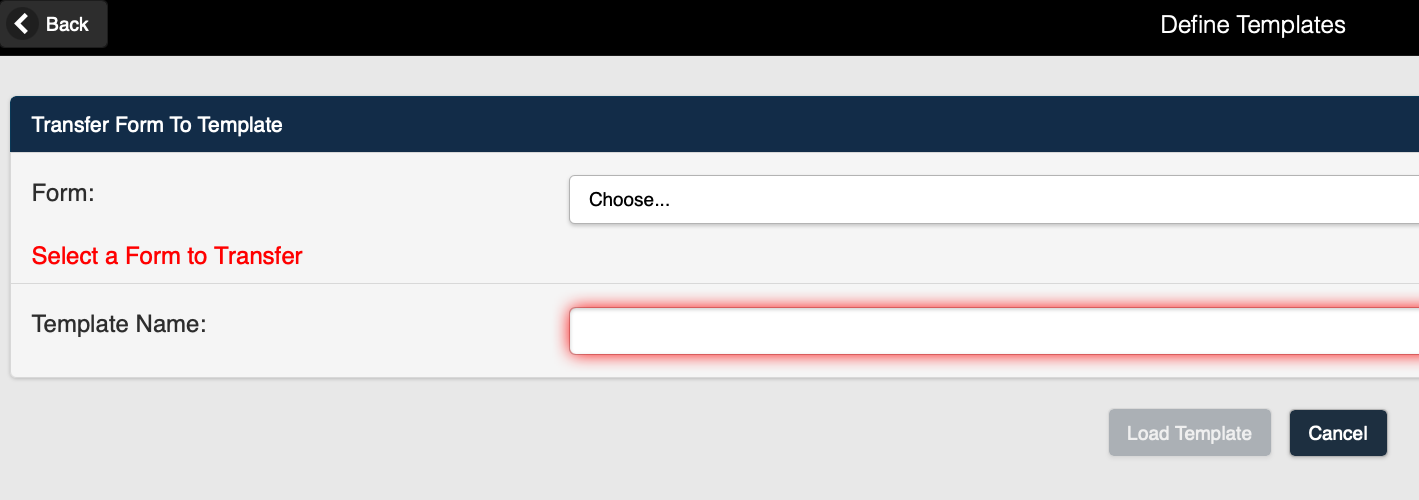
4. The Transfer Form to Template page is displayed (Figure 4).  Figure 4
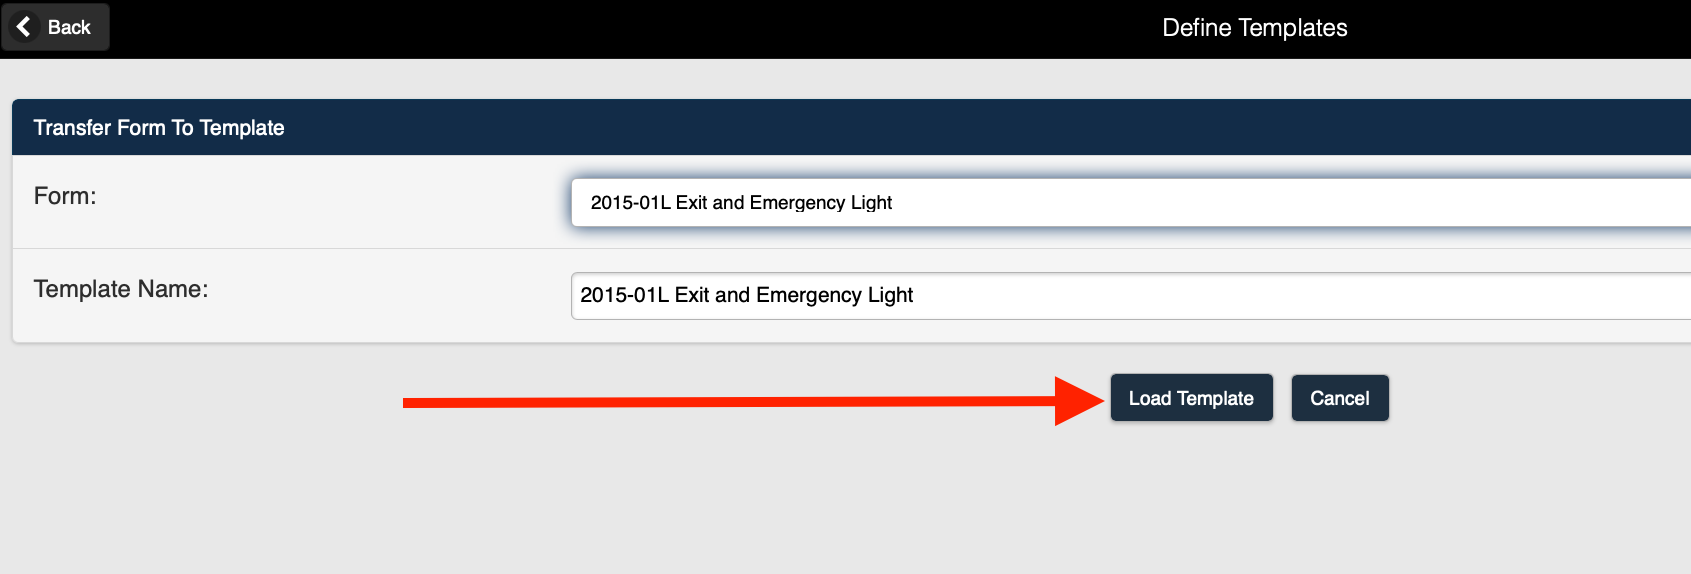
5. Select an existing form to transfer (Figure 5).
.png) Figure 5 Note: The Template Name defaults to the name of the form being transferred. When transferring a form, the default Template Name will be the name of the form being transferred. For example, if you transfer a form named Alarm Test, the Template Name for the transferred form would also be Alarm Test. The Template Name field can be edited if you want to give the file a different name.
Figure 5 Note: The Template Name defaults to the name of the form being transferred. When transferring a form, the default Template Name will be the name of the form being transferred. For example, if you transfer a form named Alarm Test, the Template Name for the transferred form would also be Alarm Test. The Template Name field can be edited if you want to give the file a different name.
Note: When editing or creating new templates, it is highly recommended that you include a version number in the template name to help identify the template and to reduce the chance of unintentionally changing an older version of the form. For example, you could use (templatename1.0, templatename1.1, templatename1.2) etc,.
6. Select Load Template (Figure 6).
 Figure 6
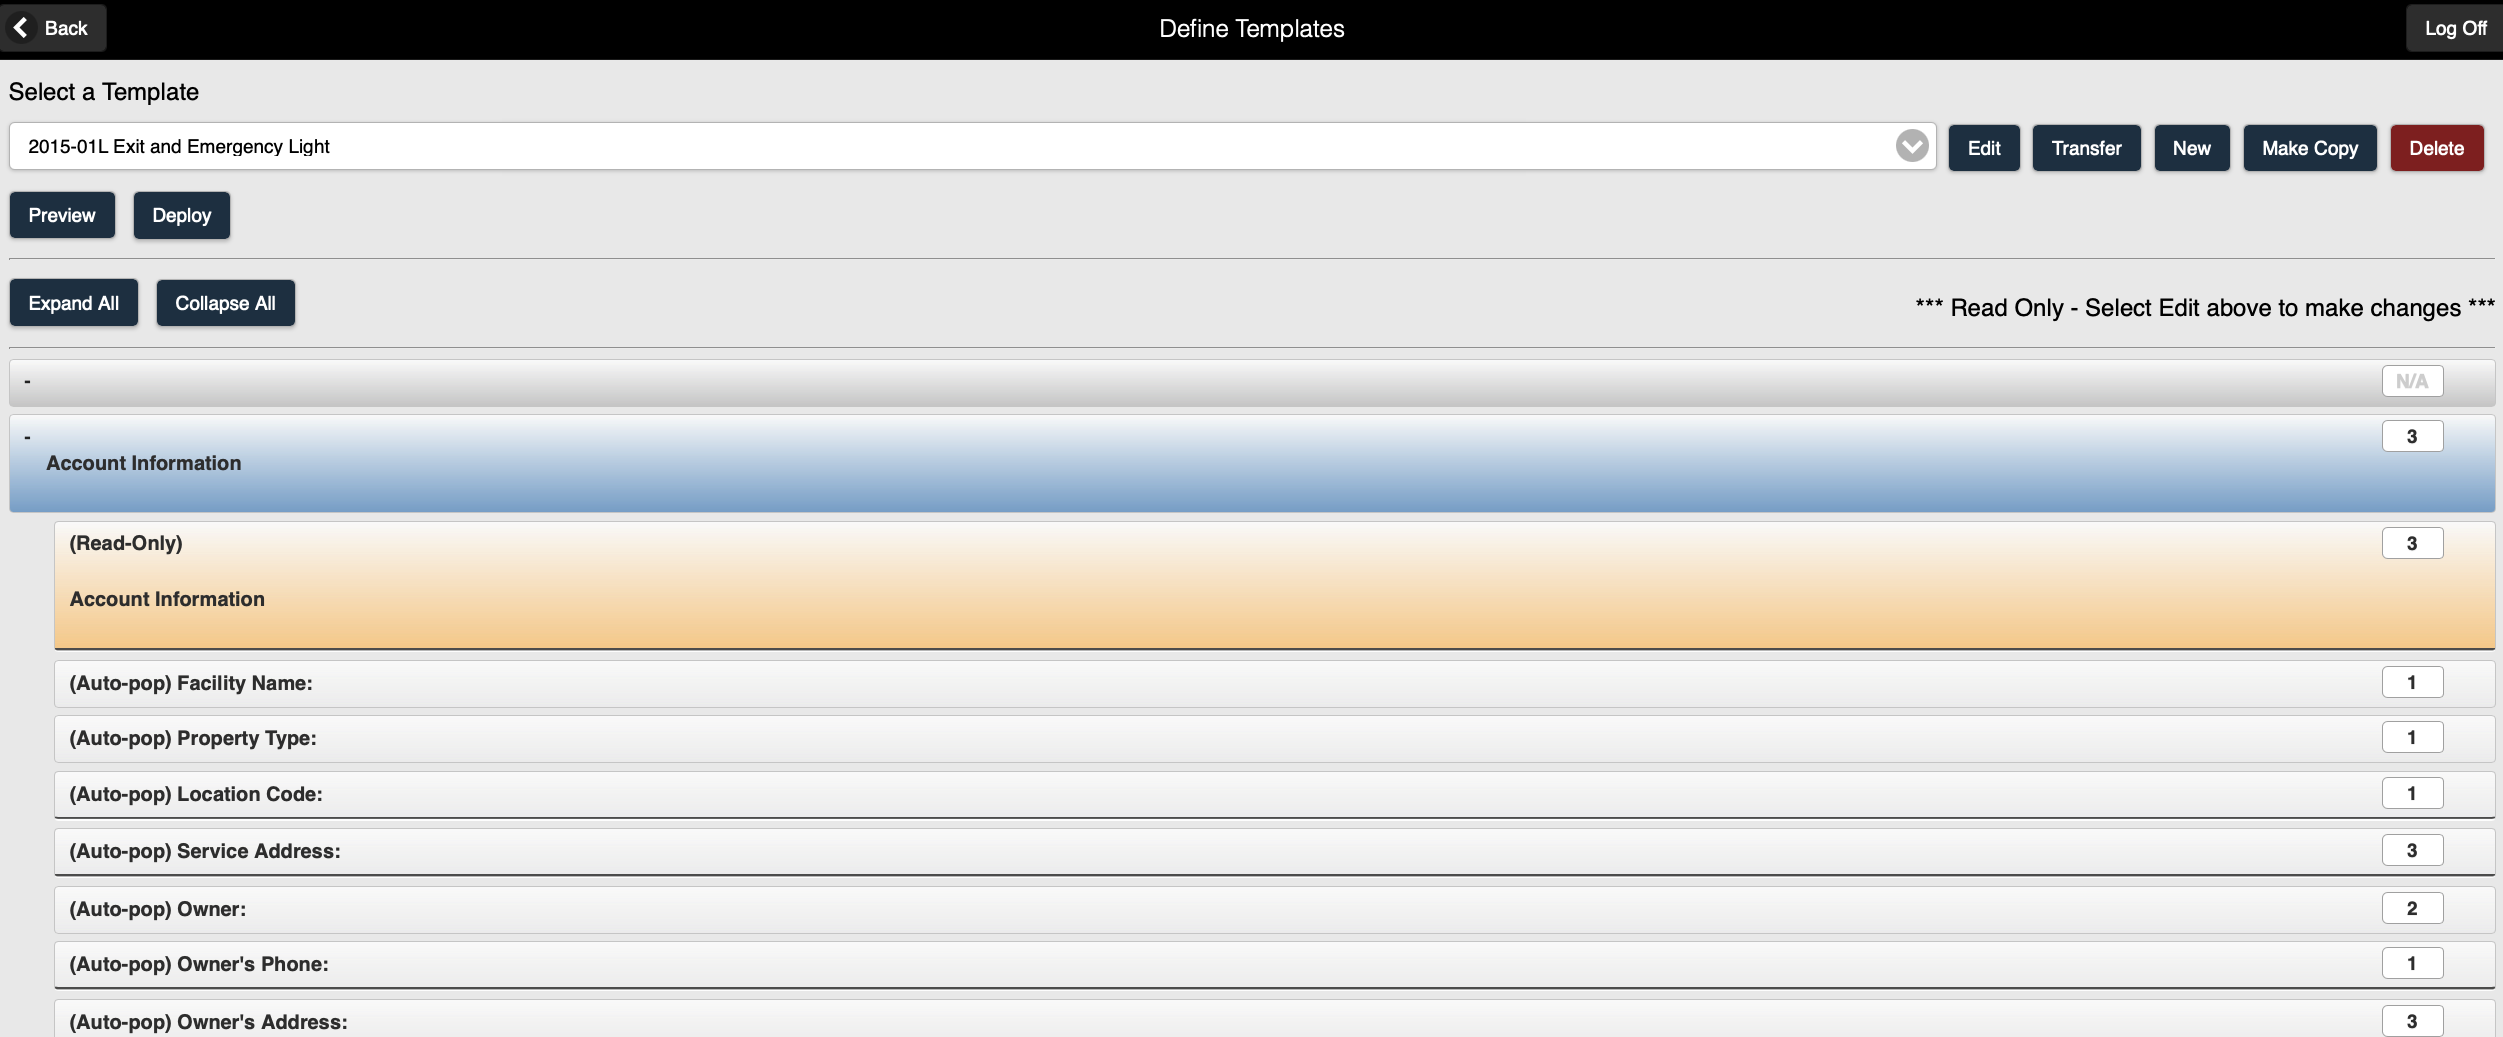
7. The template for the transferred form is displayed (Figure 7).
 Figure 7
8. The template can now be edited using the Custom Forms Feature.
You can edit the template from the Edit Template page by selecting the Template Details button.
The associated fields for each Section Type can also be added to the form:
- Add fields to Standard Section
- Add fields to Fixed Table Section
- Add fields to an Expanding Table Section
- Add fields to a Supplement Section
- Add fields to a Pump Curve Section
8. Save the template.
9. Preview the Custom Form to view the template as it will appear as a form in your system.
10. Deploy the form to your system.

