How to Import Assets into a Form
- 20 Jul 2021
- 2 Minutes to read
- Contributors

- Print
- DarkLight
How to Import Assets into a Form
- Updated on 20 Jul 2021
- 2 Minutes to read
- Contributors
- Print
- DarkLight
Article summary
Did you find this summary helpful?
Thank you for your feedback!
How to Import Assets into a Form
1. Once you have exported the CSV file for the form to your computer (Figure 1), you can add new asset information.
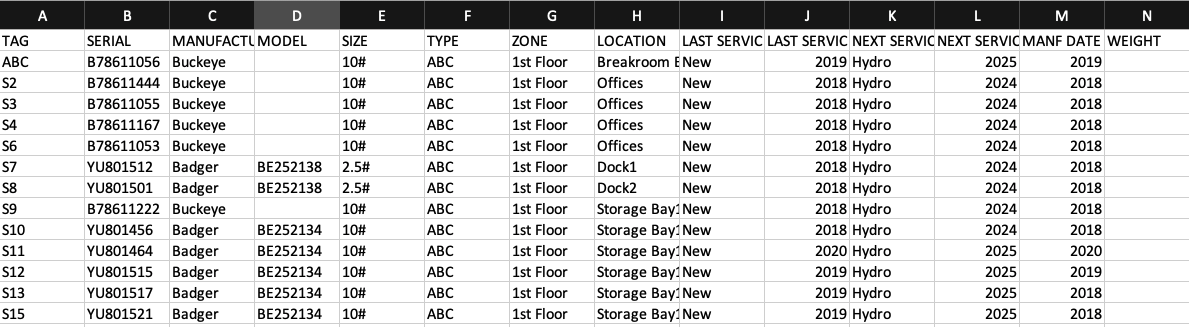 Figure 1
2. You can add your information manually, or you can populate the file using your own spreadsheet and saving it as a CSV file.
Note: Formlink expects a CSV file to be used for importing the information into the form. CVS files can be created with many “spreadsheet applications” including Excel. While Excel is not required to import a file, it is a useful tool when editing CSV files.
You can also add asset information row by row or by pasting information into columns. This allows you to quickly add all required information to the CSV file. The rows can also be reordered in the file before saving if desired.
Note: The required columns/headers for the form are automatically exported to your computer. The column headers must remain in the order in which they were exported to your computer. Repositioning of the columns in the exported CSV file will prevent the file from being imported back into the assembly.
3. In this example (Figure 2), the CSV file was exported from a new form. Since the form currently has no assets added, the rows are empty. The required and optional column headers for the asset(s) have been exported to your computer.
 Figure 2
4. The information for the assets being added to the form was previously entered in a spreadsheet. The spreadsheet was then saved as a CSV file using the required column headers (in the proper order) for the form (Figure 3).
.png) Figure 3
Figure 3
5. Save the file on your computer as a CSV file.
6. From the Import/Export Assets page, select Choose File and then select the CSV file you saved to import into the form (Figure 4).
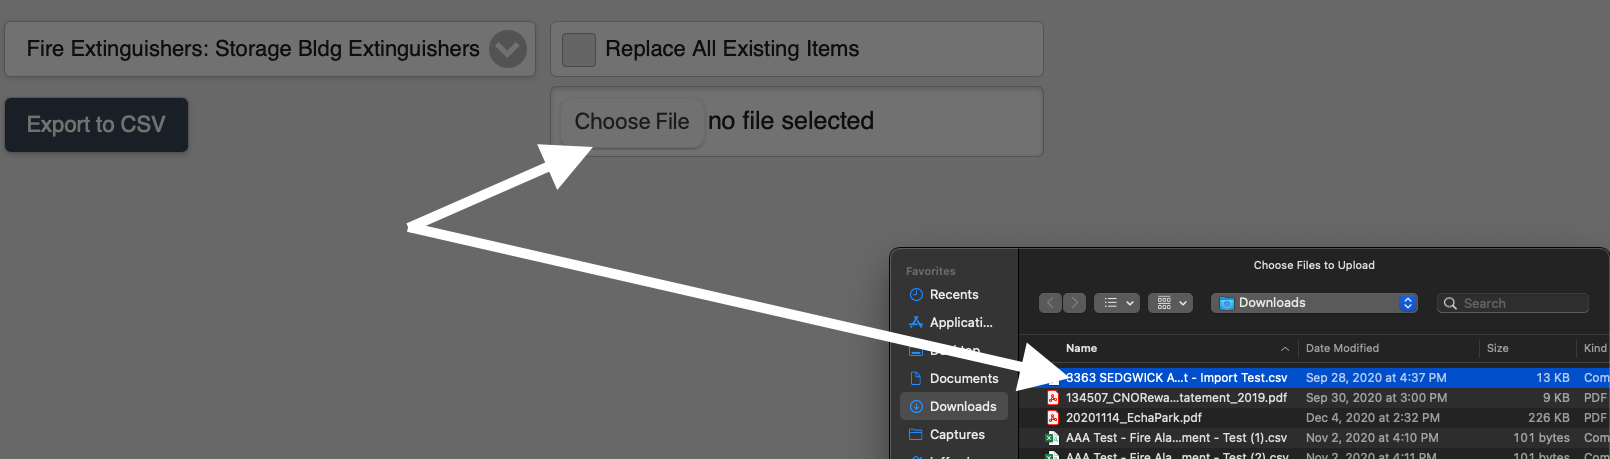 Figure 4
 7. If you want to replace all of the existing asset information on the form with new information, you can select “Replace All Existing Items” when you import the CSV file (Figure 5).
Note: Selection of “Replace Existing Files” will overwrite/delete the existing assets on the form.
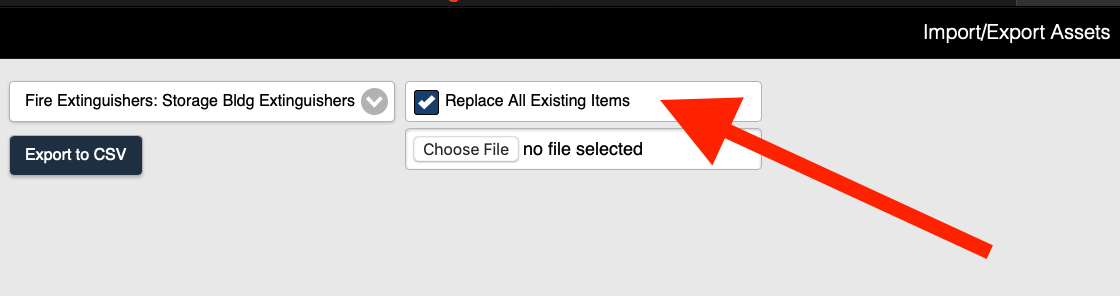 Figure 5
8. The Import CSV table for your form is displayed with the newly added assets(s) on the Import/Export Assets screen (Figure 6).
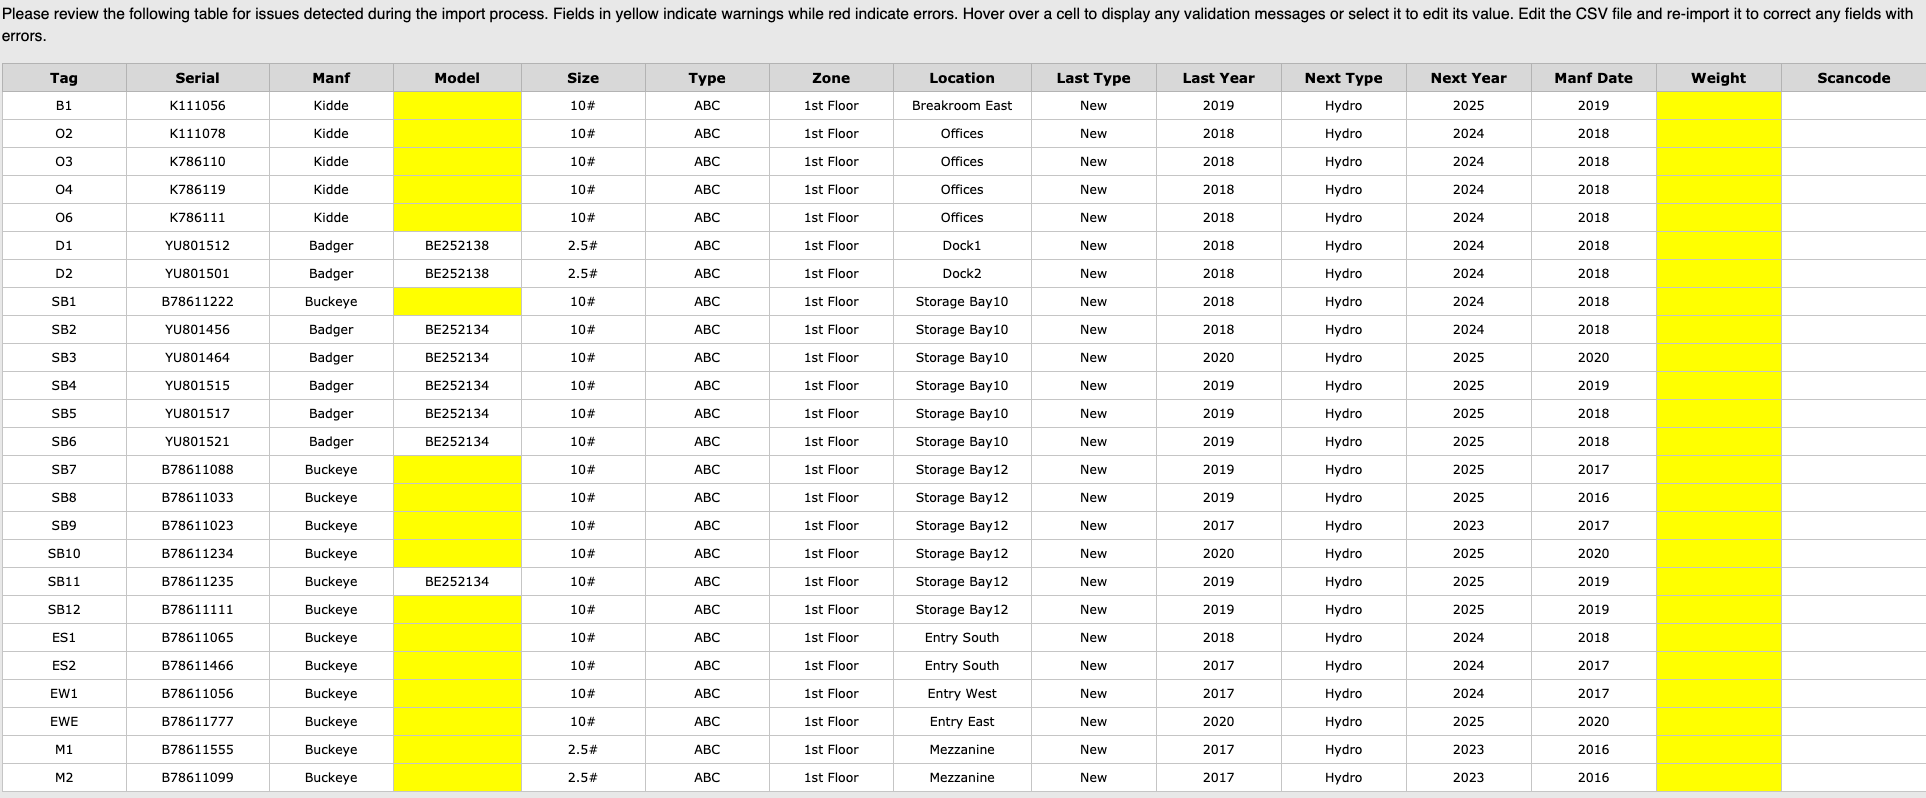 Figure 6
Note: The yellow highlighted cells on the Import/Export Assets screen indicate empty, non-required cells that can be used if desired. Red highlighted cells indicate errors. If Red highlighted errors are displayed, you must edit the CSV file and import it again to resolve the errors. Refer to What are the Errors on the Import/Export Assets Screen? for details on resolving import errors.
9. From the Location Summary page, select the form.
10. The new assets are now included in the Fire Extinguisher Inspection List (Figure 7).
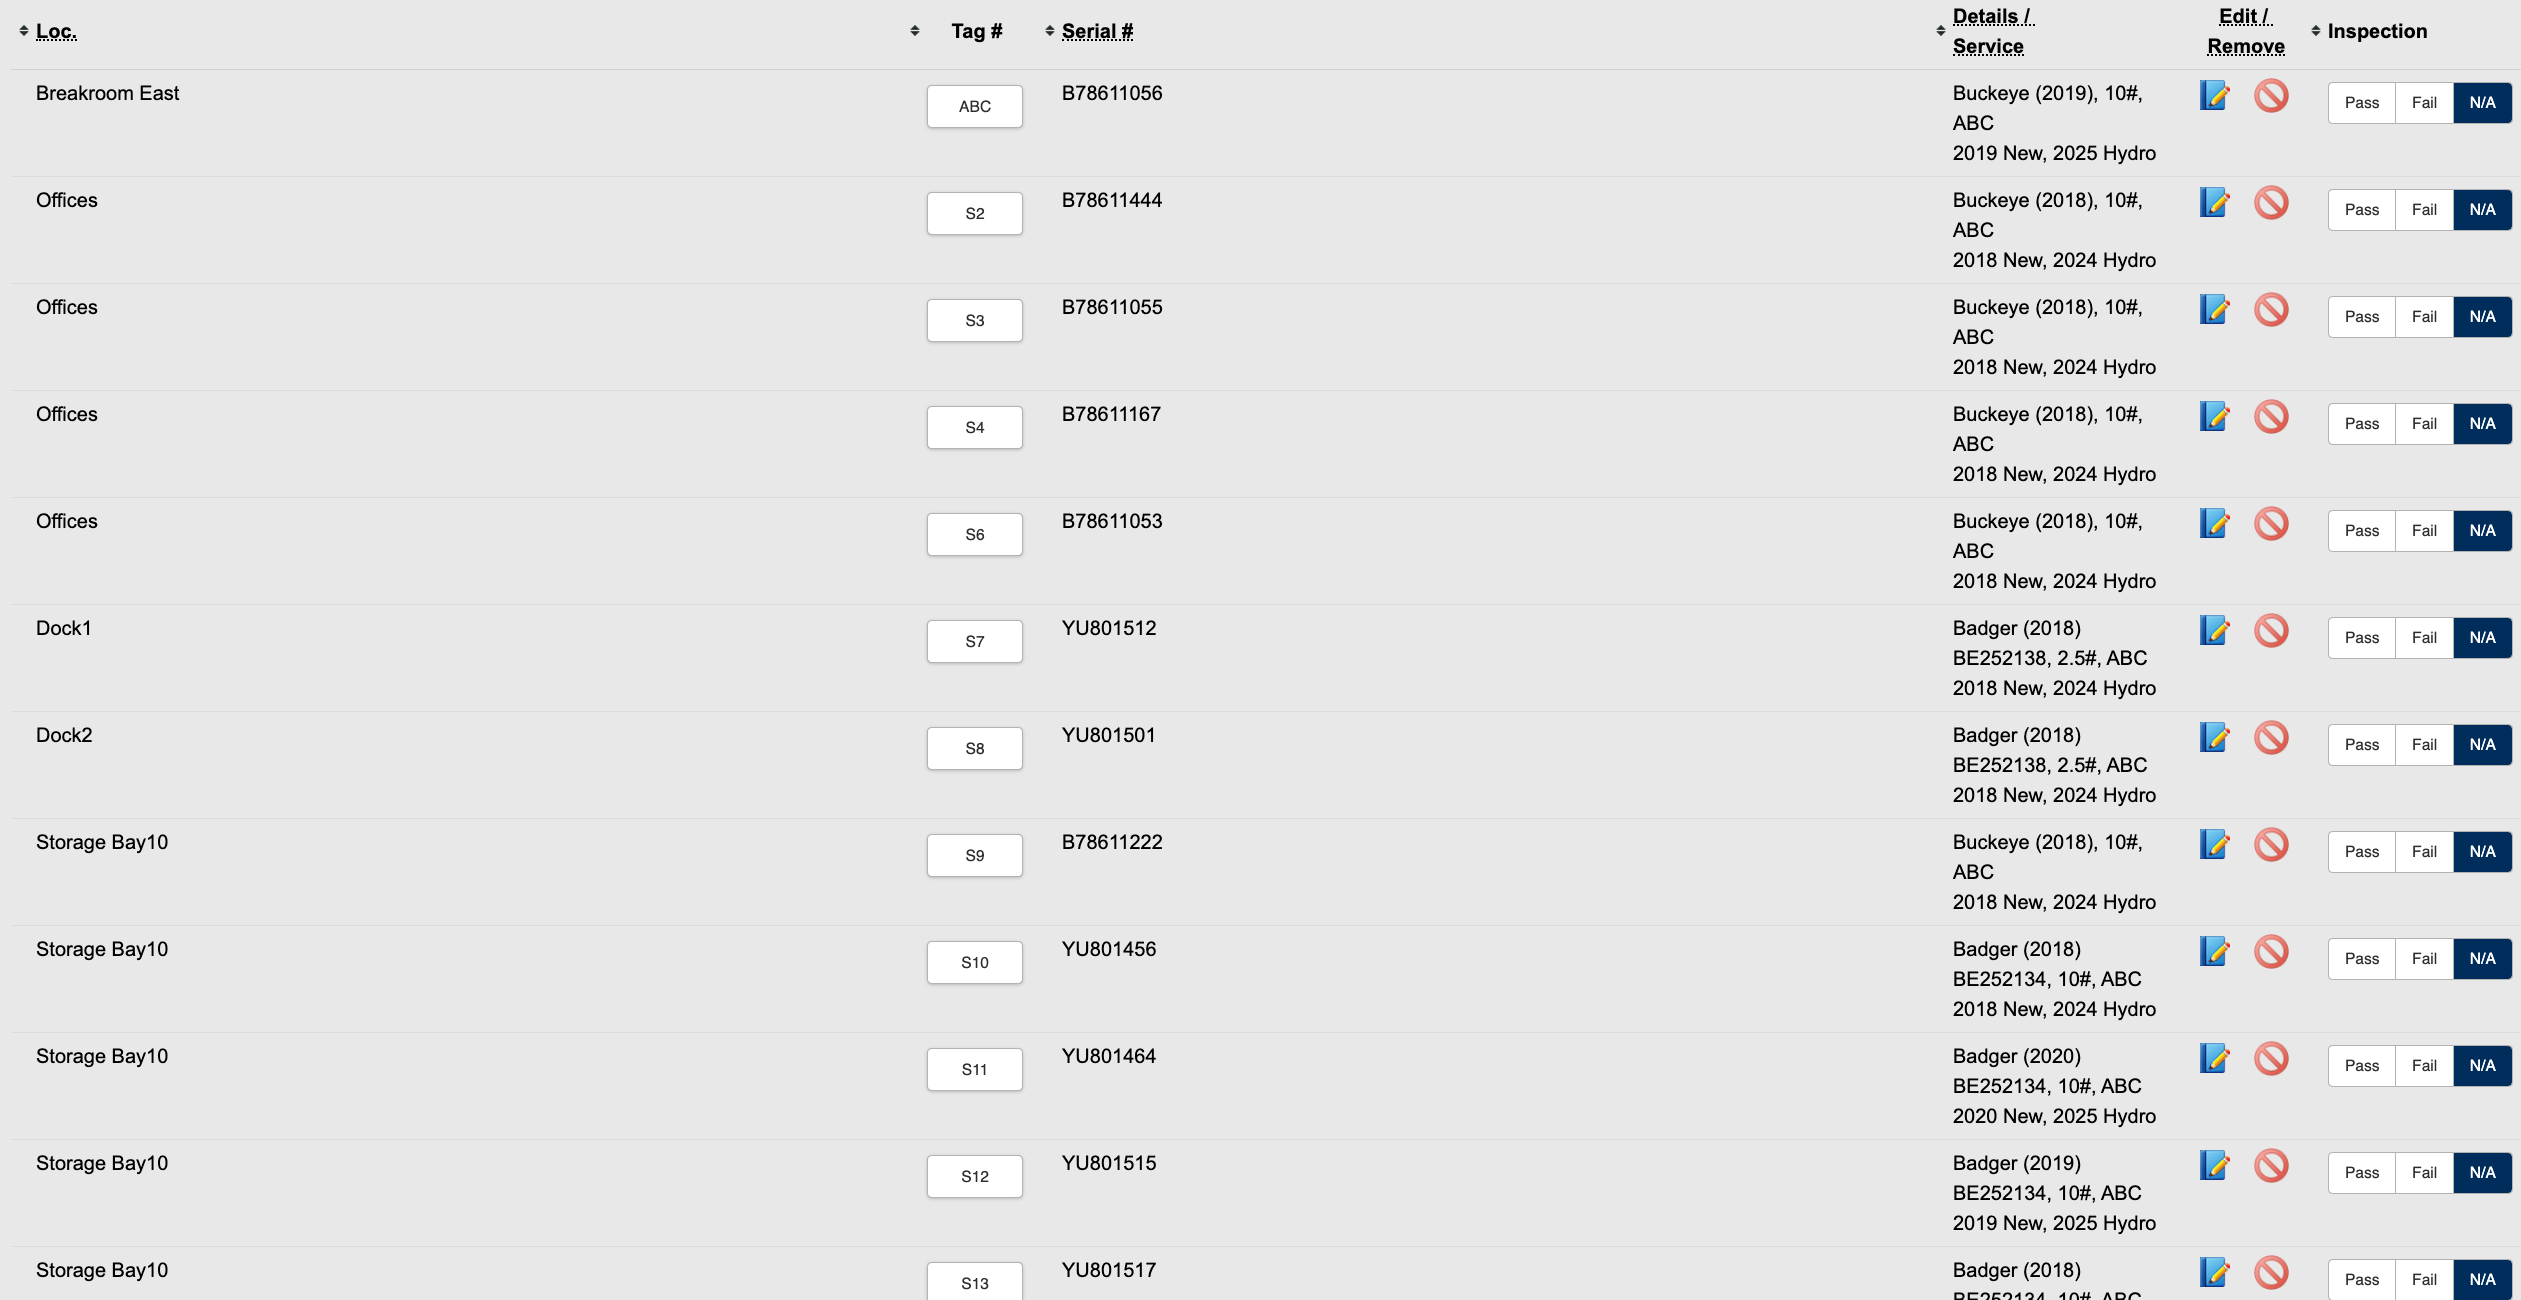 Figure 7
How to Import Assets into an Assets Form
How to Import Assets into a Fire Alarm Supplementary Form
How to Import Assets into a Fire Extinguishers Inspection List (Form)
How to Import Assets into a Control Valves Form
How to Import Assets into a Device Supplement Form
How to Import Assets into a Security Alarm Assets Form
Was this article helpful?