Deploy a Custom Form
- 21 Jan 2022
- 2 Minutes to read
- Contributors

- Print
- DarkLight
Deploy a Custom Form
- Updated on 21 Jan 2022
- 2 Minutes to read
- Contributors
- Print
- DarkLight
Article summary
Did you find this summary helpful?
Thank you for your feedback!
How to Deploy a Custom Form
Once a new form has been created using the template, you can Deploy the Custom Form to your system for use in the field.
1. Select Deploy or Save & Deploy (dependent upon if changes to the template have been saved) on the Define Templates page (Figure 1).
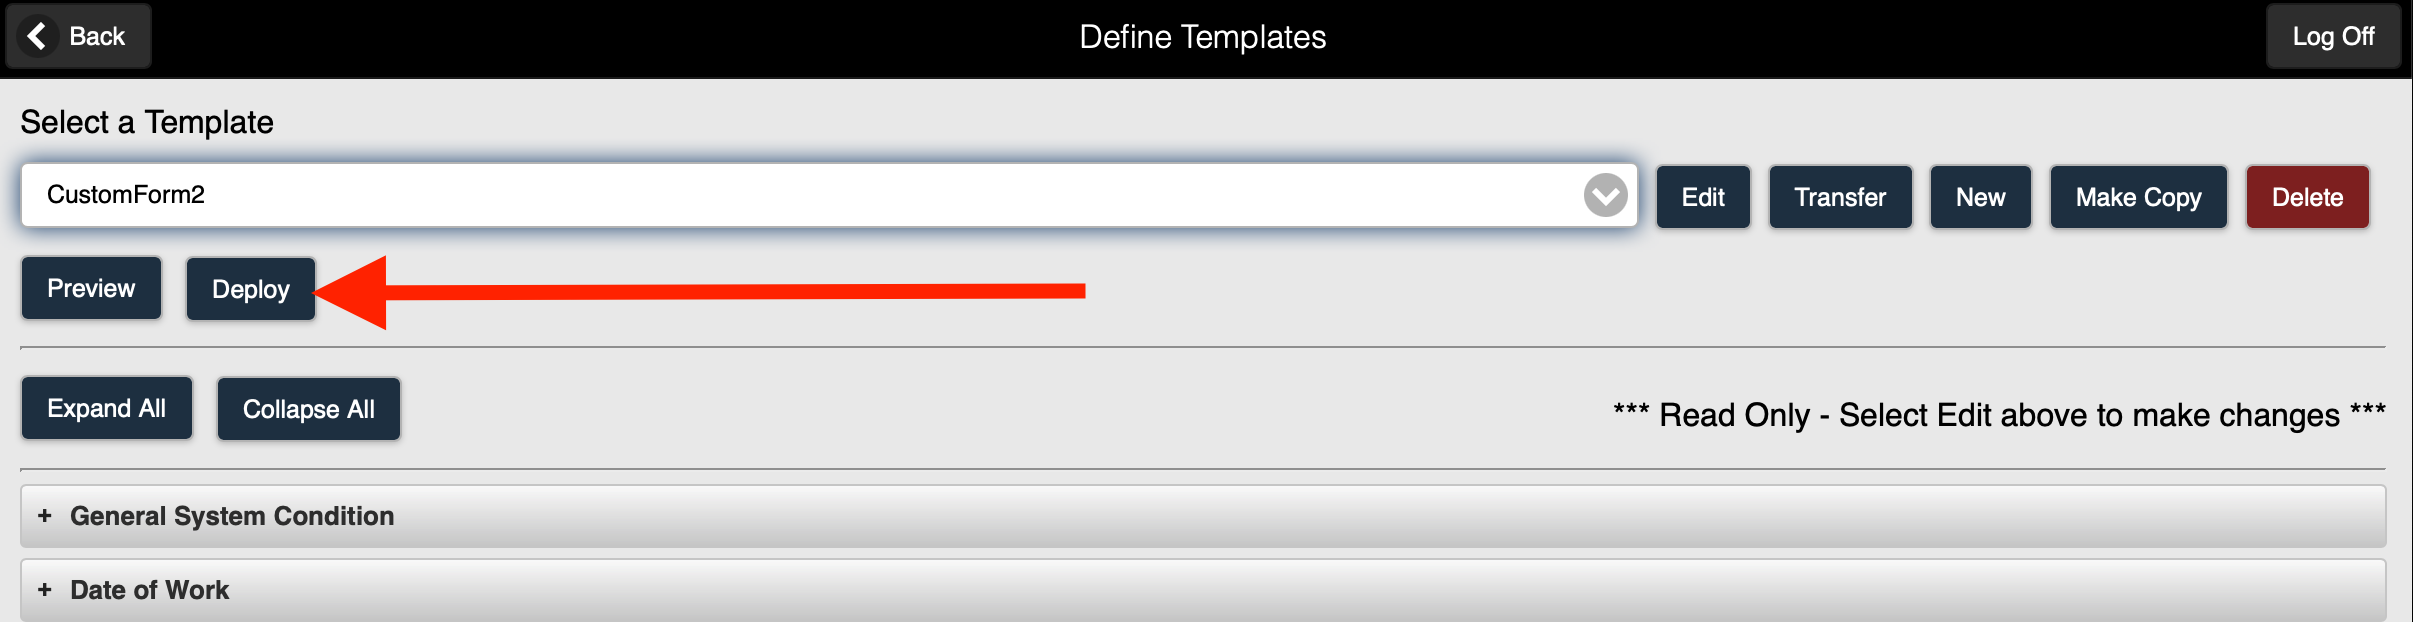 Figure 1
Note: You must resolve all Error Messages before you can deploy a form.
2. The Form page is displayed (Figure 2).
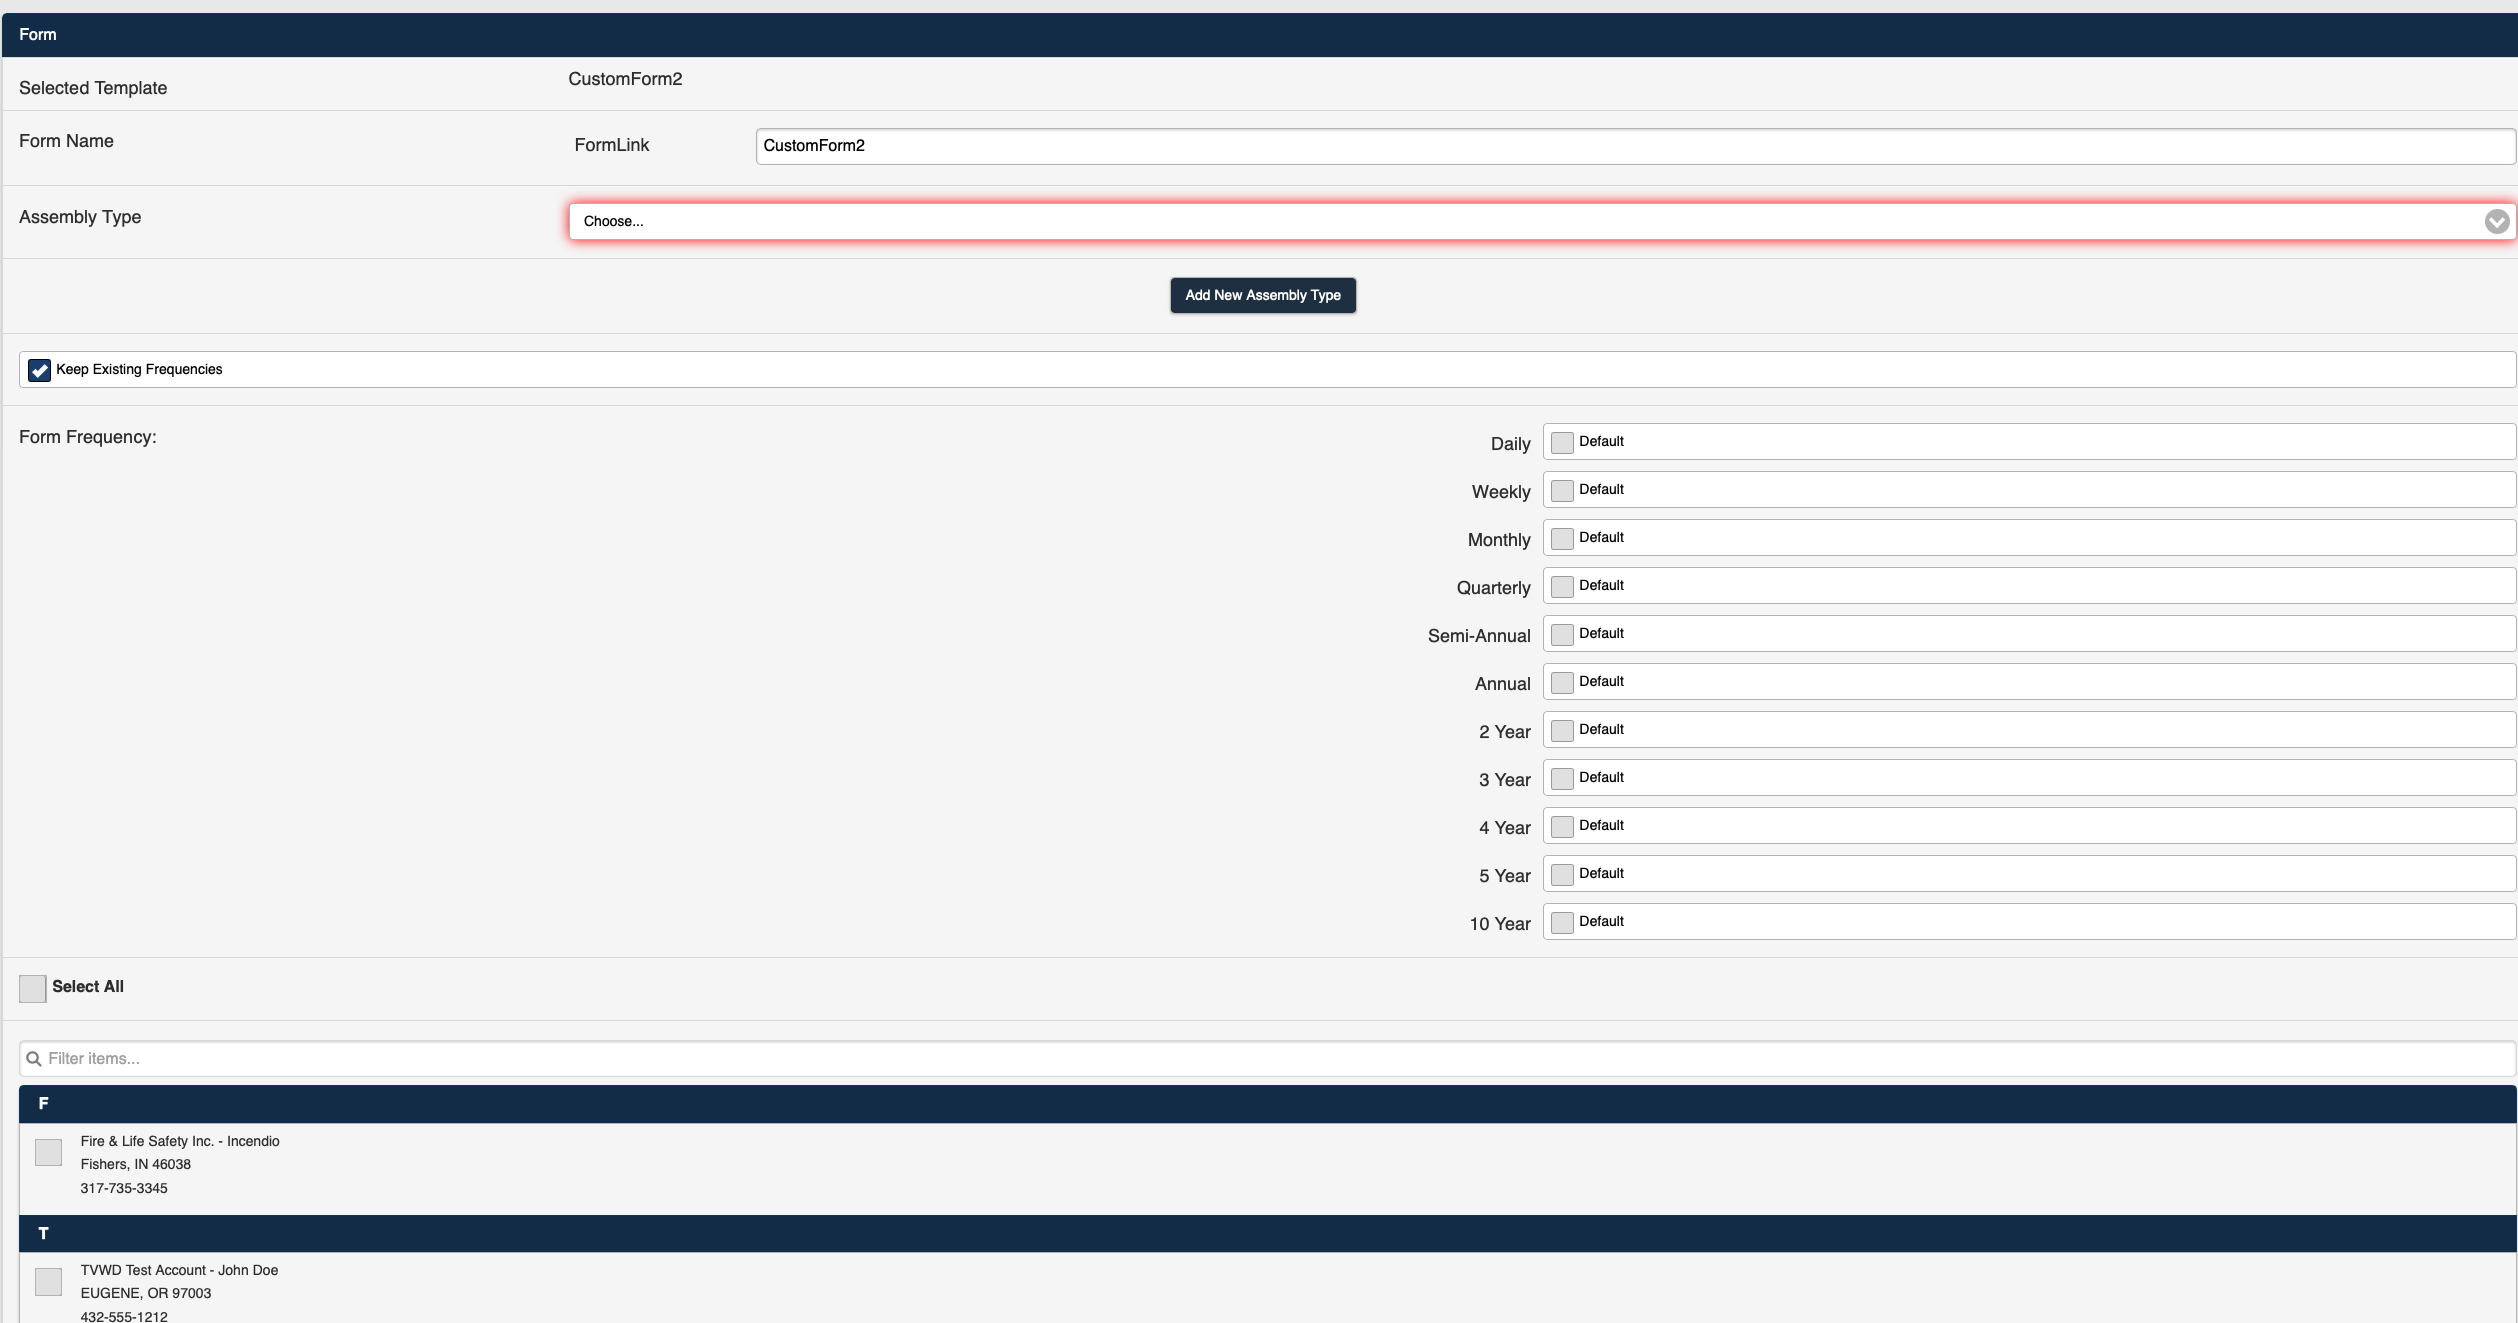 Figure 2
3. Select an Assembly Type from the drop-down selection list (Figure 3).
.png) Figure 3
Figure 3
Note: You can also select the Add a New Assembly Type option (Figure 4) from the drop-down selection list to add a new Assembly Type. Refer to the Add a New Assembly Type Section of this article for details on adding new Assembly Types.
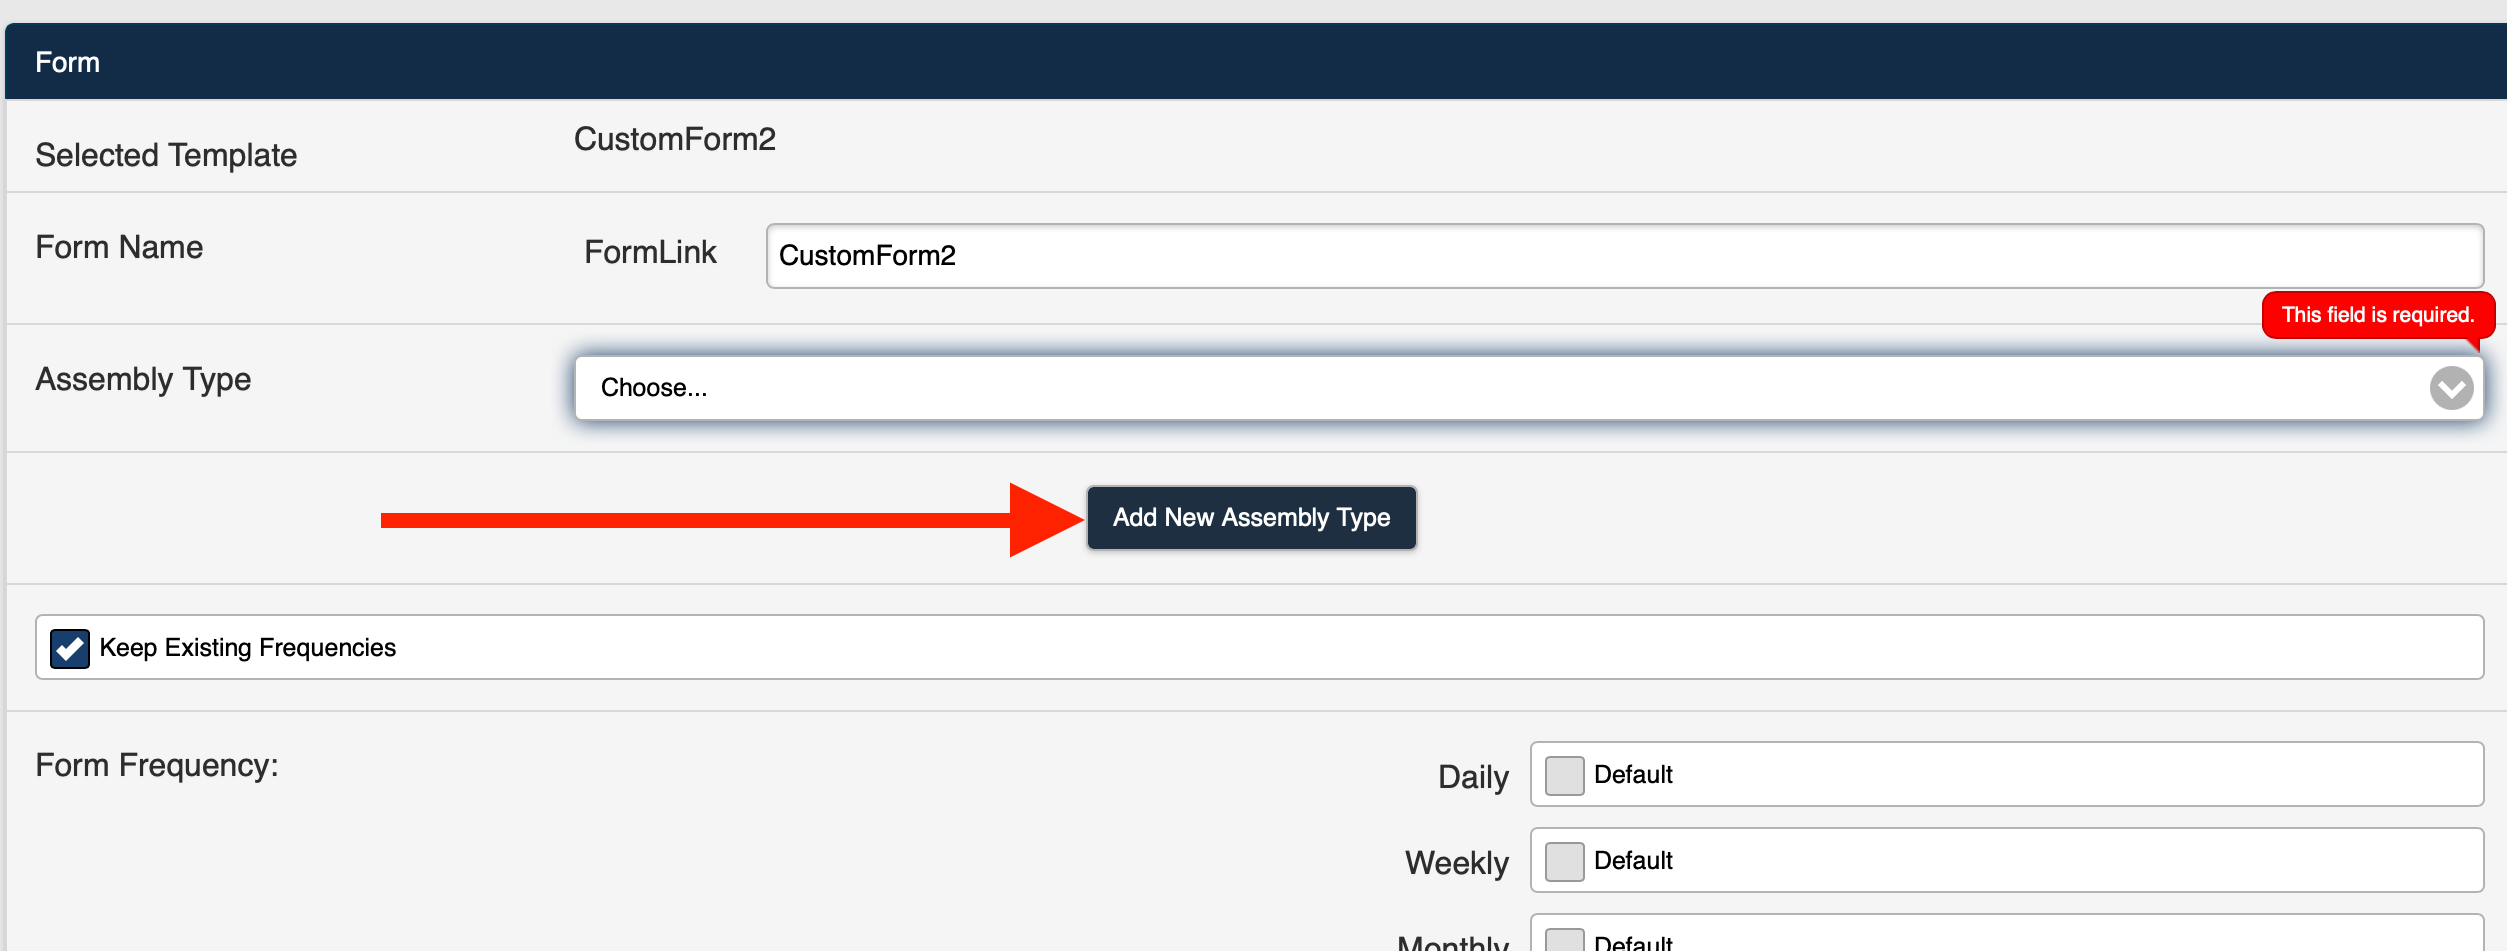 Figure 4
4. If the selected Assembly Type is included in an Account, The Default Frequencies for the Assembly are now available using the Load Default Frequencies button (Figure 5).
.png) Figure 4
Figure 4
Note: If there are no Default Frequencies established for an Account, the Default Frequencies button for that Account will not be enabled and the label will read No Default Frequencies (Figure 4).
5. Select the Load Default Frequencies button for the selected Assembly (Figure 5).
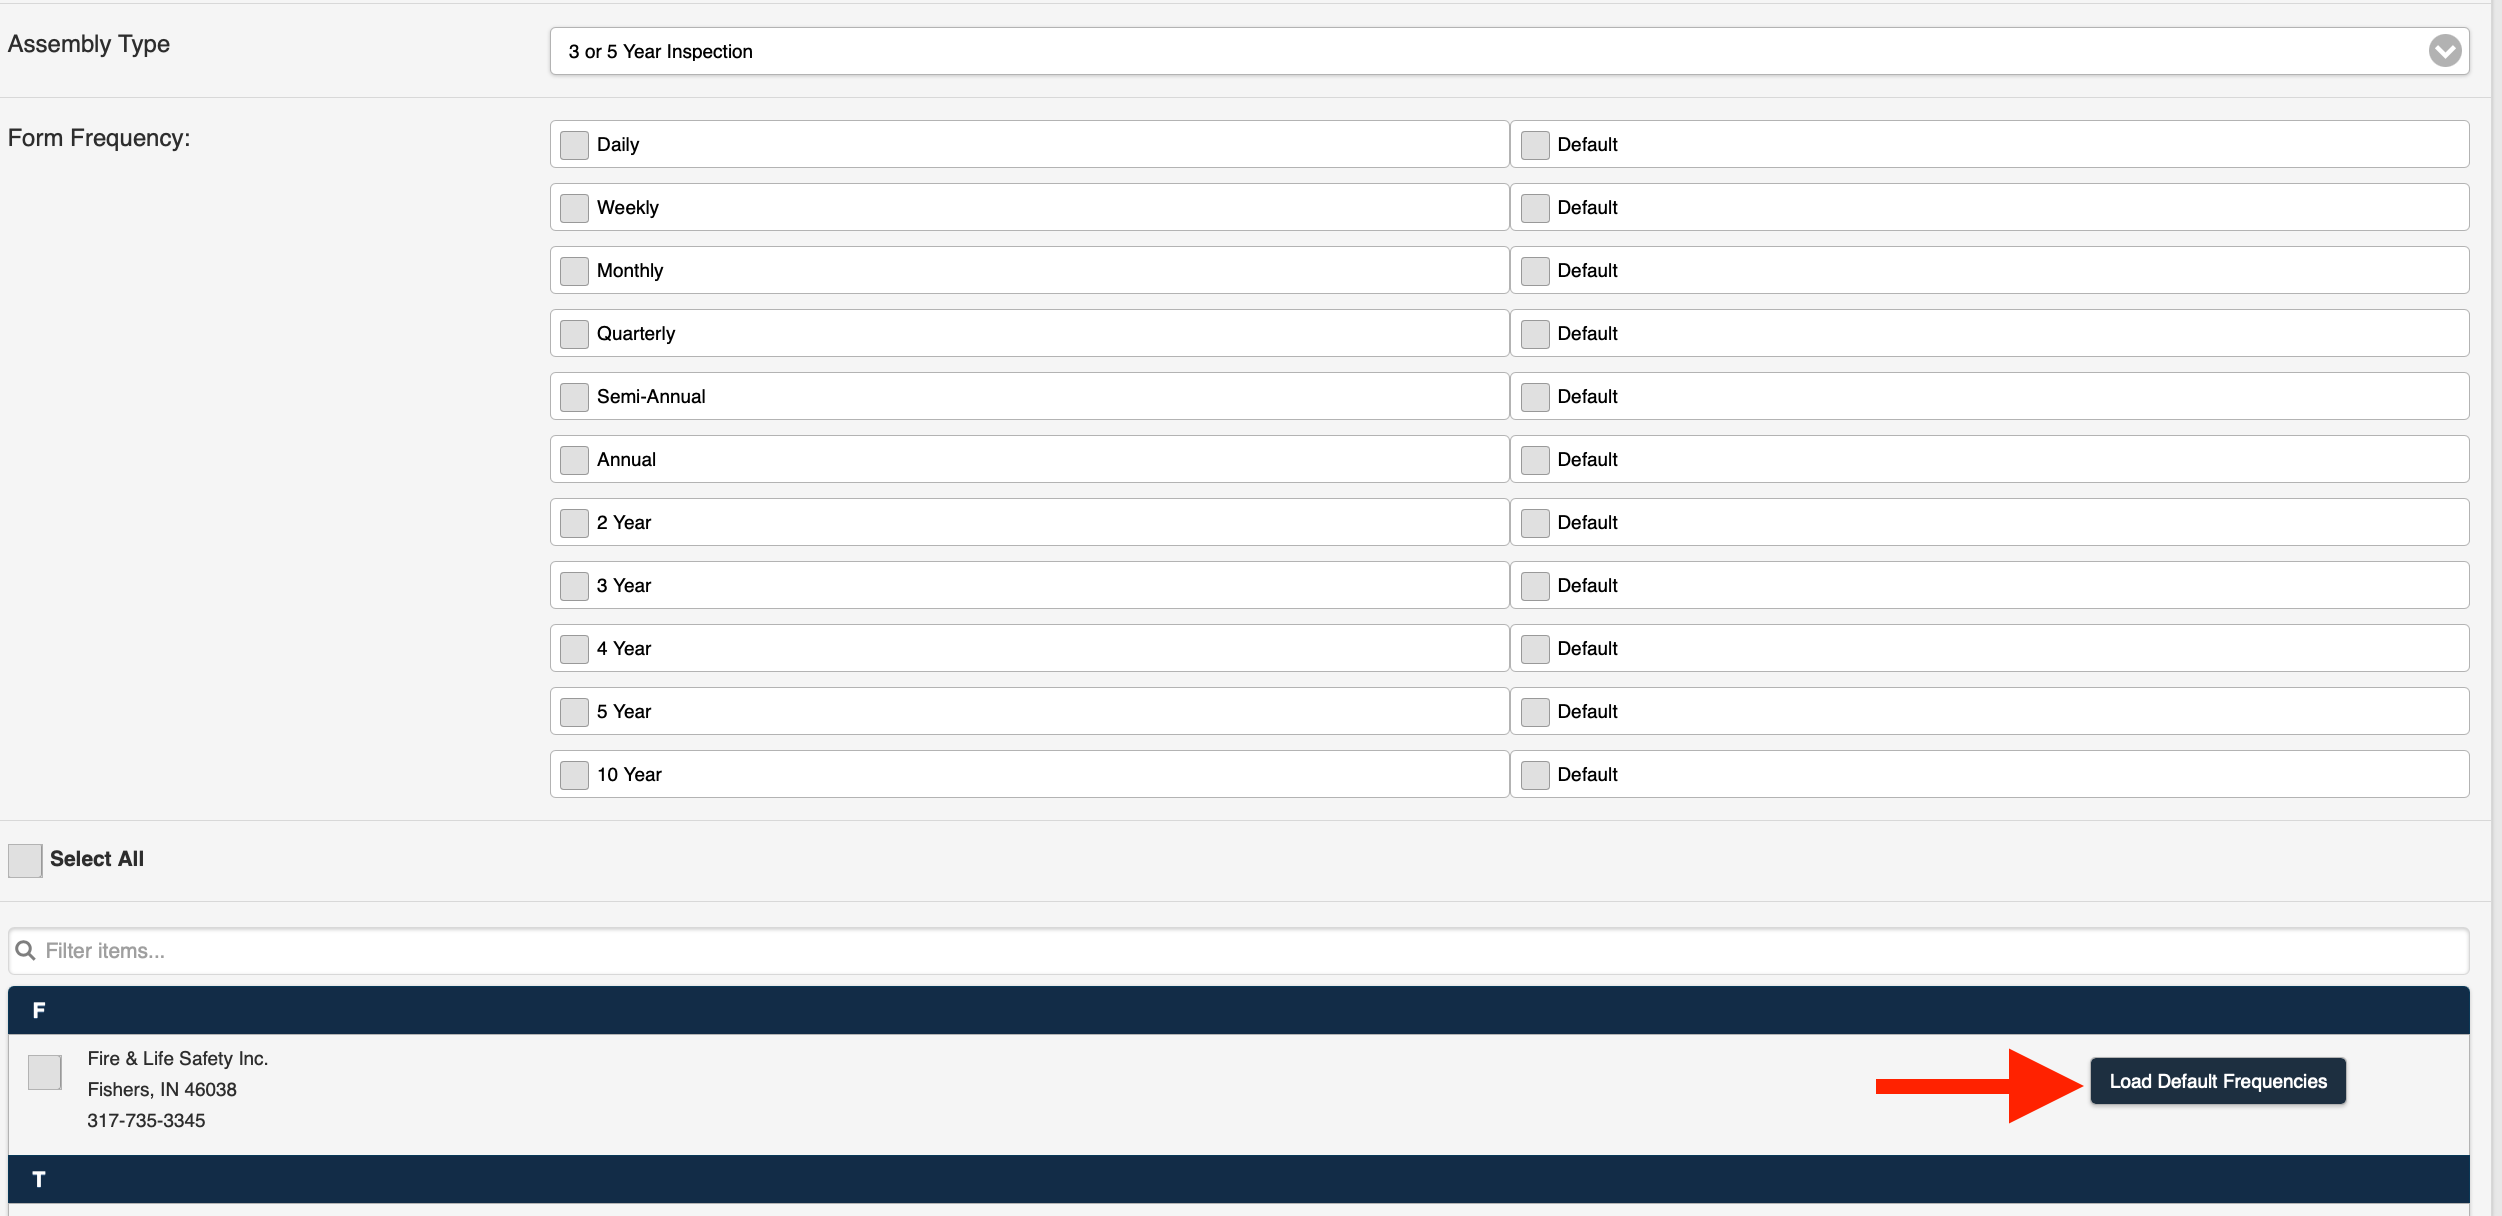 Figure 5 6. The Default Frequencies for the selected Assembly are displayed (Figure 6).
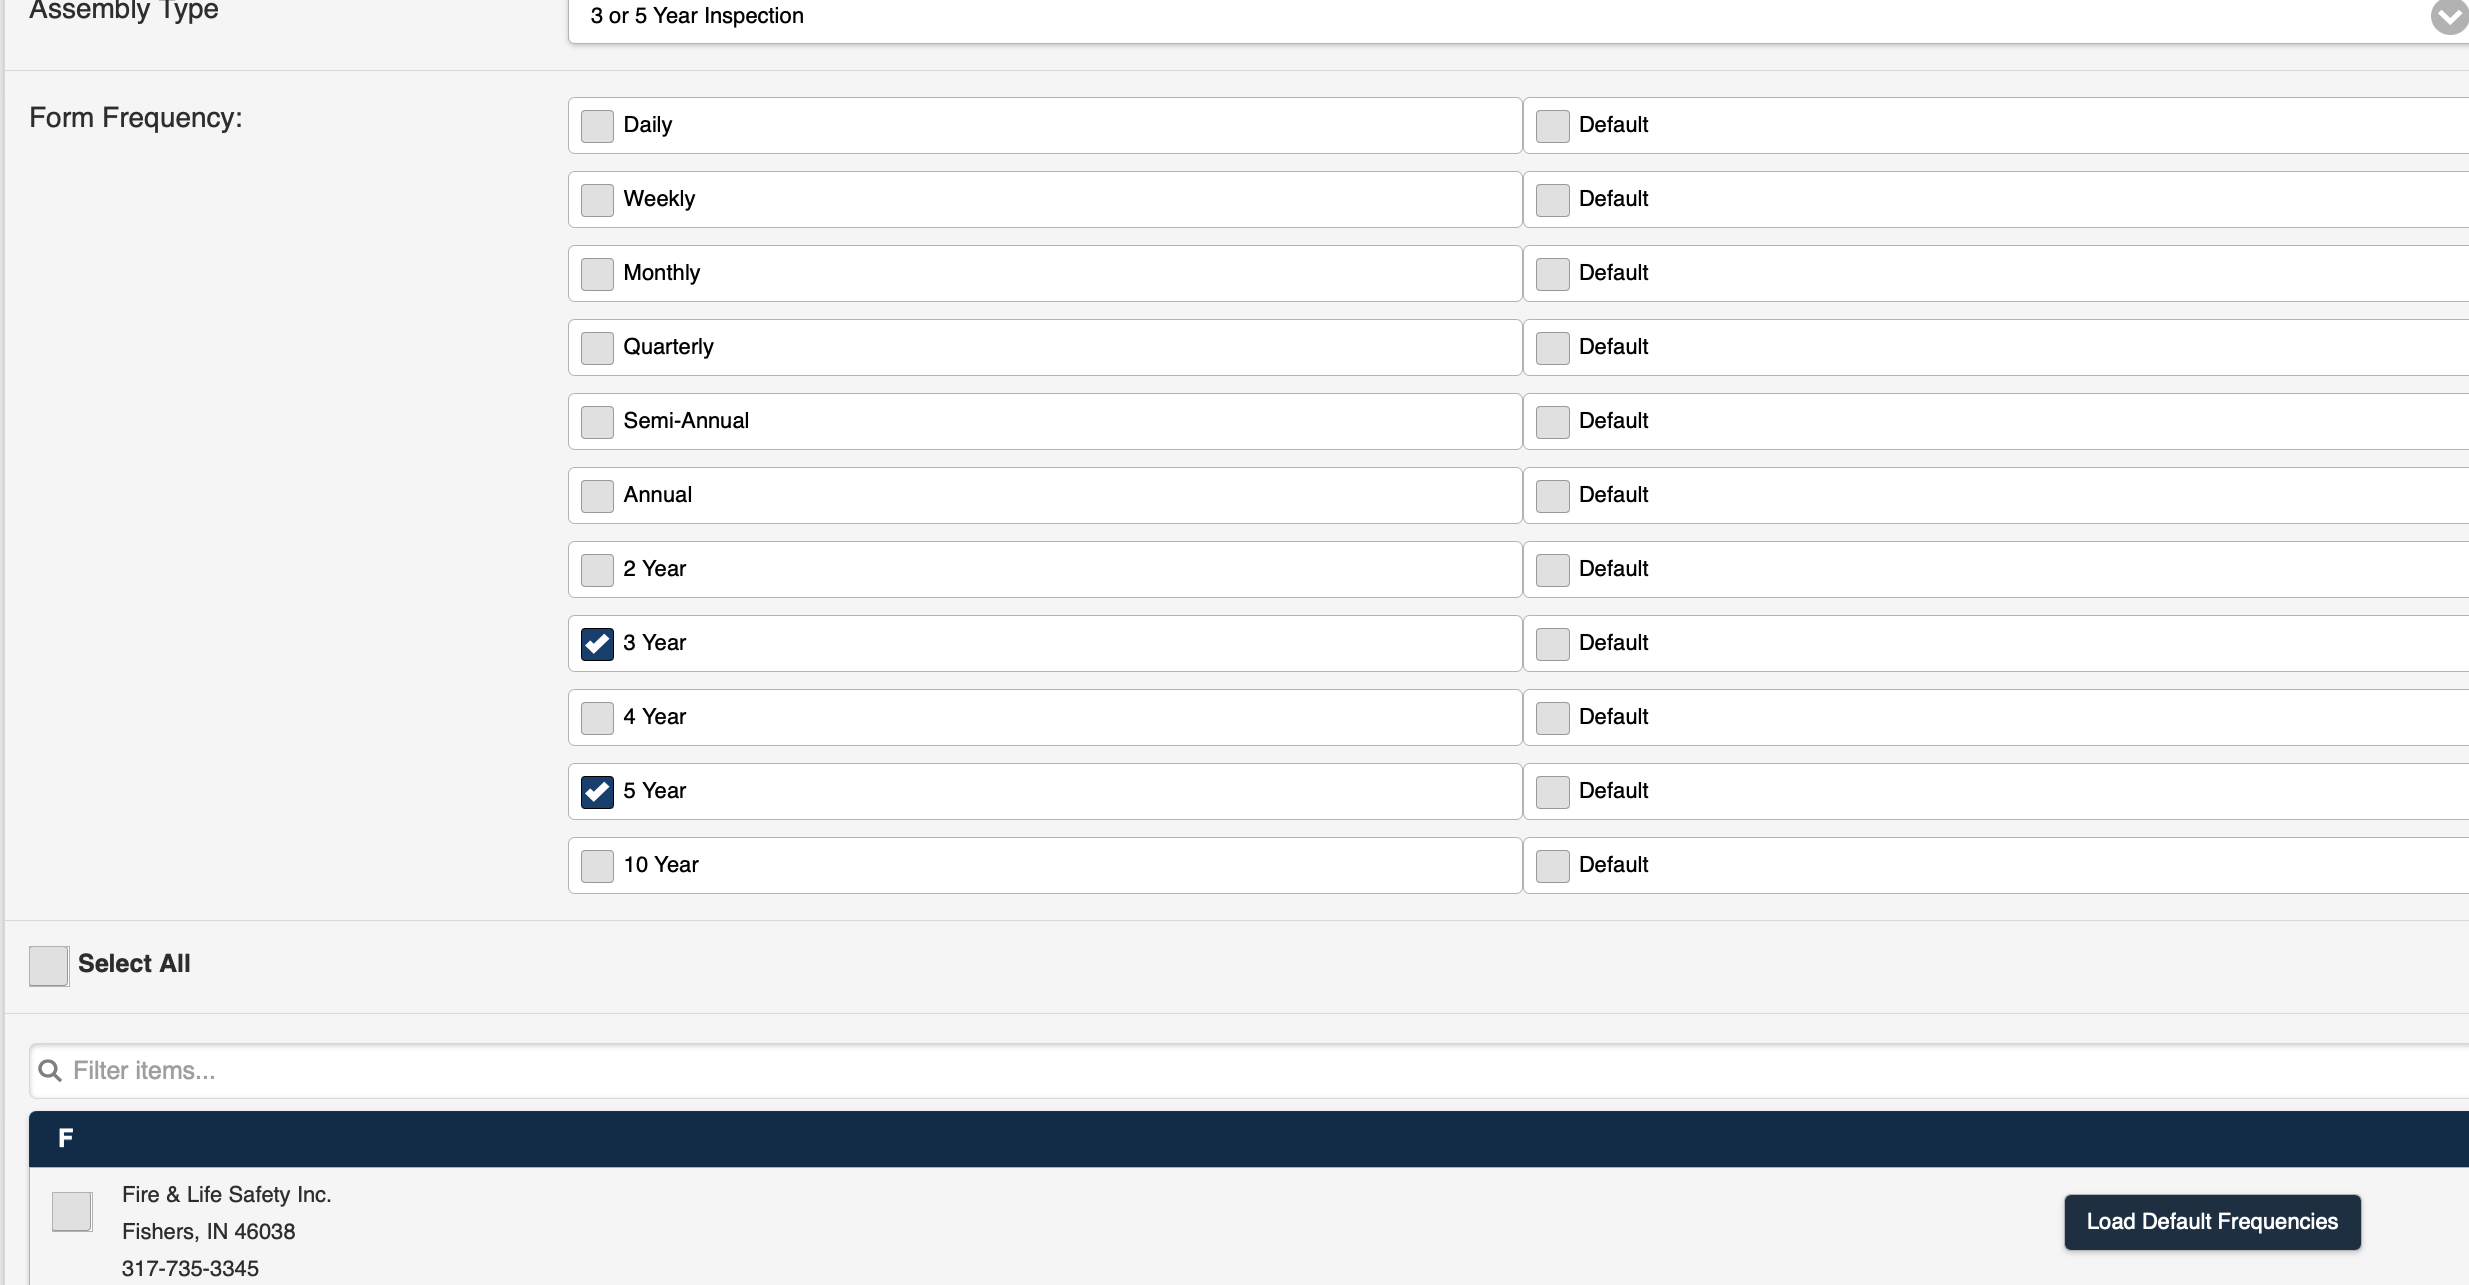 Figure 6
7. Select the Account(s) in which to deploy the form (Figure 7).
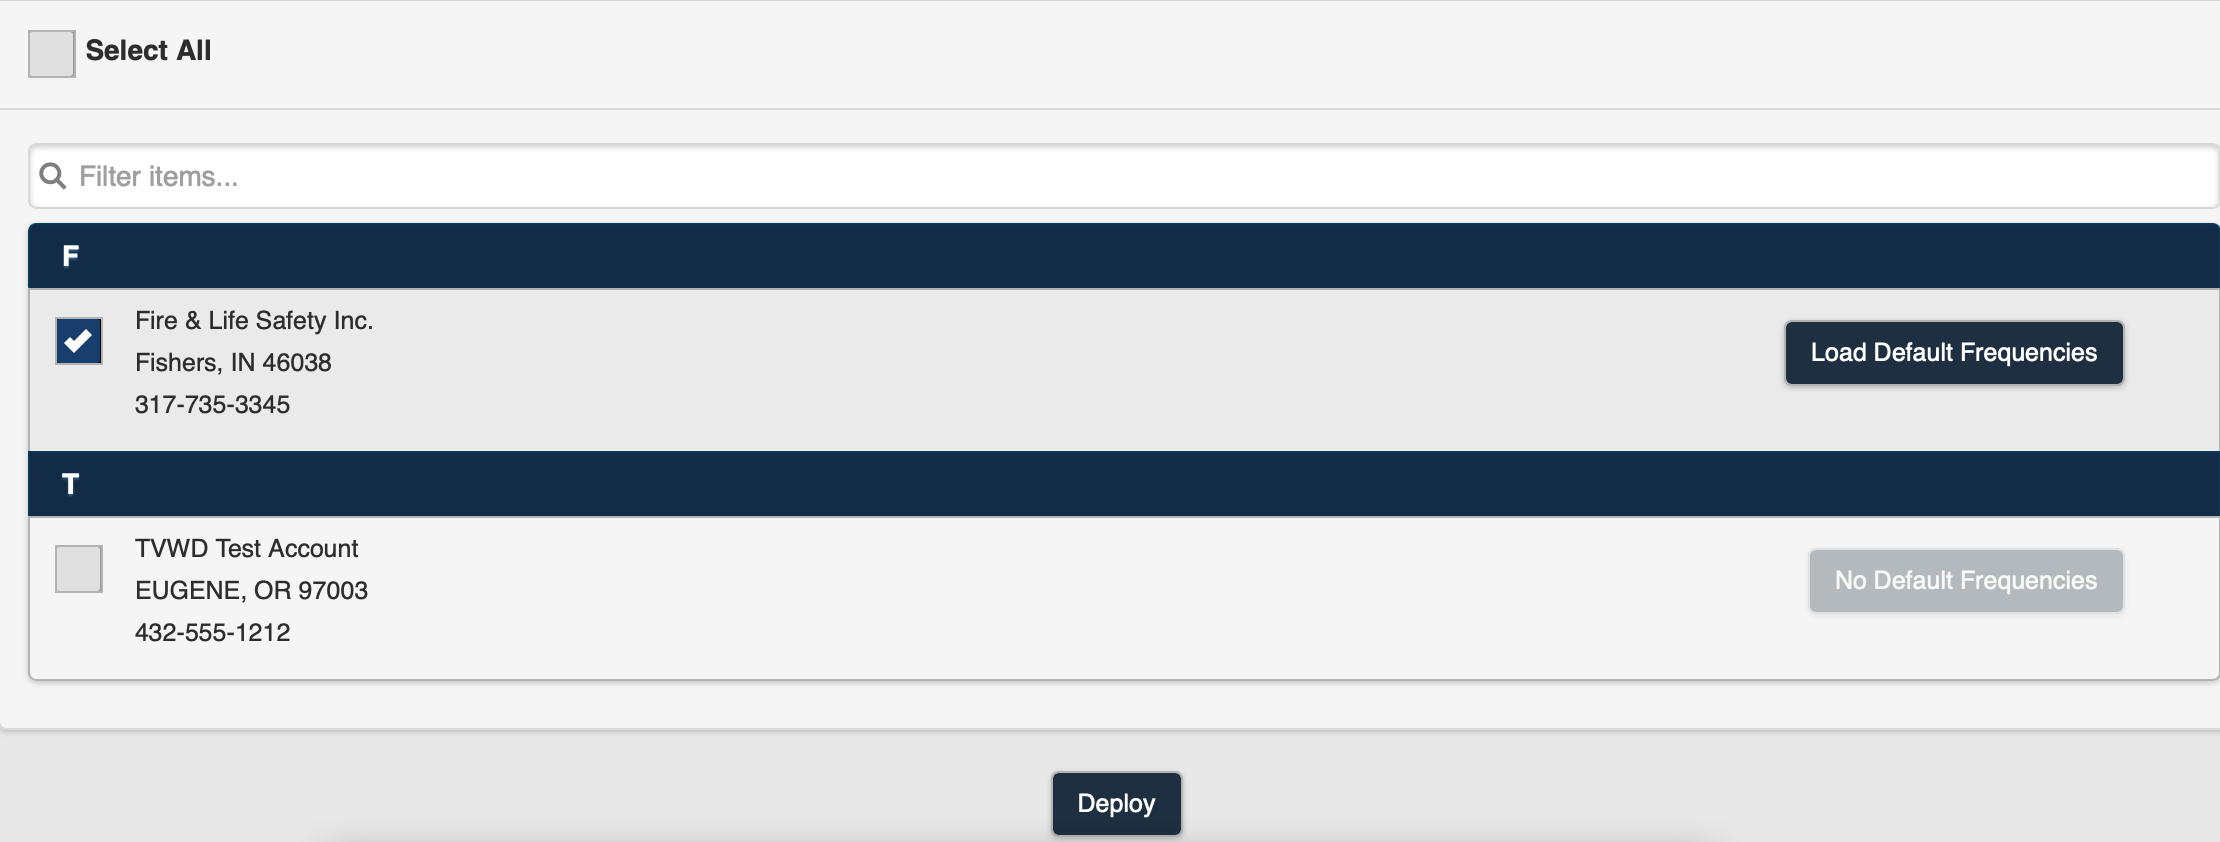 Figure 7Note: You can also use the Select All checkbox to deploy the form to all Accounts (Figure 7).
Note: The Filter option allows you to filter Accounts by name (Figure 7).
8. Select the Deploy button (Figure 8).
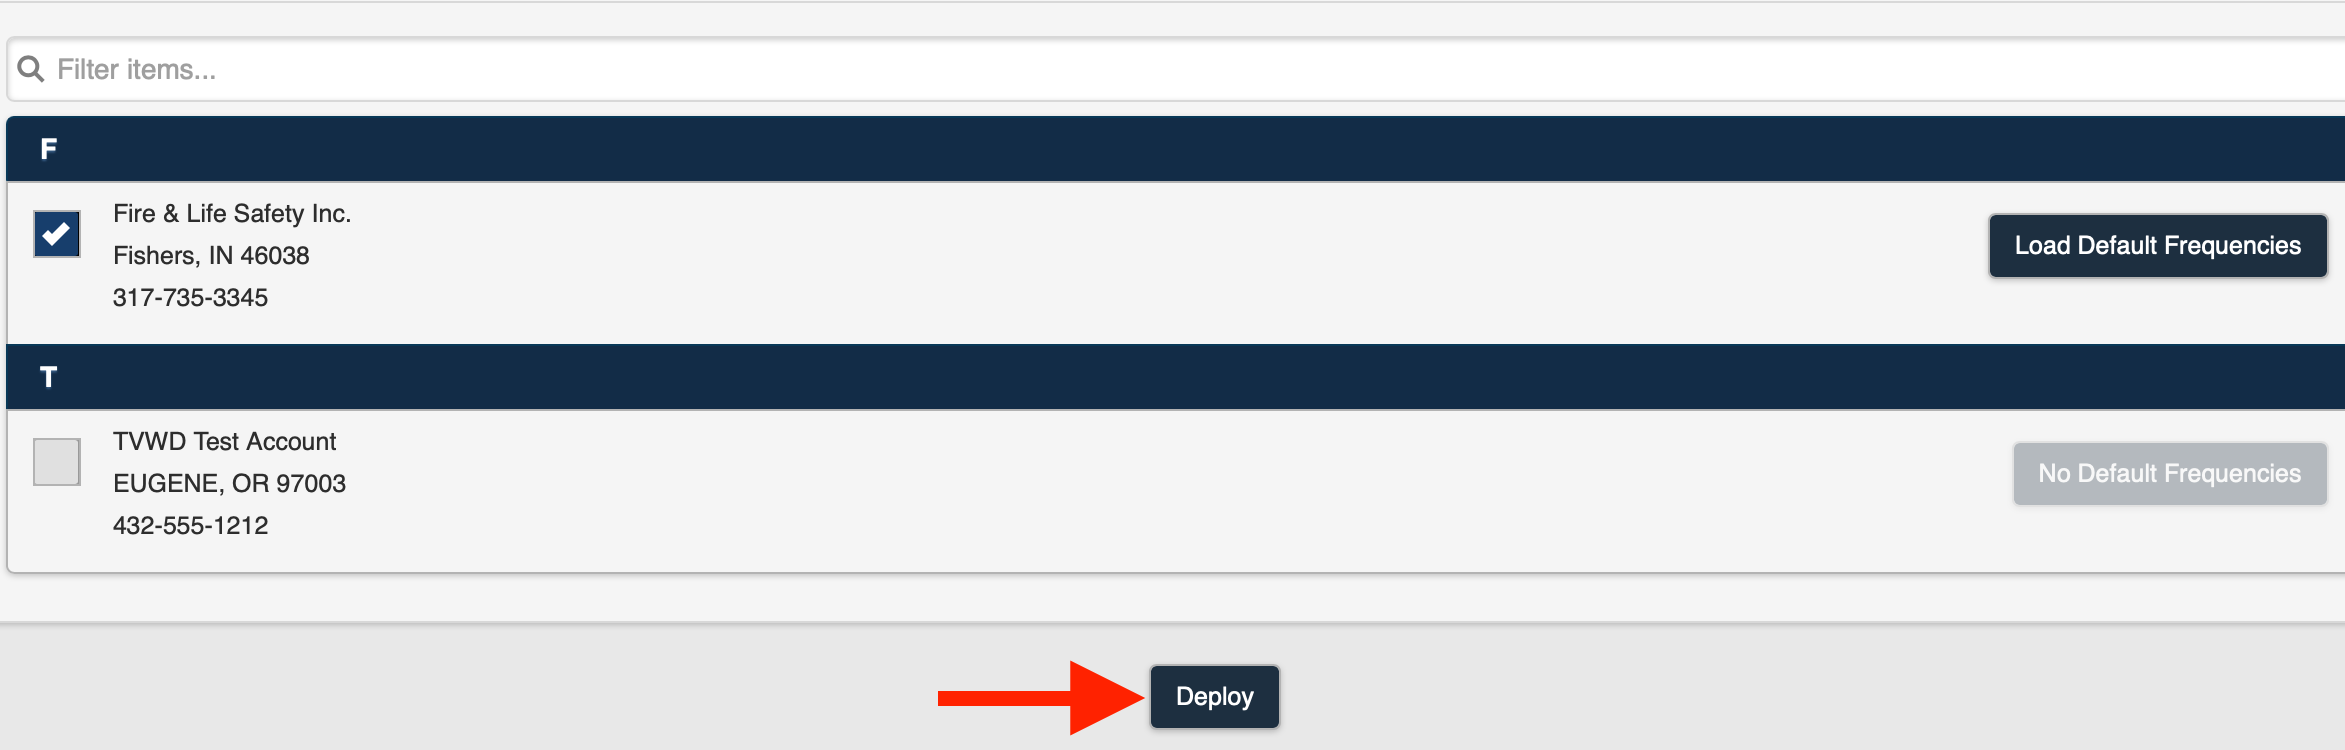 Figure 8
9. The form is deployed to the selected Account(s).
Note: If you select more than one Account when you deploy the form, any Default Frequencies will be transferred to all selected Accounts. For Example, If you select both Accounts above and then deploy the form, the TVWD Test Account will then include the Default Frequencies from the Fire & Life Safety Inc. Account the next time the form is accessed.
Adding a New Assembly Type
1. Select Add a New Assembly Type from the Assembly type drop-down selection list (Figure 1).
.png) Figure 1
Figure 1
2. The Form page is displayed (Figure 2).
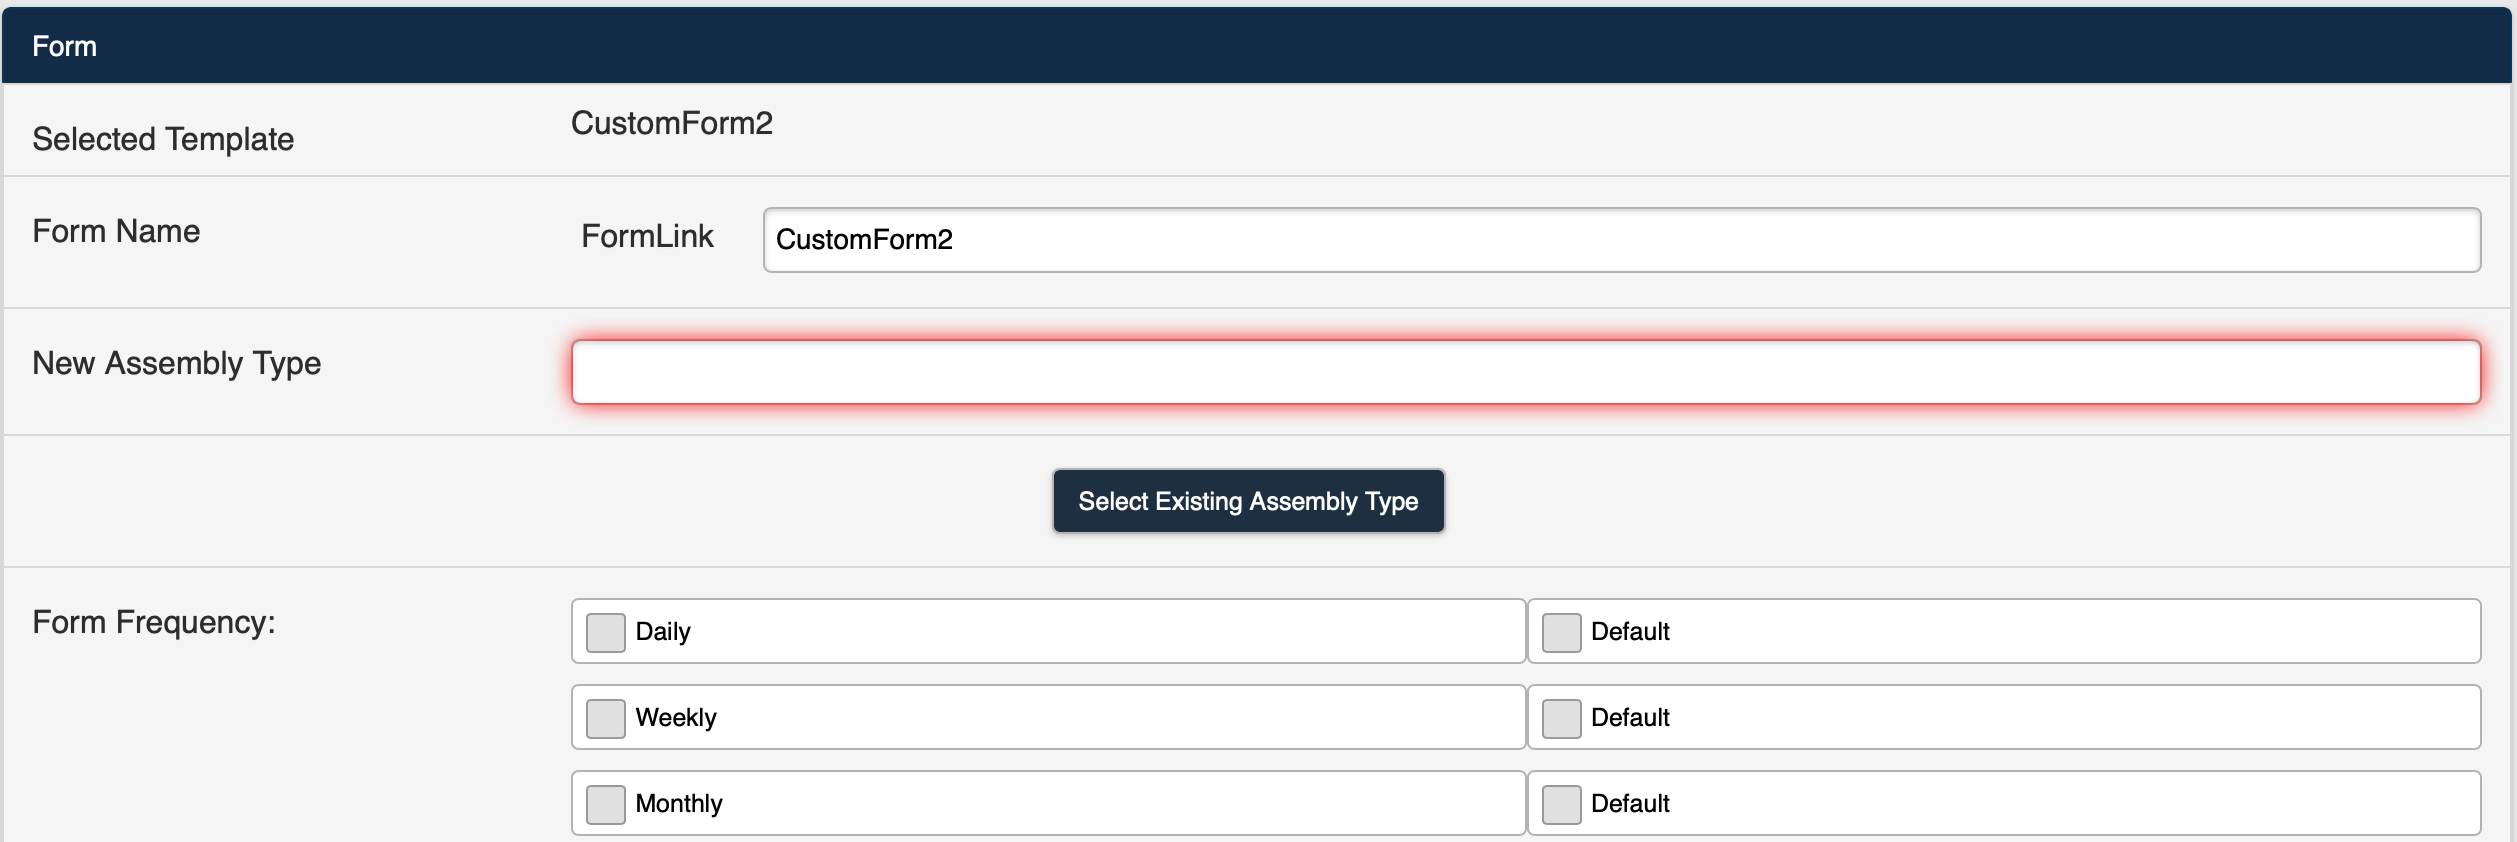 Figure 2
3. Enter a name in the New Assembly Type field (Figure 3).
Note: The Assembly Type name must be unique. If the name entered is not unique, an error message will be displayed.
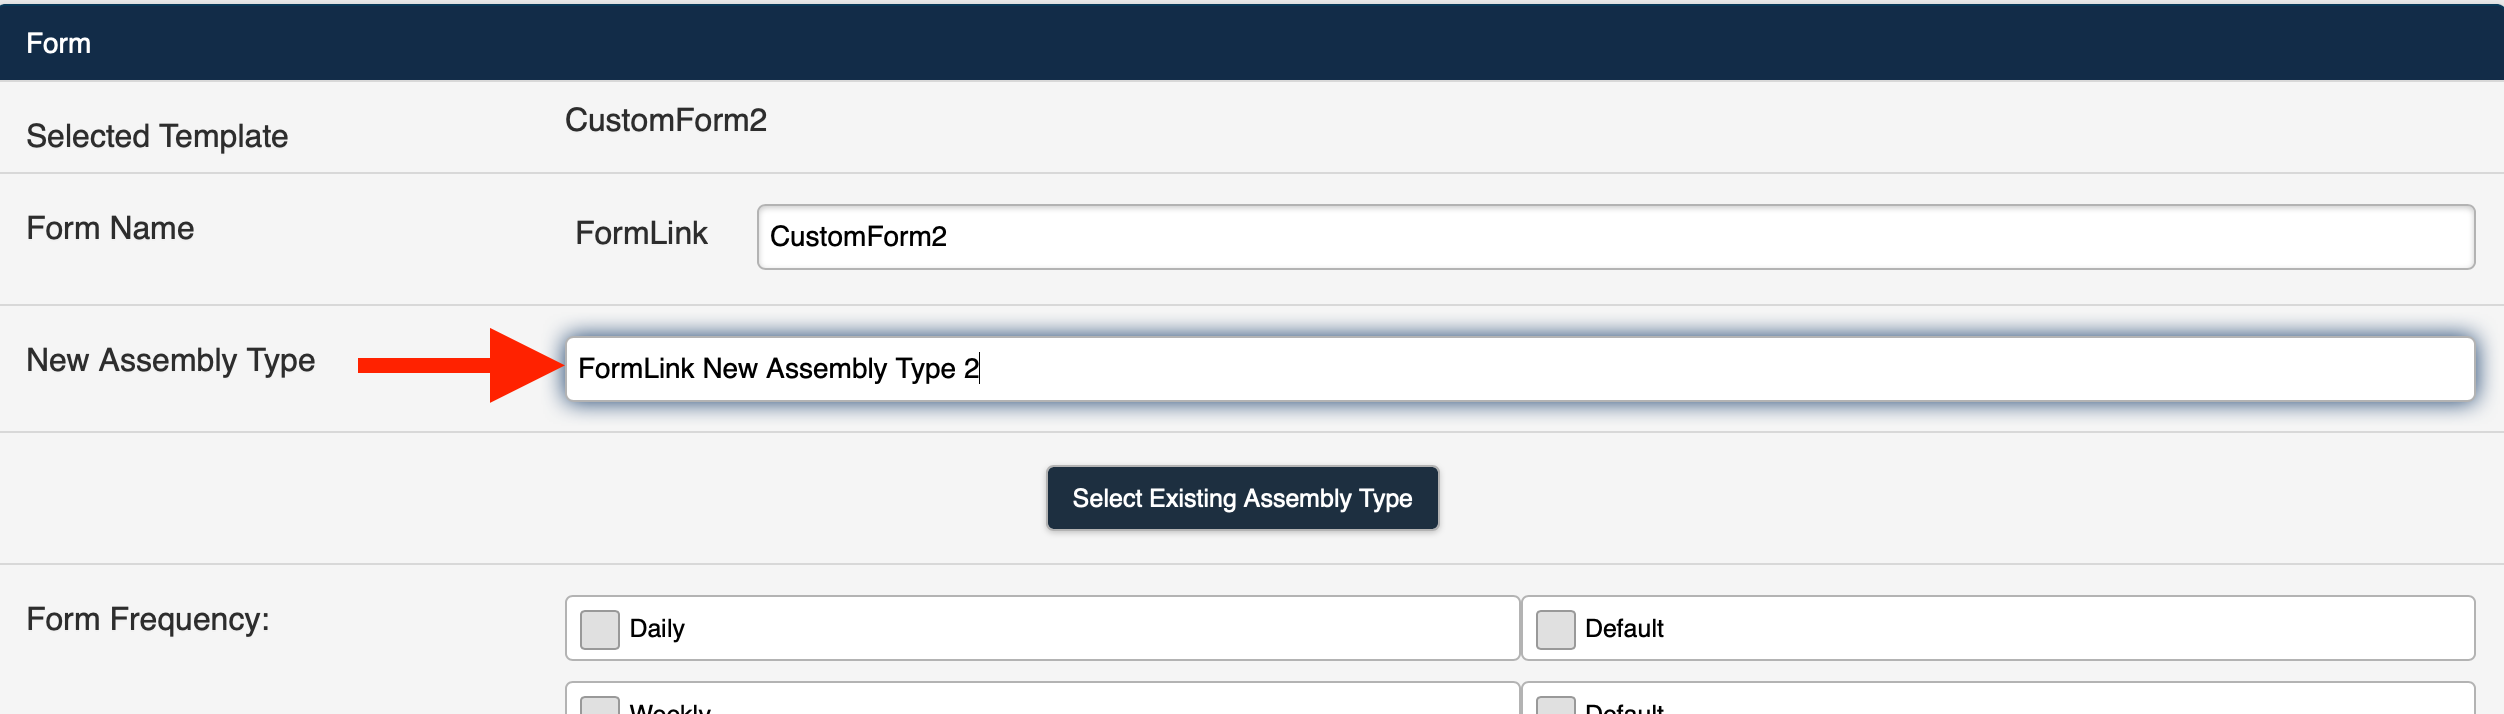 Figure 3
4. You can select the desired Form Frequencies and Default Frequencies at this time as described in the Setting Default Frequencies section of this article.
Note: It is not required that you add Form Frequencies to create the new Assembly Type.
5. Deploy the Form.
6. The new Assembly Type will be displayed in the Assembly Type drop-down selection list the next time the Form page is accessed (Figure 4).
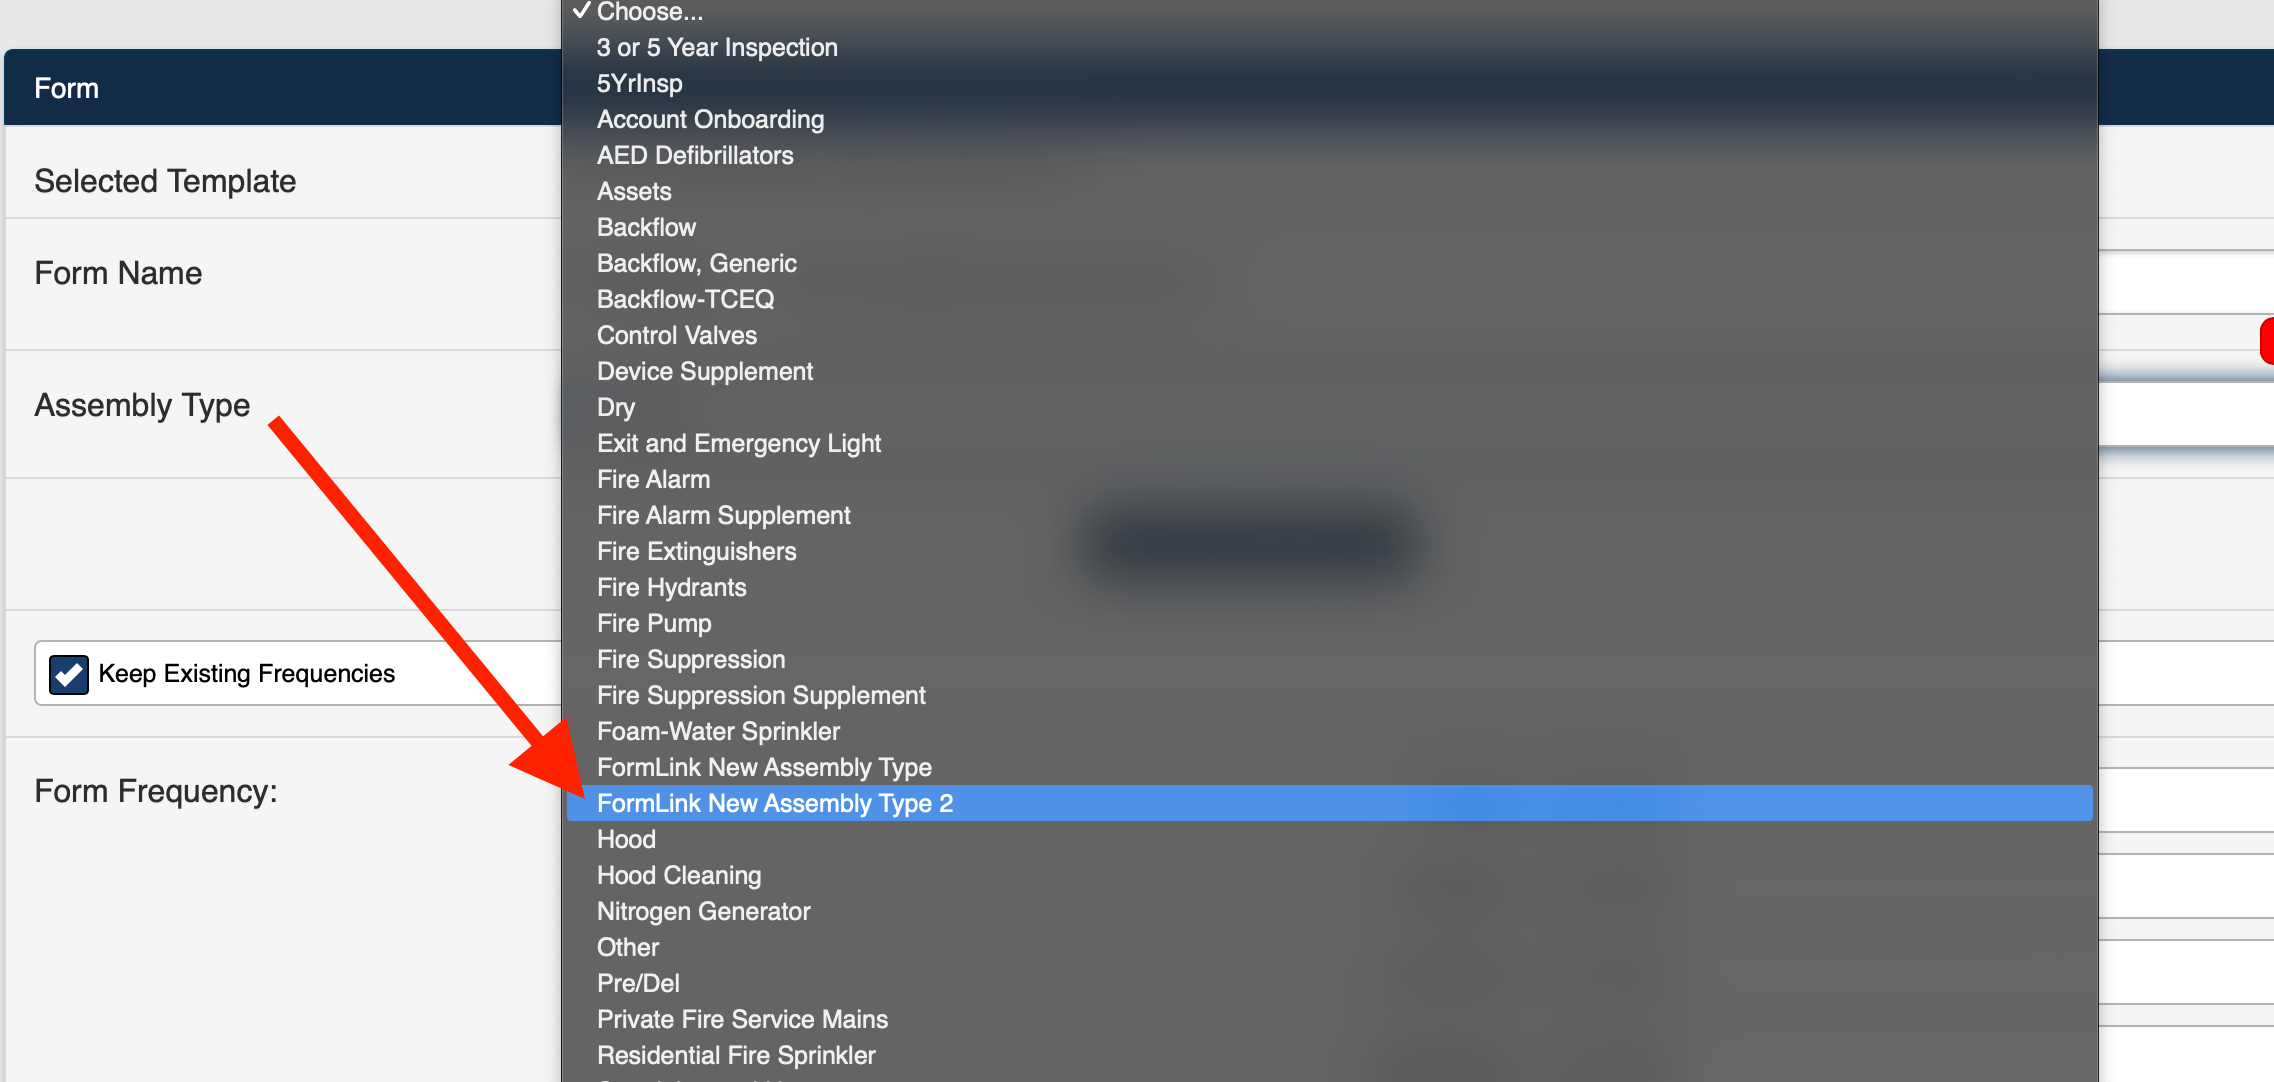 Figure 4
Setting the Default Frequencies
If you want to change or create new Default Frequencies for an Assembly, you can do so in the following ways:
1. Manually select a Form Frequency and also select the Default checkbox for the Frequency to make it a Default Frequency (Figure 1).
Note: The Default Frequency is created when the form is deployed.
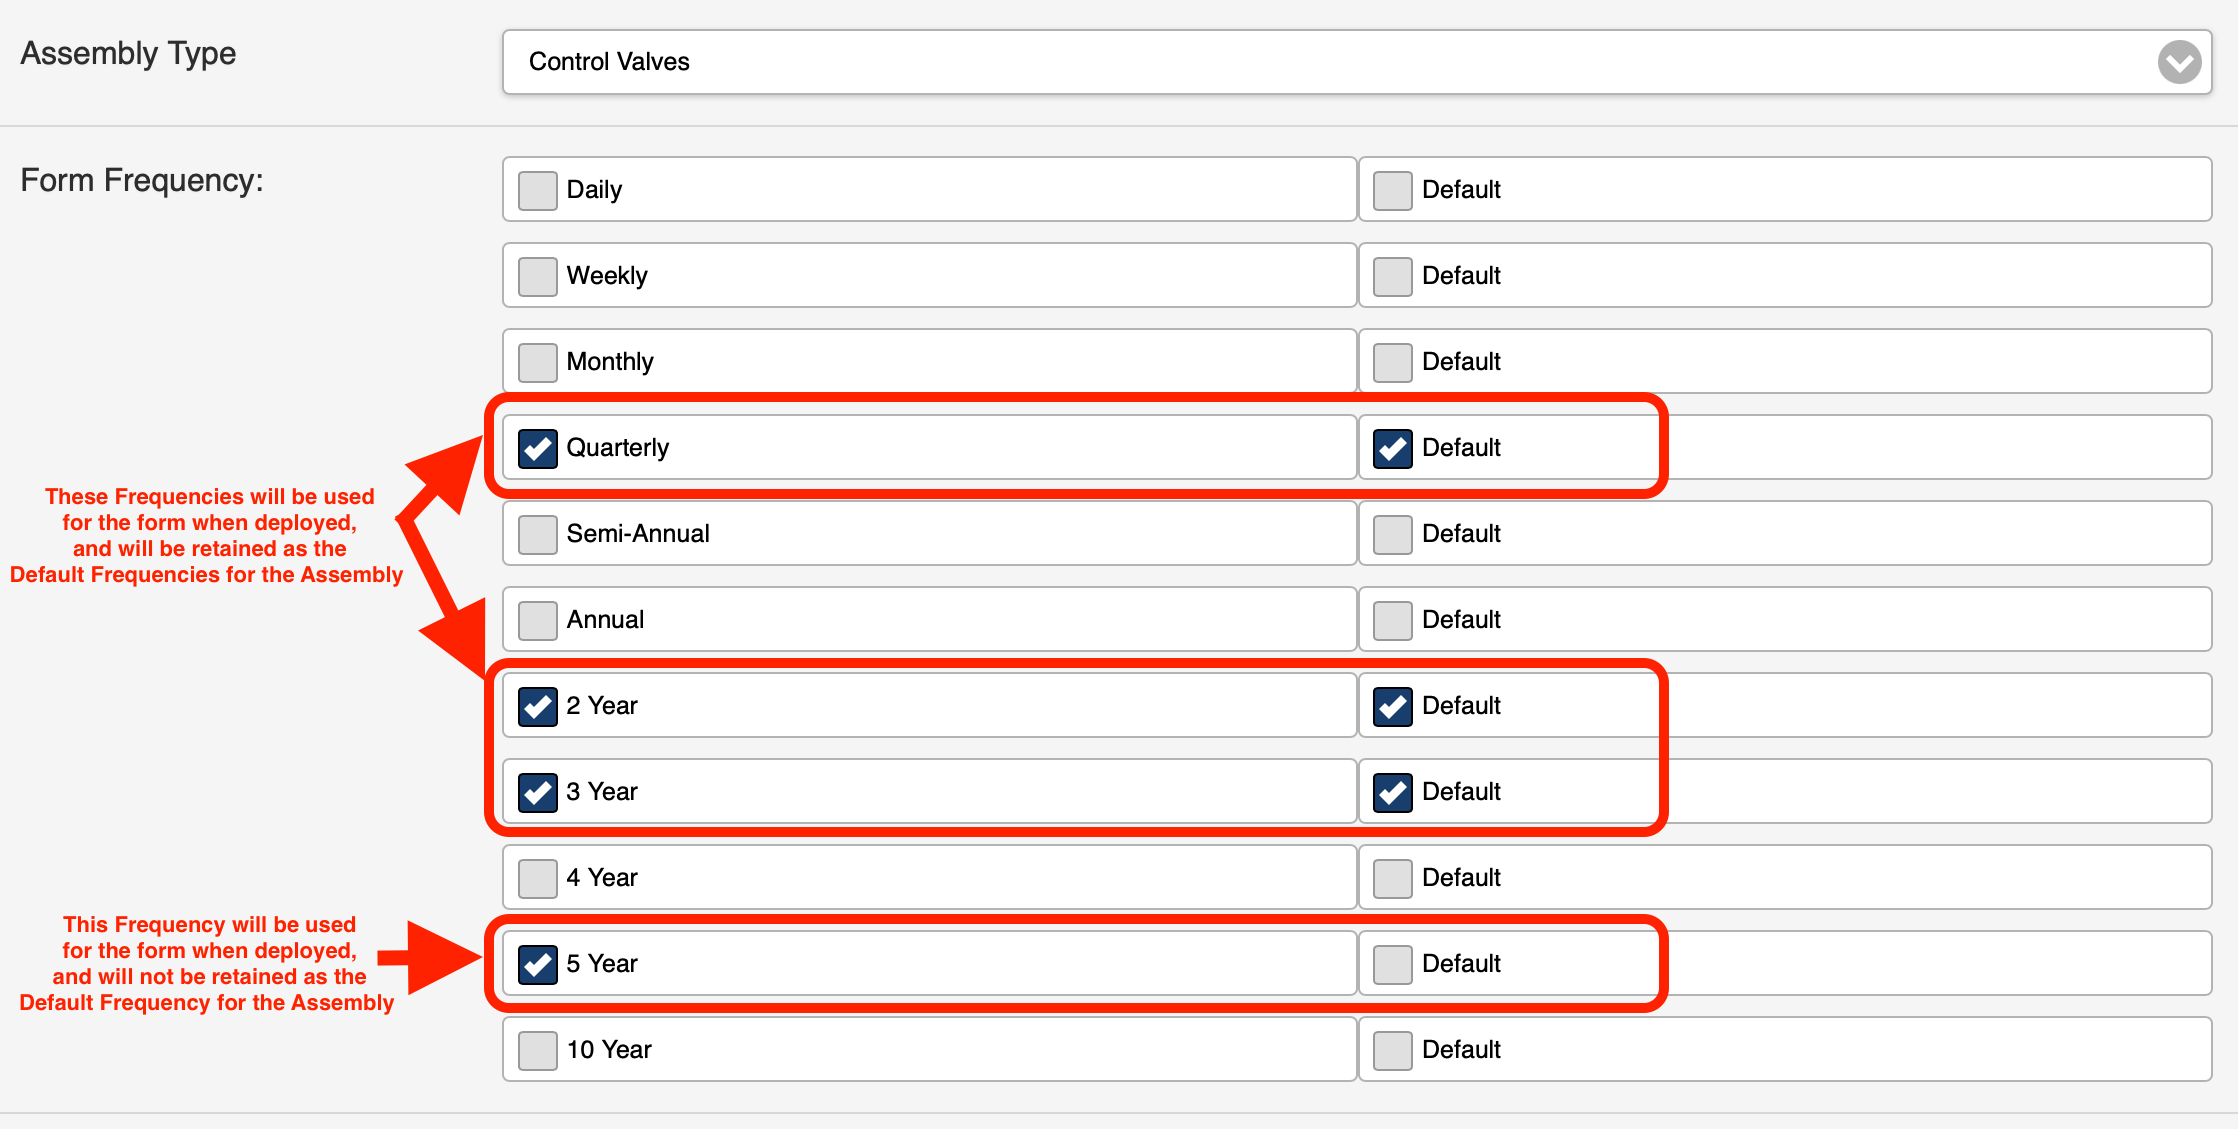 Figure 12. Deploy a form to more than one Account and include an Account with established Default Frequencies.
 For Example, If you select both Accounts (Figure 2) and then deploy the form, the TVWD Test Account will then include the Default Frequencies from the Fire & Life Safety Inc. Account the next time the form is accessed.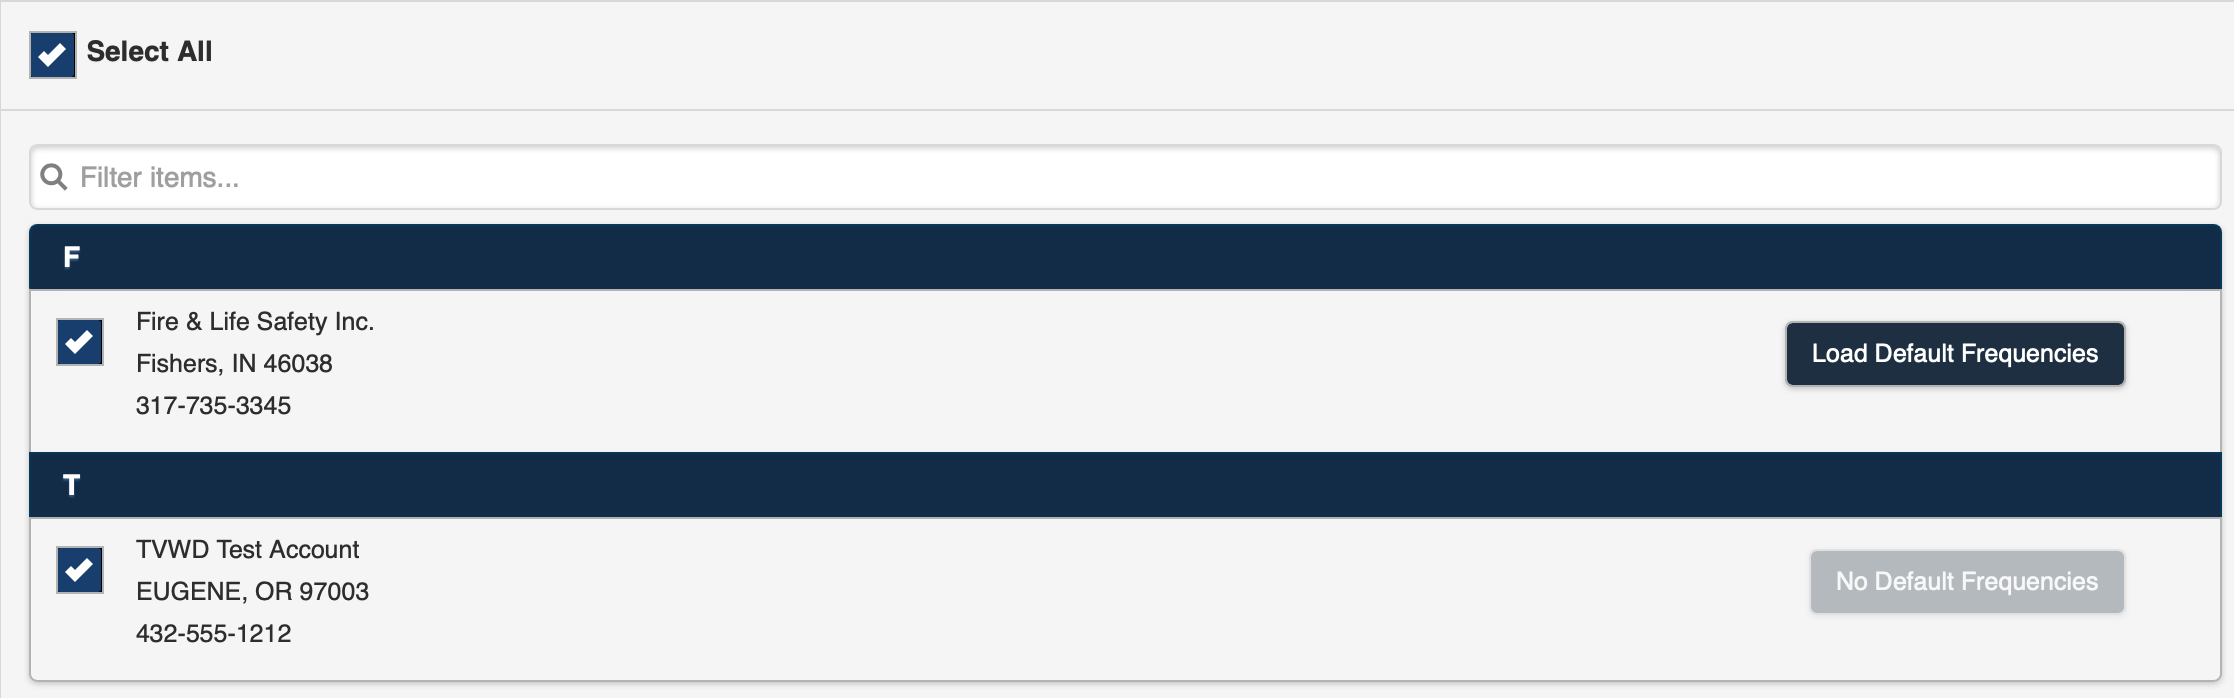 Figure 2
Was this article helpful?