Admin - How do I add a new location?
- 05 Aug 2022
- 2 Minutes to read
- Contributors

- Print
- DarkLight
Admin - How do I add a new location?
- Updated on 05 Aug 2022
- 2 Minutes to read
- Contributors
- Print
- DarkLight
Article summary
Did you find this summary helpful?
Thank you for your feedback!
Admin - How to Add a New Location ?
Note: Refer to the FormLink Training Video for additional details on adding a new Location from the New Location Page.
Complete the following steps to add a new Location from the Admin Home page.
1. From your Admin Home page, select the Locations Tab or select the Locations Search box and press Enter or Return.
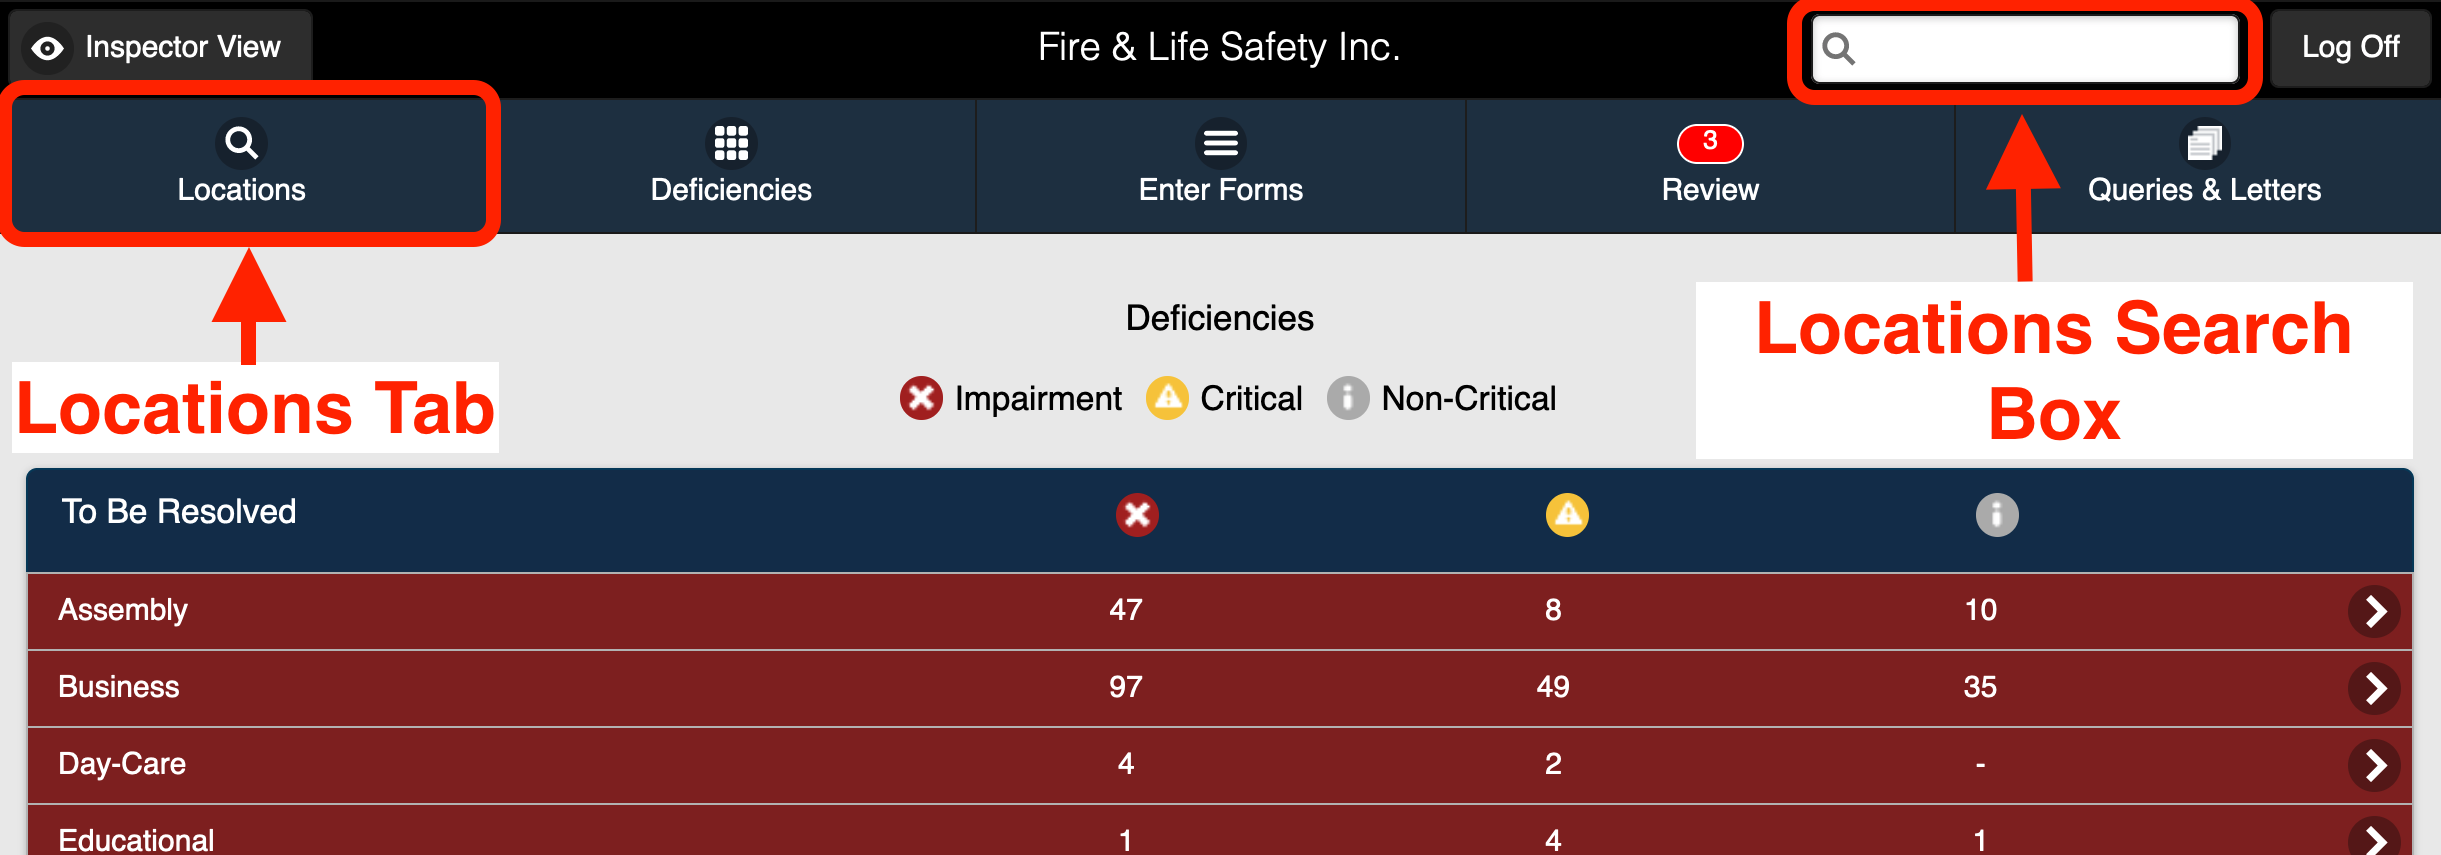 Locations Tab & Locations Search Box on Admin Home Page
2. Select New on the Locations page.
Note: To reduce the chances of adding a duplicate Location, consider searching for a Location by street number and/or customer before adding the new Location.
3. Enter the Location information on the New Location page.
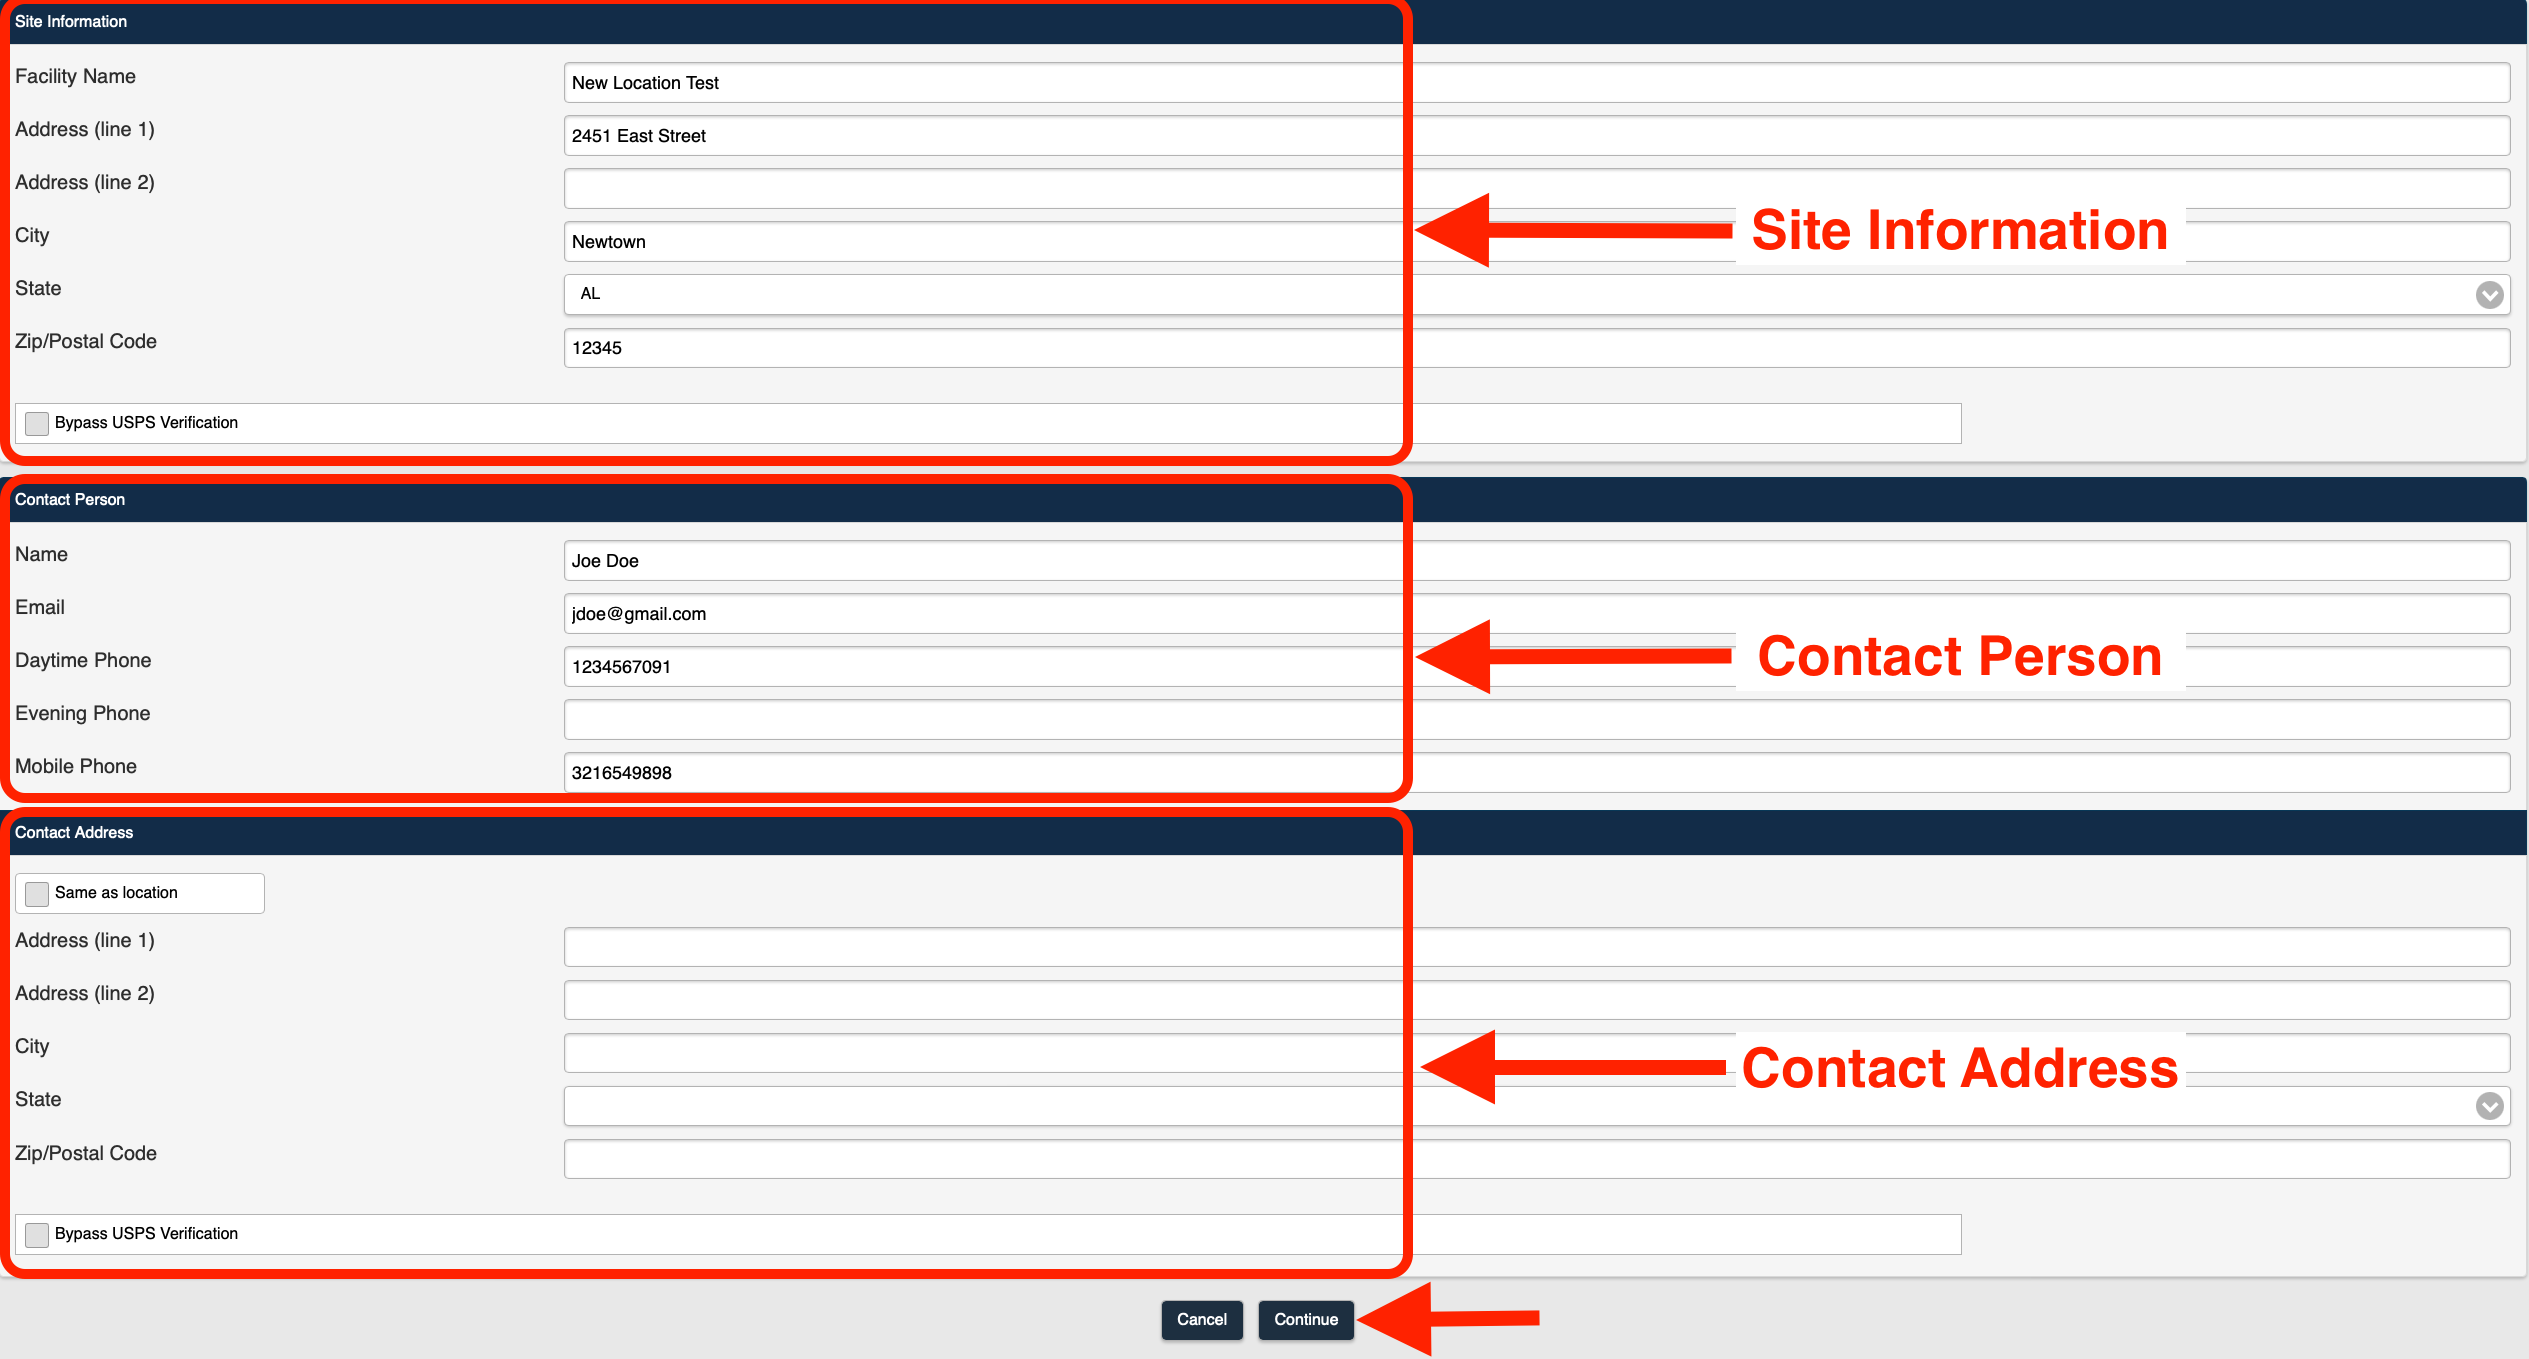 New Location Page Overview
The following fields are available on the New Location page.
| Field | Description |
|---|---|
| Site Information Section | |
| Facility Name | Enter a name for the new Location. The Facility Name is a required field. |
| Address (line 1) | Enter an address for the new Location. The Address (line 1) field is a required field. |
| Address (line 2) | If needed, enter a second line for new Location address. |
| City | Enter a City for the new Location. |
| State | Select a State for the new Location from the drop-down selection list. |
| Zip/Postal Code | Enter the Zip/Postal Code for the new Location. The Zip/Postal Code is a required field. |
| Bypass USPS Verification | Select the Bypass USPS Verification checkbox to disable USPS verification of the address entered. When disabled (unchecked), the system will instead only verify that the address you entered is not a duplicate address within your account. |
| Contact Person Section | |
| Name | Enter the Contact Person's name. The Contact Person's Name is a required field. |
| Enter the Contact's Email address. | |
| Daytime Phone | Enter the Contact's Daytime Phone number. |
| Evening Phone | Enter the Contact's Evening Phone number. |
| Mobile Phone | Enter the Contact's Mobile Phone number. |
| Contact Address Section | |
| Same as location | Select the Same as location checkbox to use the Location Address for the Contact. When disabled (unchecked), the system will require manual entry of the Contact's address information. |
| Address (line 1) | Enter an address for the Contact person. The Address (line 1) field is a required field. |
| Address (line 2) | If needed, enter a second line for new Contact address. |
| City | Enter a City for the new Contact. |
| State | Select a State for the new Contact from the drop-down selection list. |
| Zip/Postal Code | Enter the Zip/Postal Code for the new Contact. The Zip/Postal Code is a required field. |
| Bypass USPS Verification | Select the Bypass USPS Verification checkbox to disable USPS verification of the address entered. When disabled (unchecked), the system will instead only verify that the address you entered is not a duplicate address within your account. |
3. Select Continue.
4. Enter all necessary information on the Confirm Location page.
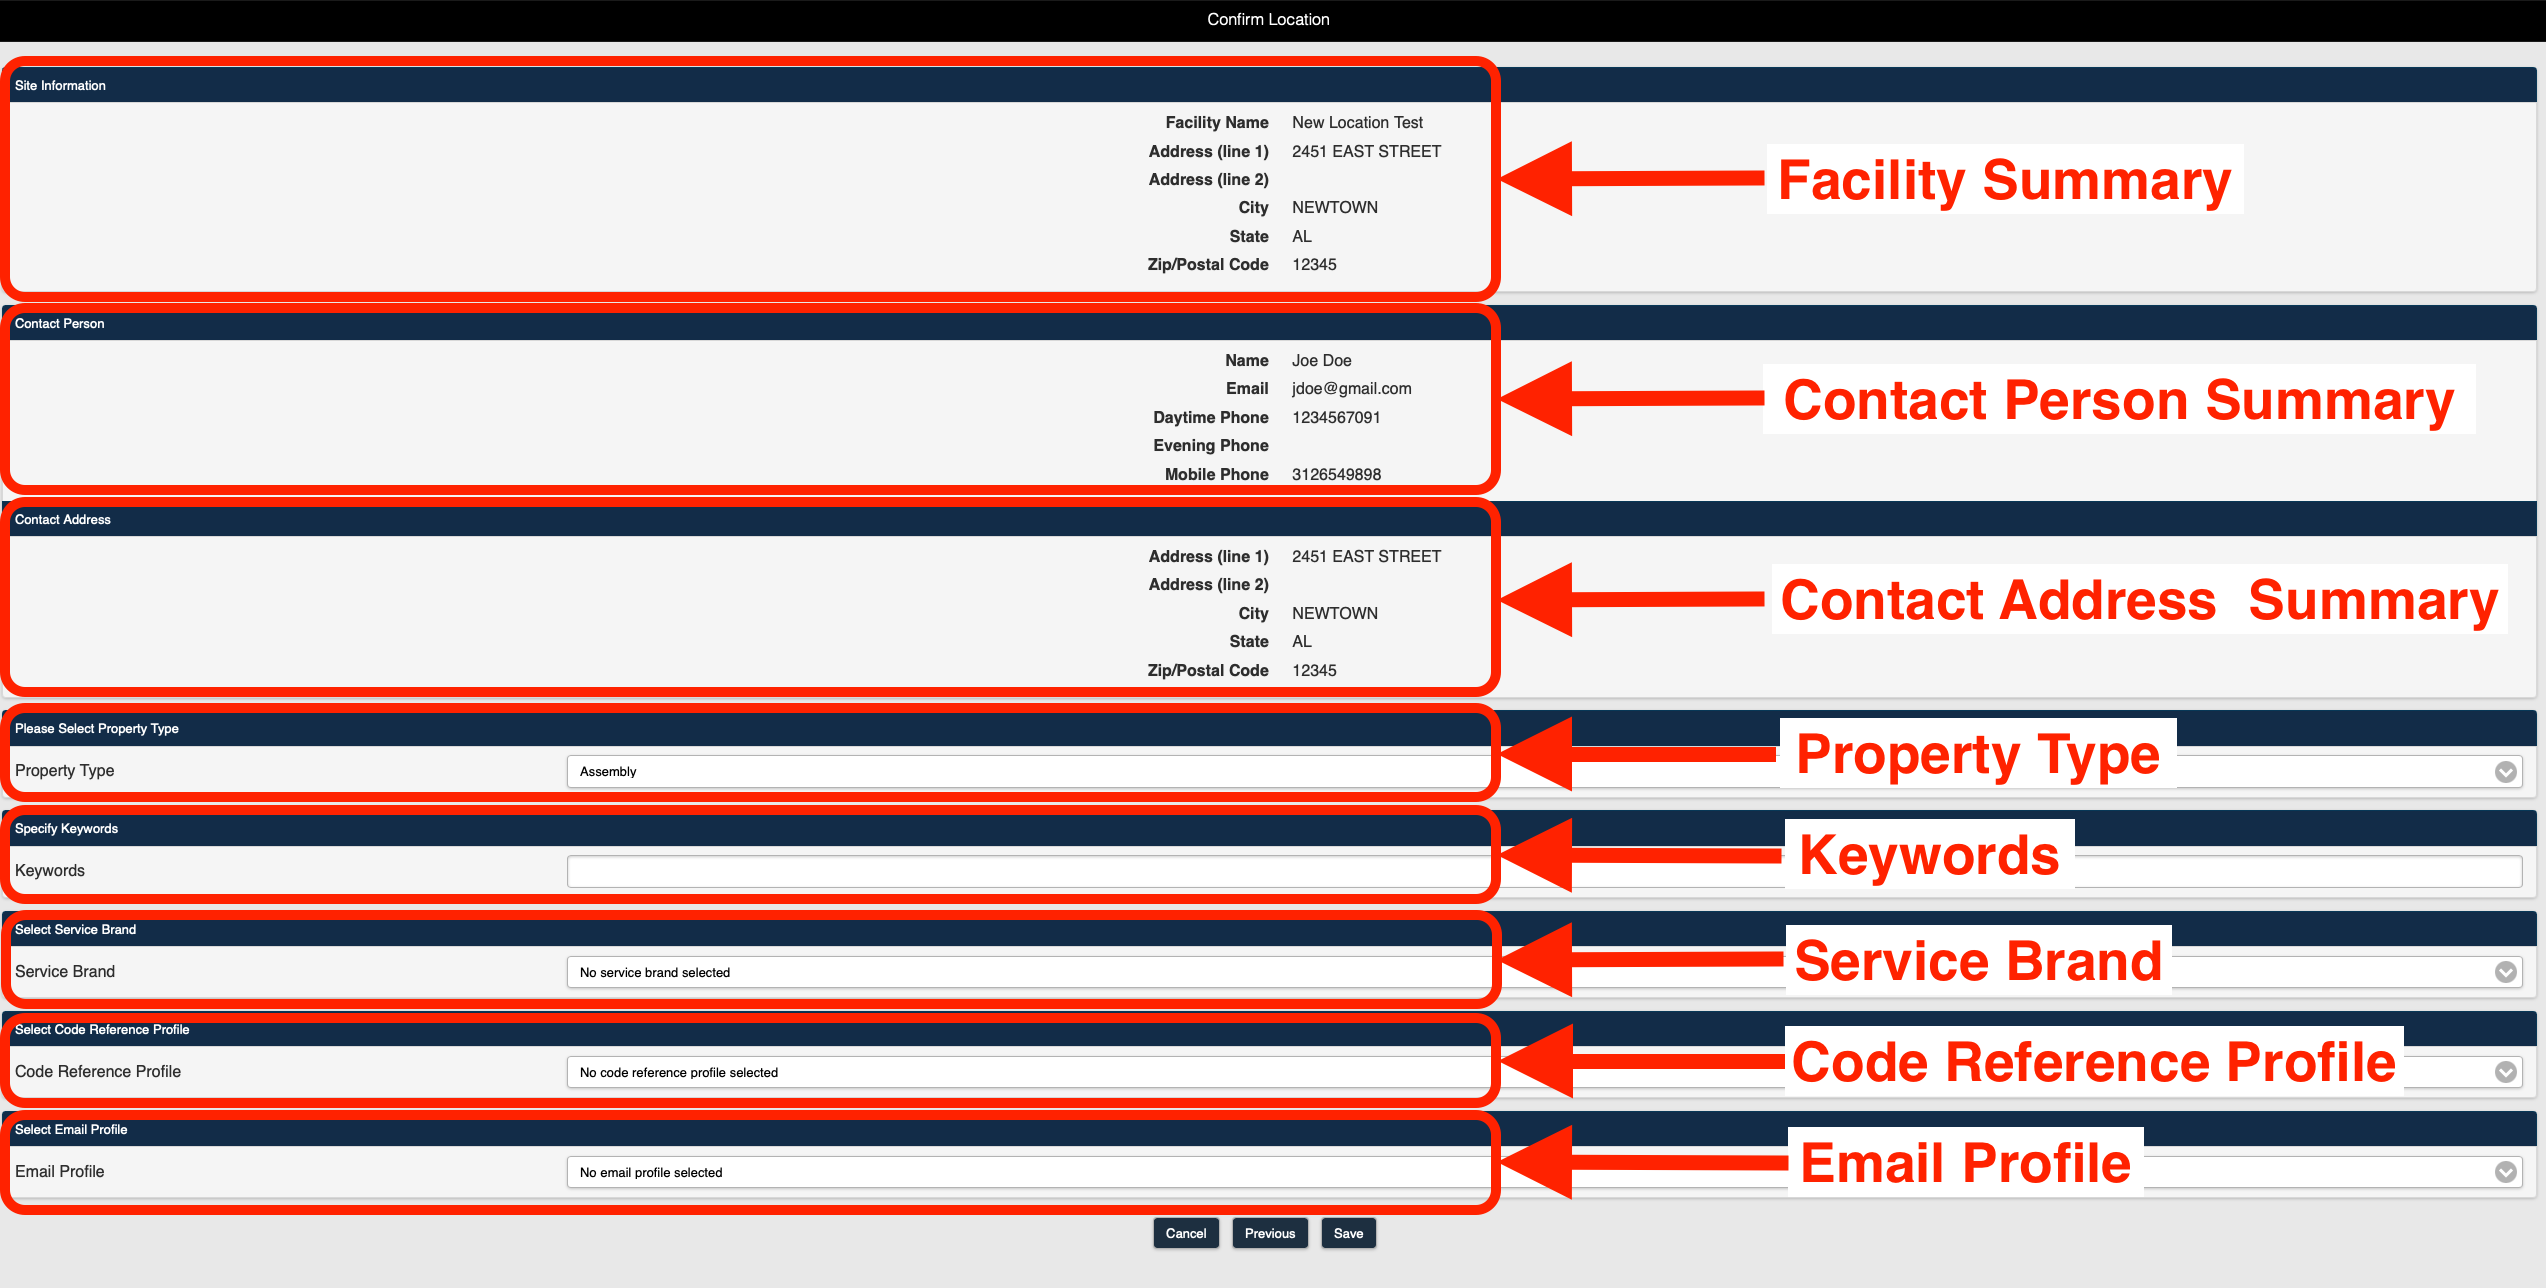 Confirm Location Page Overview
The following fields (optional) are available on the Confirm Location page.
| Field | Description |
|---|---|
| Property Type | Select a Property Type for the Site/Location from the drop-down selection list. The available selections are:
|
| Keywords | Enter any Keywords that may be used to find the Site/Location. |
| Service Brand | Select a Service Brand for the Site/Location from the drop-down selection list. |
| Code Reference Profile | Select a Code Reference Profile for the Site/Location from the drop-down selection list. |
| Email Profile | Select an Email Profile for the Site/Location from the drop-down selection list. |
Note: You can select the Previous button to return to the New Location page.
5. Save the new Location.
Was this article helpful?