Copy a Custom Form
- 26 Jan 2022
- 3 Minutes to read
- Contributors

- Print
- DarkLight
Copy a Custom Form
- Updated on 26 Jan 2022
- 3 Minutes to read
- Contributors
- Print
- DarkLight
Article summary
Did you find this summary helpful?
Thank you for your feedback!
How to Make a Copy of a Custom Form
This section is intended to show you how to make a copy of an existing Custom Form.
1. From the Configuration page, select Custom Forms (Figure 1).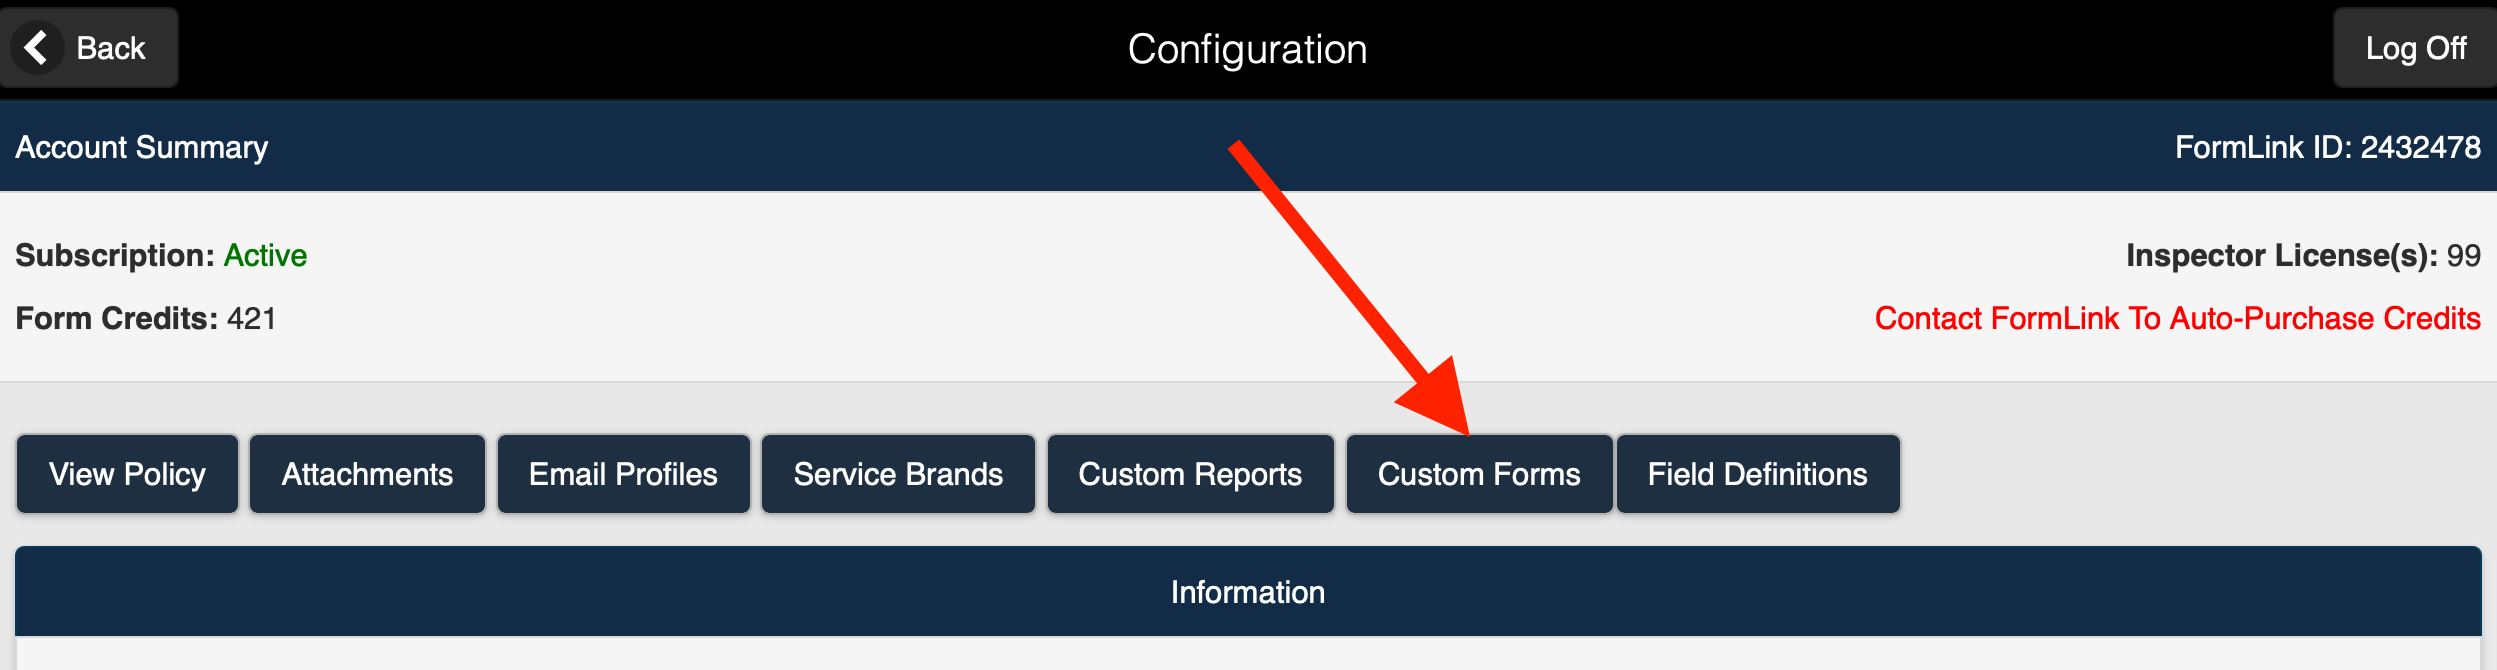 Figure 1
2. The Define Templates page is displayed (Figure 2).
.png) Figure 2
Figure 2
3. Select a Template (Figure 3).
.png) Figure 3
Figure 3
4. The Define Templates page for the template you selected is displayed (Figure 4).
.png) Figure 4
Figure 4
5. Select Make Copy (Figure 5). Figure 56. The Copy Template page is displayed (Figure 6).
.png) Figure 6
Figure 6
Figure 5
Figure 6
7. The following fields are available on the Copy Template page:
| Field Type | Description |
|---|---|
| Template Name | The Template Name field is the file name given to the template. When making a copy of a form, the default Form Name will be existingformname-copy. For example, if you make a copy of a form named Alarm Test, the file name for the copied form would be Alarm Test-copy. The Template Name field can be edited if you want to give the copied file a different file name. FormLink highly recommends that you use the Template Name field to add a version number to the template/form. |
| Description | The Description field is the name that will appear at the top of the new form. When making a copy of a form, the Description will be copied from the original form. The Description field can be edited for the new form. |
| Footer Text | The Footer Text will appear at the bottom of a page on the new form. When making a copy of a form, the Footer Text will be copied form the original form. The Footer Text can be edited for the new form. |
| Report Parts | The Report Parts determines the content of the new form that will be displayed to the inspector. When making a copy of a form, the Report Parts settings will be copied from the original form. The Report Parts can be edited for the new form. The selections available in the Report Parts drop-down list are:
|
| Page Orientation | The Page Orientation field allows you to select the page orientation for the form. When making a copy of a form, the Page Orientation will be copied from the original form. The Page Orientation can be edited for the new form.
|
| Include Frequencies | The Include Frequencies checkbox allows you to set the frequency for the form. When making a copy of a form, the Include Frequencies settings will be copied from the original form. The Include Frequencies setting can be edited for the new form. If there are no frequencies for the for, leave the Include Frequencies checkbox unselected. The Section Frequency field allows you to determine the frequency of a section within the form. The available selections for Section Frequency are:
|
| Report Output | The Report Output field allows you to set the format for the report. When making a copy of a form, the Report Output settings will be copied from the original form). The Report Output settings can be edited for the new form. The Report Output selections available are:
|
Note: When editing or creating new templates, it is highly recommended that you include a version number in the template name to help identify the template and to reduce the chance of unintentionally changing an older version of the form. For example, you could use (templatename1.0, templatename1.1, templatename1.2) etc,.
8. The template can now be edited using the Custom Forms Feature.
You can edit the template from the Edit Template page by selecting the Template Details button.
When editing a Custom Form, you can add the following Section Types:
The associated fields for each Section Type above can also be added to the form:
- Add fields to Standard Section
- Add fields to Fixed Table Section
- Add fields to an Expanding Table Section
- Add fields to a Supplement Section
- Add fields to a Pump Curve Section
9. Save the template.
10. Preview the Custom Form to view the template as it will appear as a form in your system.
11. Deploy the form to your system.
Was this article helpful?